
I drink a lot of coffee. If you are reading this, you probably do too. Finding a coffee maker that handles large batches without ruining the flavor is surprisingly hard. I got tired of my old 10-cup machine. It just never made enough for a busy morning. So, I started looking for a bigger capacity brewer.
That search led me to this machine. I wanted to write a complete Ninja DCM201CP review because most reviews I read online just listed the specs. They did not tell me what it was actually like to use it every day at 6:00 AM. I bought it, put it on my counter, and used it daily. Here is exactly what I learned, including the mistakes I made along the way.
The Reality of a 14-Cup Capacity
When you hear “14 cups,” you might picture a massive machine. I certainly did. I worried it would take up my entire kitchen counter. The truth is much less intimidating. A “cup” in coffee maker terms is usually about 5 ounces. So, this machine brews about 70 ounces total.
For my household, that equals about four or five large travel mugs. It is the perfect amount for two people heading to work. You do not have to brew a second pot.
Here is a quick look at the myths and realities I discovered about this large capacity.
| Myth I Believed | The Actual Reality |
| It will be too big for my kitchen. | It takes up the same space as my old 12-cup brewer. |
| The coffee will sit and get bitter. | You can brew smaller batches if you want to. |
| 14 cups means 14 large mugs. | It actually means about 5 standard travel mugs. |
Unboxing and Setting Up the Ninja DCM201CP
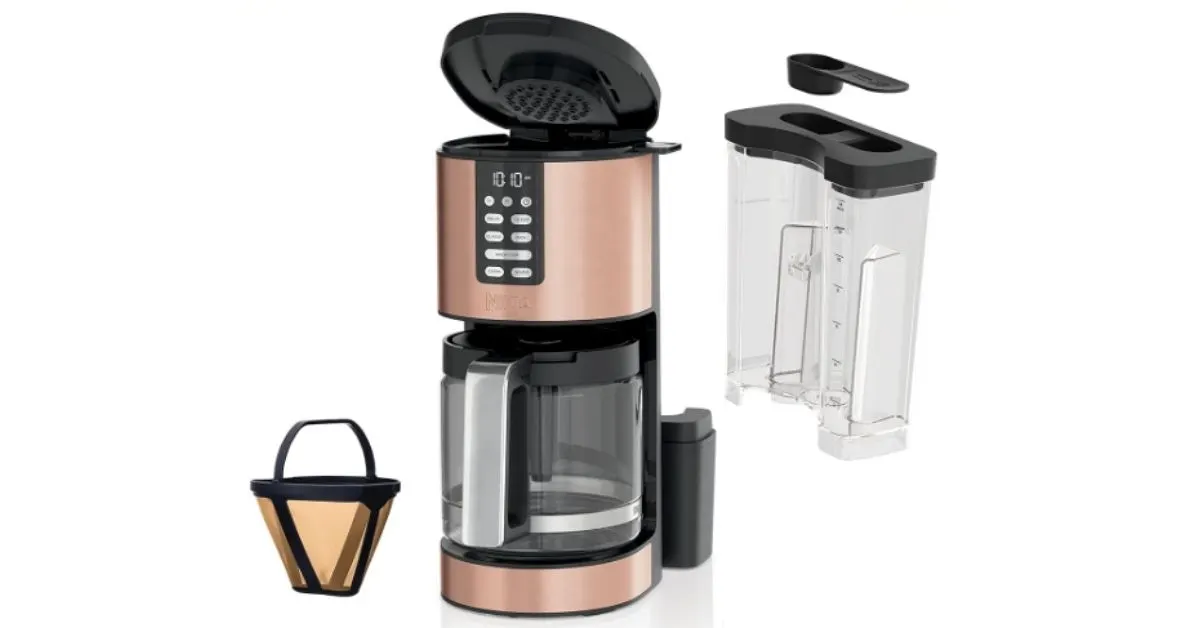
Taking the machine out of the box was straightforward. The “CP” in the name usually points to the copper finish. It looks very nice in person. It has copper accents that make it look a bit more expensive than it actually is.
The machine feels sturdy. The glass carafe feels a little thin, which is normal for this price range, but you still need to be careful when washing it. The control panel is flat and easy to wipe down. I hate machines with deep crevices around the buttons because coffee spills always get stuck there.
Setting it up on my counter revealed my first real-world challenge. The machine fits perfectly under my standard upper cabinets. However, to fill the water reservoir, you have to open a lid on the top.
Here are the basic setup steps and what I noticed.
| Setup Step | My Observation |
| Placing on the counter | Fits under cabinets, but must be pulled out to fill. |
| Washing the parts | The carafe and filter basket are easy to rinse. |
| Running a clean cycle | Highly recommended before brewing your first real pot. |
The Under-Cabinet Clearance Issue
Because you fill the water from the top, you cannot leave the machine pushed back against the wall when setting up your morning brew. I have to slide it forward to pour the water in. This annoyed me for the first few days.
Now, it is just part of my routine. I slide it forward at night, load the water and grounds, and slide it back. When it brews, I also leave it pulled slightly forward. Why? Because a lot of steam escapes from the top vents. I do not want that hot steam warping the wood on my upper cabinets over time.
This coffee maker is perfect for my morning routine. Easy to use and makes great coffee!
Testing the Brew Modes: Classic vs. Rich
One of the main reasons I chose this machine was the brew options. The Ninja DCM201CP review would not be complete without talking about the “Classic” and “Rich” settings.
Most basic machines just drip hot water over grounds. This Ninja machine uses a showerhead design. It sprinkles water evenly over the coffee bed. This is supposed to extract better flavor.
Classic mode gives you a standard, smooth cup of coffee. It tastes exactly like what you expect from a good diner. But the Rich mode is where things get interesting.
Here is how the two modes compare based on my daily taste tests.
| Feature | Classic Mode | Rich Mode |
| Water Flow | Normal, steady drip. | Slower, pulses water. |
| Flavor Profile | Smooth and standard. | Darker, bolder, less acidic. |
| Best Used For | Everyday black coffee. | Adding heavy cream or milk. |
My Frustration with the Rich Setting
At first, I used the Rich setting for every single pot. I figured “Rich” just meant “Better.” But I soon realized I was making a mistake. I was using a very dark roast coffee bean.
When you use a dark roast on the Rich setting, the machine extracts so much flavor that the coffee can actually taste burnt or overly bitter. I thought the machine was broken. I eventually learned that the Rich setting works best with medium roasts. It pulls out sweet, chocolatey flavors from medium beans. If you already buy very dark, oily beans, stick to the Classic setting.
Using the Small Batch Feature
Sometimes I just want a coffee on a Saturday afternoon. I do not need 14 cups. This machine has a “1-4 Cups” button. This is also called the Small Batch mode.
When you press this button, the machine adjusts how it heats and drips the water. Small batches on regular machines often taste weak because the water runs through the shallow grounds too fast. The Ninja slows the process down. It actually makes a great small pot.
Here are the common mistakes I made when learning this feature.
| Mistake I Made | The Better Approach |
| Using the exact same coffee ratio. | Grind slightly finer for small batches to boost flavor. |
| Forgetting to press the 1-4 cup button. | Always double-check the button before hitting brew. |
| Leaving the warming plate on high. | Lower the plate temp so a small amount does not burn. |
The Glass Carafe and Drip-Free Pouring
Nothing ruins a morning faster than pouring coffee and watching it drip all over the counter. My old machine was terrible at this. The Ninja DCM201CP claims to have a precision pour spout.
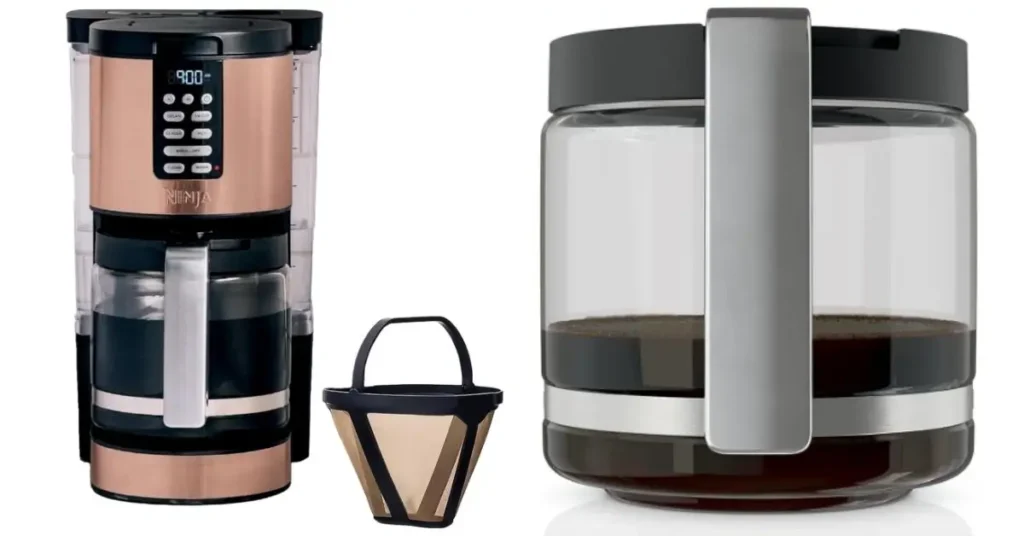
Does it actually work? Yes, mostly. The plastic rim on the glass carafe is designed to catch drips. If you pour at a normal, steady pace, it does not spill a drop.
However, if you are rushing and you tip the carafe completely upside down to get the last drop out fast, it will spill. You have to let the coffee flow naturally.
The Adjustable Warming Plate
This is an underrated feature. The warming plate stays on for up to four hours. You can adjust the time and the temperature.
I keep mine set to two hours. If you leave a small amount of coffee on a hot plate for four hours, it tastes like battery acid. The adjustable temperature helps prevent this.
Here is how I use the warming plate settings throughout the day.
| Situation | Warming Plate Recommendation |
| Full 14-cup pot just brewed | Leave on High for the first hour. |
| Half a pot left over | Switch to Low to prevent a burnt taste. |
| Only 1 or 2 cups left | Turn the plate off entirely and drink it soon. |
Cleaning and Daily Maintenance
A huge part of this Ninja DCM201CP review comes down to cleaning. A dirty machine makes bad coffee.
This model comes with a permanent gold-tone filter. At first, I loved it. It saved me money on paper filters. But after a week, I noticed a fine layer of sludge at the bottom of my mug. Permanent filters let micro-fines slip through. They also let more coffee oils through, which makes the coffee taste heavier.
I eventually switched back to standard #4 paper cone filters. The machine takes them easily. You just take the gold-tone filter out and put the paper one in the basket. The paper filter gives me a much cleaner, brighter cup of coffee. Plus, cleanup is easier. You just grab the paper and throw it away.
Here is my honest comparison of the two filter methods.
| Filter Type | Pros I Found | Cons I Experienced |
| Gold-Tone (Included) | Saves money, zero waste. | Leaves sludge in the cup, hard to rinse out. |
| #4 Paper Cone | Clean taste, super easy cleanup. | Ongoing cost, requires folding the seams. |
How I Descale the Machine
After about three months, the “Clean” light lit up on the control panel. This means mineral scale has built up inside the water lines. If you ignore it, your coffee will take longer to brew and will not be as hot.
The manual suggests using a specific descaling solution. I just use cheap white vinegar. I mix half water and half vinegar, fill the reservoir, and press the Clean button. The machine handles the rest. It pauses and soaks the internal parts. It takes about an hour.
The most annoying part is flushing the vinegar smell out. You have to run two or three full pots of plain water afterward. Do not skip this step, or your next batch of coffee will taste like salad dressing.
Comparing the Ninja DCM201CP to Standard Drip Brewers
If you are reading a Ninja DCM201CP review, you might be wondering if it is really better than a cheap $30 machine from the grocery store.
I have owned cheap machines. They heat water and drip it. That is it. The Ninja gives you control. The showerhead distribution makes a huge difference in flavor extraction. The programmable timer is easy to use. I love waking up to the smell of coffee already brewed.
Here is how I rank this machine against standard, cheaper models.
| Feature | Cheap Standard Brewer | Ninja DCM201CP |
| Water Distribution | Single hole, drills a hole in grounds. | Wide showerhead, even saturation. |
| Flavor Control | None. You get what you get. | Classic, Rich, and Small Batch options. |
| Build Quality | Flimsy plastic, drips easily. | Solid build, mostly drip-free carafe. |
What People Never Mention
There is one hidden challenge with this machine that nobody talks about. It is the built-in water reservoir. Because you cannot remove it to wash it in the sink, it can get a little cloudy over time.
You have to be very careful not to spill coffee grounds into the water tank when you are filling the basket. The basket and the tank are right next to each other under the top lid. I accidentally dropped a scoop of dry grounds into the water side once. It was a nightmare to fish them out. I had to use a turkey baster. Now, I always cover the water tank with my hand when I scoop the coffee in.
The Included Coffee Scoop
Ninja includes a nice little plastic scoop that clips to the side of the machine. It tells you exactly how many scoops to use for the amount of water you poured in.
I actually stopped using it. It measures by volume, not weight. If you want truly consistent coffee, you should buy a cheap kitchen scale and weigh your beans. But if you are in a rush, the included scoop is very handy and better than guessing with a random spoon from your drawer.
Here are a few best practices I developed for the best daily experience.
| Action | Practical Benefit |
| Sliding the machine forward | Prevents steam from ruining your upper cabinets. |
| Covering the water tank | Stops stray coffee grounds from falling into the water. |
| Using paper filters | Removes the muddy sludge from the bottom of your mug. |
Final Thoughts
Writing this Ninja DCM201CP review made me realize how much I rely on this machine. It is not a perfect, magical device. It requires you to pull it forward to fill it, and you have to be careful with the glass carafe. But once you understand its quirks, it is an absolute workhorse. The 14-cup capacity completely fixed my busy morning routine, and the Rich brew setting makes a genuinely fantastic cup of coffee.
If you just want a single quick cup, this is not for you. Look into a pod machine. But if you have a family of coffee drinkers, or you just like to drink multiple large mugs before noon, this is a great buy. Skip the permanent filter, use fresh medium roast beans on the Rich setting, and you will not be disappointed.
To Get More About Home and Kitchen Product You Can Visit Our Site. If You Found our Posts Helpful Leave a Comment Below