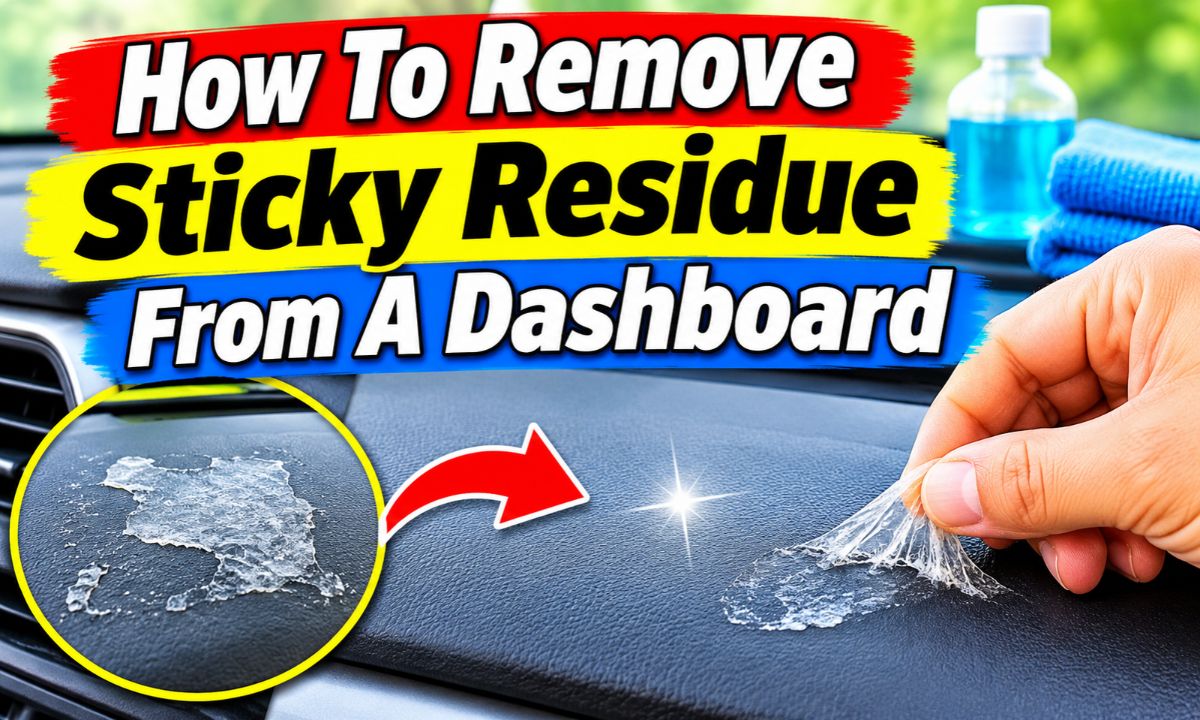
Use a soft microfiber cloth, warm water, and a mild pH-neutral interior cleaner to remove sticky phone mount residue. Test any stronger adhesive remover on a hidden spot first.
If you have removed an old phone mount from your car, you may notice a sticky patch where the base once sat. This is a common annoyance for drivers across the United States. Whether you drive a Ford, Toyota, Honda, Chevrolet, or another vehicle, adhesive pads can leave behind glue, foam, or a tacky film after removal.
The good news is that you can often clean the area with simple supplies. The trick is to remove the glue without damaging the dashboard. Modern car interiors can use textured plastic, vinyl, painted trim, or soft-touch coatings. Each material can react differently to cleaning products, so a harsh solvent is not always the right answer.
Start with the mildest cleaning method. Remove loose dirt, wipe the area with a damp microfiber cloth, and use a cleaner approved for your dashboard material if needed. If the glue remains, identify the surface and check your vehicle owner’s manual before trying a dedicated adhesive remover. Patience and gentle cleaning are much better than hard scrubbing.
Why Does a Phone Mount Leave Sticky Residue on a Dashboard?
A phone mount can leave sticky residue because its base uses an adhesive layer to stay attached to the dashboard. This layer may contain foam tape, acrylic adhesive, rubber-like gel, or another sticky material. When you remove the mount, some of that material can stay behind.
The problem can become worse after months of use. Heat inside a parked car can soften some adhesives. Cold weather can change how flexible they feel. Dust and dirt can also collect around the edge of the mount and mix with the glue.
Some phone mounts use a reusable sticky gel pad. Others use a strong double-sided adhesive disk. A suction-cup mount may also use a separate adhesive dashboard plate. The type of mount affects the kind of residue you see.
Source: YouTube > Problem Solver
Acrylic adhesive
This type of glue can leave a thin, stubborn film or small patches of adhesive after the mounting pad comes off.
Foam tape
Foam-backed adhesive may split during removal. You may see thick pieces of foam mixed with sticky glue.
Reusable gel
Gel pads can leave a soft, tacky coating that collects dust and feels rubbery.
Suction cup residue
A suction cup may leave a circular mark, dust ring, or slight tacky feel. The mark is not always leftover glue.
How Can You Tell What Kind of Residue Is Left?
Look closely at the affected area before cleaning. If you see thick, raised material, you are probably dealing with leftover foam or gel. If the surface looks clean but your finger feels a tacky film, a thin adhesive layer may remain.
A circular outline with no sticky feel may be caused by dust, surface wear, or a difference in how the dashboard aged under the mount. Cleaning can remove dirt, but it cannot always restore a faded or discolored surface.
Do not assume every mark is glue. A dashboard coating may have changed while covered by the phone mount. Try a gentle wipe first and check whether the mark changes.
Raised sticky patches
Look for foam pieces, gel, or thick adhesive that may need gentle manual removal.
Thin sticky film
This may respond to a suitable interior cleaner and repeated gentle wiping.
Smooth circular mark
This may be a surface or color difference rather than adhesive.
What You Need Before Cleaning the Dashboard
Gather your cleaning supplies before you start. You do not need a large collection of detailing products. A few soft tools and a suitable cleaner are usually enough for light residue.
Park your car in a shaded, well-ventilated area. Let the dashboard cool to a normal room-like temperature. A very hot dashboard can make cleaning products dry too quickly and may increase the chance of streaks.
Check your owner’s manual for interior cleaning instructions. This matters because dashboard materials and factory coatings vary between vehicles. A product that works on one hard plastic panel may damage another soft-touch finish.
Source: wheelingaway.com
Microfiber cloths
Use two or three clean, soft microfiber cloths. One is for cleaning, another is for removing excess moisture, and a third can be used for the final wipe.
Clean water
Use a small amount of clean water for the first cleaning attempt. Avoid soaking the dashboard.
Mild interior cleaner
Choose a cleaner approved for your specific dashboard material. A mild, pH-neutral product is a sensible starting point.
Plastic detailing tool
A smooth plastic trim tool or plastic card may help lift thick adhesive. Avoid sharp or rough edges.
Soft detailing brush
A clean, soft brush can help remove residue from dashboard texture and small grooves.
Protective gloves
Wear suitable gloves when handling cleaning products, following the product label.
Do You Need a Commercial Adhesive Remover?
Not always. Many light adhesive marks respond to a suitable interior cleaner and gentle wiping. A commercial adhesive remover may help with stubborn glue, but it should only be used when its manufacturer confirms that it is suitable for your exact dashboard material.
Do not assume that a product labeled for automotive use is safe for every surface inside a car. Some adhesive cleaners are designed mainly for painted metal or exterior vehicle surfaces. Their solvents may affect soft-touch plastic, vinyl coatings, or painted interior trim.
For example, 3M General Purpose Adhesive Cleaner 08984 contains a blend of solvents and requires a hidden-area compatibility test. Its technical information discusses automotive paint, vinyl, fabrics, and certain plastics, but this does not mean every dashboard coating is compatible. Follow the exact product label and your vehicle manufacturer’s instructions.
For light residue
Try water and an approved mild interior cleaner first.
For stubborn adhesive
Consider a dedicated adhesive remover only after confirming material compatibility.
For leather or soft-touch trim
Use the vehicle manufacturer’s recommended care method instead of experimenting with general-purpose solvents.
Step-by-Step: How to Remove Sticky Residue From a Dashboard After Removing a Phone Mount
The safest approach is to work from the least aggressive cleaning method to the stronger option. Do not begin with alcohol, citrus solvents, or heavy-duty adhesive removers. Start by removing loose dirt and checking how the dashboard reacts to a damp cloth.
Keep the cleaning area small. This makes it easier to control moisture and see whether the adhesive is coming off. It also helps prevent cleaning products from reaching air vents, buttons, screens, and electrical controls.
Source: easeholder.com
Step 1: Inspect the dashboard
Check whether the surface is hard plastic, vinyl, leather, textured trim, or a soft-touch coating. Look for cracks, lifted layers, or existing damage.
Step 2: Remove loose dirt
Use a clean, dry microfiber cloth to lift dust and loose particles. Do not rub gritty dirt into the dashboard.
Step 3: Try a damp microfiber cloth
Dampen a clean cloth with water and gently wipe the sticky area. Use light pressure and avoid flooding the surface.
Step 4: Use a suitable interior cleaner
If the residue remains, place a small amount of a material-approved, mild interior cleaner on the cloth. Follow the product directions.
Step 5: Work on the adhesive gently
Wipe in short, controlled strokes. If thick foam remains, gently roll it away with your fingertips or use a smooth plastic tool.
Step 6: Repeat if needed
Use a fresh section of the cloth and repeat the gentle cleaning process. Do not increase pressure just because the glue is stubborn.
Step 7: Remove cleaner residue
Use a separate clean cloth, slightly dampened with water if the product instructions allow, to remove leftover cleaner.
Step 8: Dry the area
Pat the surface dry with a clean microfiber towel. Allow the dashboard to dry fully before installing another mount.
How to Remove Thick Foam Adhesive
Thick foam tape needs a different approach from a thin glue film. Trying to dissolve a large amount of foam with cleaning liquid can create a bigger mess. Remove as much loose material as possible before using a cleaner.
If the foam is already loose, gently roll it inward with your fingertips. Work from the outer edge toward the center. This can help gather the material without spreading it over a larger area.
For a firmly attached piece, use a smooth plastic card or a proper plastic trim tool. Keep the tool nearly flat against the surface and work slowly. Stop if the dashboard coating begins to lift or change appearance.
Keep the tool flat
A shallow angle reduces the chance of digging into the dashboard.
Use gentle pressure
Let the tool lift the loose adhesive rather than forcing it under the surface.
Avoid metal tools
Metal blades and screwdrivers can scratch, cut, or permanently mark interior trim.
How to Remove a Thin, Sticky Glue Film
A thin glue film can be harder to see than thick foam. You may only notice it when your finger sticks to the area or dust starts collecting on the surface.
Apply a small amount of an approved interior cleaner to a microfiber cloth. Wipe the affected spot gently and turn the cloth to a clean section as the adhesive transfers. This helps prevent the glue from spreading back across the dashboard.
If the cleaner does not work, stop and check the product instructions and vehicle manual before choosing another chemical. Do not keep adding different products to the same area.
Use small amounts
Too much liquid can run into dashboard seams and nearby controls.
Change cloth sections
A clean section helps collect adhesive instead of moving it around.
Check the finish
Stop if the dashboard becomes unusually shiny, dull, discolored, or rough.
Best Cleaning Methods for Different Dashboard Materials
The best way to clean sticky residue depends on the material under the phone mount. A hard plastic dashboard may tolerate a mild interior cleaner, while a leather-wrapped or soft-touch dashboard may need a more specific product.
Before cleaning, check your vehicle manual and identify the surface. Some dashboards combine several materials in one area. A single panel may have textured plastic around a leather or painted trim section.
Source: thetrackahead.com
Hard plastic
Start with a damp microfiber cloth and a suitable mild plastic interior cleaner. Avoid harsh solvents and abrasive pads.
Vinyl
Use a cleaner labeled for automotive vinyl. Test a hidden area and avoid products that leave a heavy shine.
Soft-touch plastic
Be especially careful. Some coatings can become tacky, dull, or damaged when exposed to incompatible cleaners.
Leather
Use a leather-safe cleaner recommended by the vehicle manufacturer. Do not assume a general adhesive remover is safe for leather.
Painted interior trim
Use a cleaner approved for the specific finish. Avoid scraping and strong solvents that could affect the coating.
Cleaning a Textured Plastic Dashboard
Textured plastic has small grooves that can trap glue and dirt. A flat cloth may clean the raised areas but leave residue inside the texture.
Use a clean, soft detailing brush with a suitable interior cleaner if the vehicle manufacturer permits it. Apply the cleaner to the cloth or brush rather than spraying directly onto the dashboard. Move gently across the texture and wipe away loosened residue.
Do not use a stiff household brush or a rough kitchen sponge. These tools can wear down the surface or change its appearance.
Use soft bristles
A soft detailing brush can reach shallow grooves without aggressive scrubbing.
Work in small areas
Small sections help you control the amount of cleaner used.
Cleaning a Soft-Touch or Leather Dashboard
Soft-touch dashboards often have a special coating designed to create a smooth feel and low-gloss appearance. Some leather dashboards also have protective topcoats. These surfaces can react poorly to strong solvents and general-purpose cleaners.
Use only a cleaner approved for the material and follow the vehicle manufacturer’s directions. If the residue does not respond to the recommended method, contact a professional automotive detailer rather than testing stronger chemicals.
This extra care matters because a damaged coating may look like permanent glue residue. More scrubbing can make the problem worse.
Avoid unapproved solvents
Do not experiment with acetone, paint thinner, or strong adhesive chemicals.
Avoid soaking
Keep liquid away from seams and stitched areas.
Stop when the finish changes
A change in color, texture, or shine is a reason to stop cleaning.
Can You Use Goo Gone or an Adhesive Remover on a Dashboard?
A dedicated adhesive remover may help with stubborn phone mount glue, but the exact formula and dashboard material matter. Do not assume that a product is safe simply because its label mentions cars or adhesive removal.
Some automotive adhesive removers are designed for paint, metal, glass, or selected plastics. Others are made for specific interior materials. Read the complete label and check the manufacturer’s compatibility information before using one.
Goo Gone Automotive and similar products should be used only on surfaces that their current instructions specifically permit. Check exclusions for leather, delicate coatings, and other materials. If your dashboard material is not listed, contact the product manufacturer or use the vehicle maker’s recommended cleaner.
Source: wheelingaway.com
Check the intended surface
Confirm that the product is approved for your exact dashboard material, not just exterior car paint.
Read the application instructions
Follow the stated amount, contact time, wiping method, and cleanup requirements.
Test a hidden area
Check for color transfer, softening, swelling, dullness, or changes in texture.
Keep chemicals away from controls
Do not allow liquid to enter vents, buttons, screens, seams, or electronic components.
What About Rubbing Alcohol?
Rubbing alcohol is sometimes suggested for removing glue, but it is not a universal dashboard cleaner. Alcohol can affect certain plastics, painted finishes, vinyl coatings, and soft-touch surfaces.
General Motors’ interior cleaning guidance warns against organic-solvent cleaners, including alcohol, on the covered vehicle interior surfaces because they can cause uneven gloss changes. This is a useful reminder that a cleaner that works on one surface may damage another.
For this reason, do not use rubbing alcohol as your first choice. Only consider it if your vehicle manufacturer specifically permits it for the material in question and the product instructions support that use.
Do not soak the area
Excess liquid can spread into nearby gaps and damage sensitive components.
Do not use alcohol wipes blindly
Some wipes contain additional ingredients that may affect interior coatings.
Choose an approved alternative
A mild, material-specific interior cleaner is a better starting point.
Can You Use WD-40 to Remove Dashboard Glue?
WD-40 is not a good first choice for cleaning phone mount adhesive from an unknown dashboard surface. Its oily formula can leave a film, change the appearance of some finishes, and make the area harder to clean.
It may also spread beyond the glue and reach nearby trim or controls. A cleaner designed for the exact interior material is a more controlled option.
Avoid using household oils or lubricants as substitutes for an approved interior adhesive cleaner.
Avoid oily buildup
Oily products can attract dust and leave a greasy feel.
Protect nearby surfaces
Keep cleaning products away from screens, switches, and vents.
Cleaning Methods and Products You Should Avoid
Some household cleaning products can remove glue but damage the dashboard at the same time. The goal is not simply to dissolve the adhesive. You also need to preserve the surface underneath it.
Avoid aggressive chemicals and rough tools unless your vehicle manufacturer specifically approves a product for the exact surface. A small sticky patch is much easier to deal with than a scratched or discolored dashboard.
Source: enginediary.com
Acetone
Acetone is a strong solvent and can damage many plastic and painted surfaces. Keep it away from dashboard trim.
Paint thinner
Strong paint solvents can soften coatings, remove color, or damage plastic.
Nail polish remover
Many nail polish removers contain acetone or other solvents that are unsuitable for dashboard cleaning.
Metal razor blades
A blade can cut vinyl, scratch plastic, or damage a painted finish.
Steel wool
Abrasive metal fibers can leave permanent scratches.
Rough kitchen sponges
Abrasive scrub pads can change the dashboard texture and sheen.
Strong degreasers
Heavy-duty degreasers may contain ingredients that are not suitable for vehicle interior materials.
Why Is Excessive Heat a Bad Idea?
Heat can soften some adhesives, but too much heat can also damage a dashboard. Interior plastic and vinyl can become softer when exposed to high temperatures. A heat gun can deliver more heat than a delicate dashboard coating can tolerate.
For residue that is already exposed, you usually do not need to heat the dashboard. Start with gentle manual removal and an approved cleaner.
If you are still trying to remove the original mounting base, follow the mount manufacturer’s instructions. If gentle heat is recommended, use a cautious method and keep the heat source moving. Never direct intense heat at a dashboard for a long time.
Avoid heat guns
They can create damaging hot spots on plastic and vinyl.
Avoid direct sunlight during cleaning
A hot surface can make cleaners dry too quickly.
Let the dashboard cool
Work on a surface that is comfortable to touch.
What If the Sticky Residue Will Not Come Off?
If the glue remains after gentle cleaning, do not immediately switch to a stronger solvent. First, check whether the material is actually adhesive or whether the dashboard coating has changed.
Repeated scrubbing can make a small problem worse. The best next step depends on the residue’s appearance, the dashboard material, and whether the surface has already been damaged.
Source: easeholder.com
The residue is still thick
Remove loose foam or gel with gentle fingertip rolling or a smooth plastic tool before cleaning the remaining film.
The surface still feels tacky
Check whether the cleaner is suitable for the material. Repeat the approved method only as directed.
The area looks shiny
The cleaner may have altered the finish or left a film. Stop adding products and check the vehicle care instructions.
The area looks lighter or darker
The dashboard may have faded differently under the mount or suffered coating damage.
The surface feels soft or swollen
Stop cleaning. A chemical reaction may have affected the material.
When Should You Contact a Professional Detailer?
Consider professional help when the adhesive will not come off with an approved cleaning method or when the dashboard material is delicate. This is especially useful for leather-wrapped dashboards, soft-touch coatings, expensive painted trim, and older surfaces that are already worn.
A professional detailer can inspect the material and decide whether the mark is glue, a surface coating issue, or discoloration. This assessment can prevent unnecessary chemical use.
If the dashboard is already peeling, cracked, or damaged, cleaning alone may not restore it. You may need a trim repair or replacement instead.
Persistent adhesive
Get help when repeated approved cleaning attempts do not remove the glue.
Visible surface damage
Seek an assessment if the finish becomes cloudy, rough, swollen, or discolored.
Expensive interior trim
Professional care may be more sensible than experimenting with solvents.
How to Prevent Sticky Residue From a Phone Mount in the Future
You can reduce the chance of future adhesive problems by choosing a suitable mount and following its installation instructions. Not every dashboard is designed for adhesive mounting. Some surfaces are too textured, soft, or delicate to provide a suitable mounting area.
Before buying another phone holder, check the mounting method. A vent mount, cup-holder mount, or another non-adhesive option may be a better choice if you want to avoid glue on the dashboard.
Source: thetrackahead.com
Choose a suitable mounting location
Check the vehicle and mount instructions before attaching anything to the dashboard.
Consider a vent mount
This option avoids adhesive on the dashboard, although you must check that it fits your vehicle’s vents.
Consider a cup-holder mount
A cup-holder design can provide an alternative mounting position without dashboard glue.
Avoid cheap unknown adhesive pads
Choose a mount with clear material and removal instructions.
Follow removal instructions
Remove the mount slowly and avoid pulling sharply against the dashboard.
Clean before installation
Use only the preparation method approved by the mount and vehicle manufacturers.
Are Suction Cup Phone Mounts Better Than Adhesive Mounts?
A suction cup mount can be easier to remove because it relies on suction rather than a permanent adhesive layer. However, some suction cup mounts need a separate adhesive dashboard disk, so check the complete mounting system before buying.
A vent mount avoids dashboard glue, but it can block airflow or put stress on certain vent designs. A cup-holder mount avoids dashboard contact but takes up space near the center console.
There is no single best mounting style for every car. Choose one that fits your vehicle, keeps the phone secure, and does not interfere with safe driving.
Adhesive dashboard mount
Offers a fixed mounting position but may leave glue or foam after removal.
Suction cup mount
Can be removable, but some models need an adhesive mounting disk.
Vent mount
Avoids dashboard adhesive but must fit the vent securely.
Cup-holder mount
Keeps adhesive off the dashboard but uses cup-holder space.
How to Know When the Dashboard Is Clean
A clean dashboard should no longer have a sticky feel, visible glue patches, or loose foam around the old mounting spot. The surface should also have a finish that looks consistent with the surrounding area.
After cleaning, allow the surface to dry completely. Run a clean fingertip lightly across the area only when it is dry. Do not press hard or keep rubbing if the surface feels different from the rest of the dashboard.
A small color difference may remain even after all the glue is gone. This can happen when the covered area has aged differently from the exposed dashboard. It does not always mean more cleaning is needed.
Source: wheelingaway.com
No sticky feel
The surface no longer grabs your finger or attracts dust because of leftover glue.
No visible adhesive
Foam pieces, gel, and glue patches have been removed.
No cleaner streaks
There are no visible wet marks or cleaning product buildup.
No new surface damage
The dashboard has not developed scratches, discoloration, or changes in texture.
Should You Apply Dashboard Polish After Cleaning?
Dashboard polish is not required to remove adhesive. Some dressings contain silicone, wax, or other ingredients that can change the surface sheen. This may create an uneven appearance or unwanted reflections on the windshield.
General Motors’ interior cleaning bulletin recommends suitable mild, neutral-pH cleaners and warns against certain wax-based and silicone-based interior products. Other vehicle makers may have different instructions, so check your owner’s manual.
If you want to restore the appearance after cleaning, use only a finish product approved for your dashboard material. A natural, low-gloss finish is often preferable to a greasy or highly reflective surface.
Do not polish immediately
First make sure all adhesive and cleaner residue are gone.
Avoid greasy finishes
Heavy shine can create reflections and attract dust.
Follow the manual
Choose an approved interior care product if the manufacturer recommends one.
Quick Comparison: Which Cleaning Method Should You Try?
The table below matches common phone mount residue problems with a sensible first step. These are starting points, not guarantees. Always follow your vehicle manufacturer’s instructions and check cleaner compatibility before use.
Light sticky film
Try a damp microfiber cloth, followed by an approved mild interior cleaner if necessary.
Thick foam pieces
Gently roll away loose foam with your fingertips or use a smooth plastic tool.
Sticky gel
Remove loose gel carefully and use a compatible interior cleaner according to its label.
Residue in textured grooves
Use a soft detailing brush with a suitable cleaner.
Unknown dashboard material
Check the owner’s manual and avoid unapproved chemicals.
Discoloration without stickiness
Stop cleaning and check whether the surface has faded or suffered coating damage.
A Simple Decision Guide
If you are unsure what to do next, use this simple rule: remove solid material first, clean the remaining film second, and assess the surface last. Do not use a stronger chemical just because the first method takes time.
If the surface changes while cleaning, stop. A dashboard finish is not worth risking to remove a small glue mark. Professional advice is the better option when the material or damage is uncertain.
Glue comes off
Finish with the approved cleanup method and allow the area to dry.
Glue remains but the surface is unchanged
Check compatibility before repeating the approved cleaning process.
Surface appearance changes
Stop immediately and avoid further chemical treatment.
Frequently Asked Questions
Q
Can I use vinegar to remove sticky phone mount residue from my dashboard?
Vinegar is not the best first choice for dashboard adhesive. Although diluted vinegar is used for some household cleaning tasks, vehicle dashboards may have coatings that react differently to acidic cleaners. Use water and a mild, material-approved interior cleaner instead.
Always check your vehicle owner’s manual before applying an unfamiliar cleaning product. Do not pour vinegar directly onto the dashboard or allow liquid to enter seams and vents.
Q
Does rubbing alcohol remove sticky residue from a car dashboard?
Rubbing alcohol can dissolve some adhesives, but it may also damage certain dashboard plastics, vinyl coatings, and soft-touch finishes. It is not a universal solution for car interiors.
Some vehicle manufacturers specifically warn against alcohol-based or organic-solvent cleaners on interior surfaces. Check your owner’s manual and use an approved cleaner for the exact material.
Q
Can I use a hair dryer to remove phone mount glue?
Gentle heat may soften certain adhesives when you are removing the original phone mount or mounting pad. However, excessive heat can damage dashboard plastic and vinyl.
For residue that remains after the mount has already been removed, begin with gentle manual removal and a suitable interior cleaner. Avoid heat guns and prolonged direct heating.
Q
Will sticky dashboard residue damage my car?
A small amount of leftover adhesive does not automatically mean your dashboard is damaged. However, sticky residue can collect dust and dirt, making the area look worse over time.
The bigger risk often comes from using unsuitable chemicals or rough tools during cleanup. Clean the area gently and stop if the surface becomes discolored, rough, or unusually shiny.
Q
Why is my dashboard still sticky after cleaning?
The adhesive may not have been fully removed, or the cleaner may have left a film behind. Some dashboards can also become tacky when their original surface coating starts to break down.
Check whether the residue is raised glue or whether the entire surface feels sticky. If an approved cleaning method does not help, avoid stronger solvents and consider having the dashboard inspected by a professional.
Q
Can I use a plastic scraper to remove phone mount adhesive?
A smooth plastic scraper may help remove loose foam or thick adhesive from a durable hard-plastic surface. Use a shallow angle and very light pressure.
Do not use a scraper on delicate leather, soft-touch coatings, or painted trim unless the manufacturer specifically permits it. A plastic tool can still cause damage if its edge is rough or too sharp.
Q
How do I remove a circular mark left by a phone mount?
First, check whether the circular mark feels sticky. If it does, clean it with a suitable interior cleaner and a soft microfiber cloth.
If the surface feels smooth but the circle remains, it may be a difference in color, gloss, or surface aging. More scrubbing will not necessarily remove it and may make the finish worse.
Q
Can I install another phone mount immediately after cleaning?
Wait until the dashboard is fully dry and free of cleaner residue before installing another mount. Check the new mount’s instructions for surface preparation and compatibility.
Avoid installing an adhesive mount on leather, soft-touch trim, or textured surfaces unless both manufacturers confirm that the combination is suitable. A vent or cup-holder mount may be a better alternative.
✦ Wrapping Up
Conclusion
Removing sticky residue from a dashboard after taking off a phone mount does not have to be difficult. Start with a clean microfiber cloth and water, then use a mild interior cleaner approved for your dashboard material. For thicker adhesive, gently roll away loose foam or use a suitable plastic tool.
The most important part is protecting the dashboard while cleaning. Avoid acetone, paint thinner, metal blades, rough scrubbers, and unapproved solvents. Some modern dashboard finishes can react badly to products that seem harmless on other surfaces.
If the residue does not come off, take a moment to check whether it is really glue or a change in the dashboard coating. Use the vehicle manufacturer’s cleaning instructions and seek professional help when the material is delicate or already damaged.
💡 Key Takeaway
Start with a damp microfiber cloth and a mild, approved interior cleaner. Remove loose adhesive gently, test any stronger product in a hidden area, and stop if the dashboard finish changes.