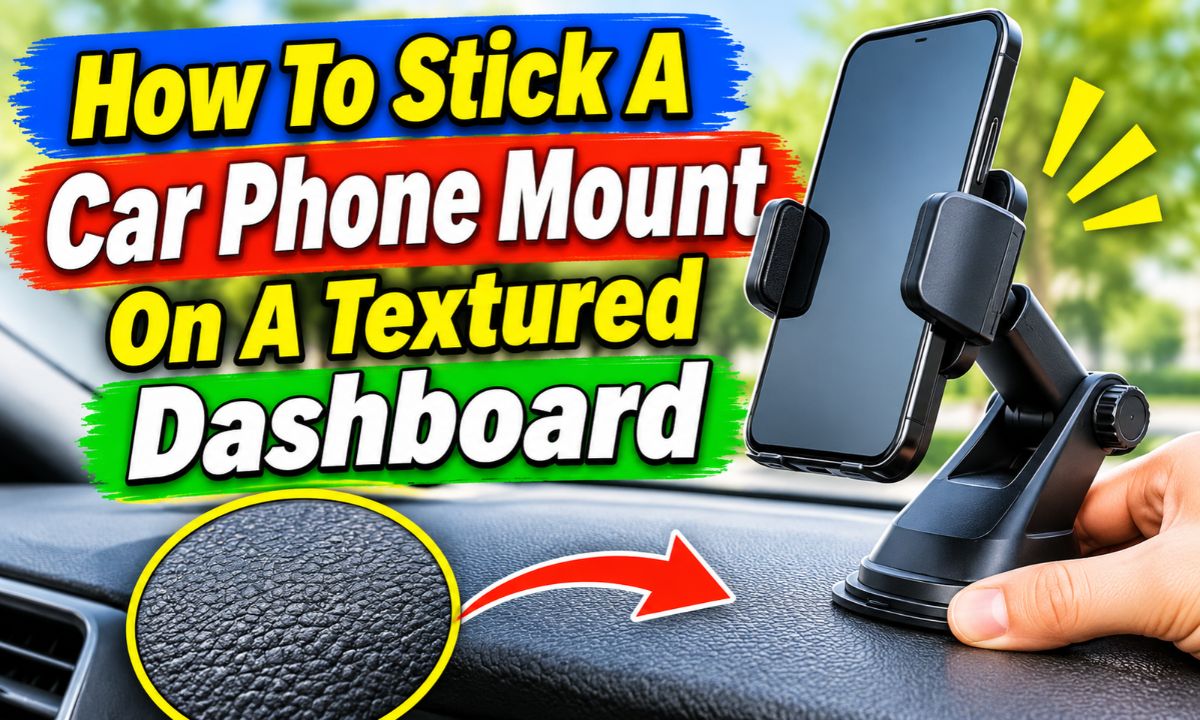
Use a compatible adhesive mounting disc to create a smooth base, clean and dry the dashboard, press the disc firmly into place, and let the adhesive cure before attaching your phone mount.
Drivers across the United States use car phone mounts for navigation, hands-free calls, and music controls. But many cars, trucks, and SUVs have dashboards with small bumps, grainy plastic, or soft-touch finishes. These surfaces can make it hard for a phone mount to stay in place. You may press the mount down firmly, only to find it falling off a few hours later.
The main problem is often the contact between the adhesive and the dashboard. A textured surface has tiny raised areas and gaps. This can stop an adhesive base from making even contact. A regular suction cup may also struggle because it needs a smooth surface to form a seal. The right mounting disc can help solve this problem by creating a flat area for the mount.
Before you start, check the type of dashboard material and the instructions for your phone mount. Some adhesive products work on certain textured plastics, while others require a smooth, flat, non-porous surface. A mounting disc is not a guarantee of success on every dashboard. The adhesive must also be safe for the surface and suited to the weight of your phone.
This guide explains how to prepare a textured dashboard, choose the right mounting method, apply an adhesive disc, and avoid common mistakes. It also covers what to do if the mount keeps falling off. The goal is a firm hold without damaging your car’s interior or placing a phone where it could interfere with safe driving.
Why Car Phone Mounts Struggle to Stick to Textured Dashboards
A car phone mount needs steady contact with the surface beneath it. On a smooth dashboard, adhesive tape can spread across a wide area. A suction cup can also press against the surface and form a seal. Textured dashboards make both tasks harder.
Many vehicle dashboards have a grain pattern. This pattern may look small, but it creates raised points and shallow gaps. When you press a flat adhesive pad against it, the pad may touch only the raised parts. The gaps can reduce the area that holds the adhesive in place.
The material itself can also cause trouble. Some dashboards use hard plastic, while others have vinyl, rubber-like coatings, soft-touch paint, or flexible trim. These materials do not all accept the same adhesive. A product that works well on hard plastic may fail on a soft or coated surface.
Heat is another factor. A parked car in the United States can become very hot during summer, especially in a sunny parking lot. Dashboard temperatures can rise well above the outdoor air temperature. This can affect some adhesives and may cause a weak mount to loosen over time.
Source: i.ytimg.com
Uneven contact
The raised grain on the dashboard may prevent an adhesive pad from touching enough of the surface.
Poor suction
A suction cup may leak air through tiny gaps in the dashboard texture instead of forming a seal.
Material problems
Some soft-touch, rubber-like, or coated surfaces do not bond well with common adhesive tapes.
Dust and oil
Dashboard cleaners, skin oils, dust, and interior protectants can leave a layer that weakens the bond.
Heat and movement
Hot interiors, road vibration, and repeated phone removal can put extra stress on a weak adhesive connection.
How to Tell If Your Dashboard Is Too Textured
Look closely at the area where you want to place the mount. If you can see small ridges, dots, grooves, or a leather-like grain, the surface may be too uneven for a standard suction cup. Run a clean fingertip over the area to feel how rough it is.
Also check whether the surface bends or feels soft when you press it gently. A flexible surface may move under the weight of the phone. This movement can put stress on the adhesive, even if the pad sticks at first.
Do not assume that every textured dashboard needs the same solution. A shallow grain on hard plastic may work with a compatible adhesive base. Deep grooves or a soft rubber-like finish may need a different mounting location.
Fine grain
A shallow pattern may work with an adhesive base designed for that dashboard material.
Deep grooves
A flat adhesive pad may bridge the gaps and fail to make enough contact.
Soft or flexible trim
Look for another mounting area or a mount designed for that surface.
Choose the Right Mounting Method Before You Start
The best way to attach a phone mount depends on the dashboard material and the design of the mount. A mounting disc is often a useful option because it gives a suction cup a smoother area to grip. However, the disc must be made for dashboard use and must be compatible with the surface.
Do not buy an adhesive pad based only on its size or the claim that it is extra strong. Check the product instructions. Some mounting products are designed for smooth, non-textured surfaces only. Others include a separate disc that can help with textured or slightly curved dashboards.
You should also check the weight limit and phone compatibility of the mount. A large phone with a heavy case may place more stress on the adhesive than a small, lightweight phone. A long mounting arm can add leverage and increase movement when the car travels over bumps.
Source: i.ytimg.com
Adhesive mounting disc
A plastic or similar mounting disc with adhesive on the bottom creates a flatter surface for a compatible suction-cup mount. Choose one intended for automotive dashboard use.
Textured-surface adhesive base
Some phone mounts use a flexible adhesive base made for certain dashboard textures. Confirm the surface compatibility before buying.
Suction cup with a mounting pad
This setup uses an adhesive disc on the dashboard and a suction cup on top. It can work well when both parts are designed to fit together.
Vent phone mount
A vent mount avoids dashboard adhesive, but it must fit the vent design and should not block important airflow or damage the vent slats.
Windshield mount
A windshield mount may avoid a difficult dashboard surface, but check local rules and make sure it does not block the driver’s view.
Which Mounting Disc Should You Use?
A dashboard mounting disc is usually the first option to consider when a suction cup cannot grip a textured surface. Look for a rigid, flat disc with automotive-grade adhesive. Some products use 3M adhesive, but the brand name alone does not prove that a particular pad will work on your dashboard.
Check whether the disc is intended for a textured dashboard or only for smooth surfaces. Also check the size of the disc. It should be large enough to support the full contact area of the suction cup without leaving the cup partly over the edge.
A product such as a dashboard mounting disc from Arkon or a compatible heavy-duty disc from Scosche shows the type of accessory used to create a smoother base. Their instructions and compatibility details should guide your choice. Do not assume that every disc from these brands works on every dashboard.
Check the surface rating
Choose a disc whose instructions allow use on your dashboard material and finish.
Check the diameter
Make sure the disc can fully support the suction cup or mounting base.
Check removal guidance
Some strong automotive adhesives may be difficult to remove and can damage interior trim.
Can You Use Double-Sided Tape Instead?
You can use double-sided automotive tape only when the tape manufacturer and mount instructions allow it for the dashboard material. Ordinary household tape is not a reliable replacement for a proper mounting disc. It may soften, shift, or release under heat and vibration.
A thick foam tape may seem useful because it can fill small gaps. However, it can also make the mount less stable if it compresses or moves under the phone’s weight. A purpose-made dashboard disc is often a better choice because it provides a defined mounting surface.
Avoid stacking several random adhesive layers. Each added layer creates another place where the mount can loosen. Use one compatible adhesive system whenever possible.
Use automotive-rated tape
Choose tape with clear instructions for vehicle interior use and the material you plan to mount it on.
Avoid thick soft layers
A soft layer can flex under the weight of the phone and increase movement.
Do not mix unknown adhesives
Combining products with different adhesive types can make bonding and removal less predictable.
What You Need to Install a Car Phone Mount
Gather the right supplies before you begin. You do not need a large tool kit for most dashboard mounts. The main items are a compatible adhesive disc, a clean microfiber cloth, and a suitable cleaner.
Read the instructions for the adhesive disc and phone mount first. They may require a specific cleaning wipe, application temperature, or waiting period. Follow the instructions for your exact product instead of using a general rule for every adhesive.
Test any cleaner on a hidden area if the dashboard maker or cleaner instructions recommend it. Some cleaning wipes can discolor certain plastics, vinyls, and painted finishes. Never use a strong solvent just because it removes dirt quickly.
Source: i.ytimg.com
Car phone mount
Use a mount that can safely hold your phone and is compatible with your intended mounting disc.
Dashboard mounting disc
Choose a flat disc with adhesive that is suitable for your dashboard surface.
Microfiber cloth
Use a clean, soft cloth to remove loose dust and wipe away cleaner residue.
Approved surface cleaner
Use a cleaner that is safe for the dashboard material. Follow the product label and vehicle manual.
Dry cloth
Keep another clean cloth ready to remove moisture before applying the adhesive.
Small measuring tool
A ruler can help you check whether the disc fits the mounting base.
Check the Dashboard Material First
Vehicle dashboards are not all made from the same material. Some have hard plastic panels. Others use vinyl, rubber-like trim, soft-touch coatings, or leather. These surfaces can react in different ways to cleaning products and adhesive.
Check your owner’s manual if you are unsure about the dashboard finish. You can also contact the vehicle manufacturer or mount maker for compatibility advice. Do not scrape the surface or use a sharp object to identify the material.
If the mounting area is covered in a protective coating, wax, or interior dressing, clean it only with a product approved for that finish. Applying adhesive over a dressing or oily layer can lead to early failure.
Hard plastic
May accept some automotive adhesives, but texture and plastic type still matter.
Vinyl
Needs a cleaner and adhesive approved for the specific vinyl finish.
Soft-touch coating
May not bond well with some adhesive products and may be damaged during removal.
Leather or rubber
Do not apply a standard adhesive pad unless its manufacturer specifically approves that material.
How to Stick a Car Phone Mount on a Textured Dashboard
The most useful approach is to prepare a safe, suitable area, attach a compatible mounting disc, and let its adhesive bond before adding the phone holder. Take your time with each step. Rushing the cleaning or curing stage can cause the mount to fall off later.
The steps below apply to a common setup that uses an adhesive dashboard disc and a suction-cup phone mount. If your mount has a direct adhesive base, follow its own instructions instead. Some adhesive bases are designed for smooth surfaces and should not be used on textured trim.
Source: vicseed.com
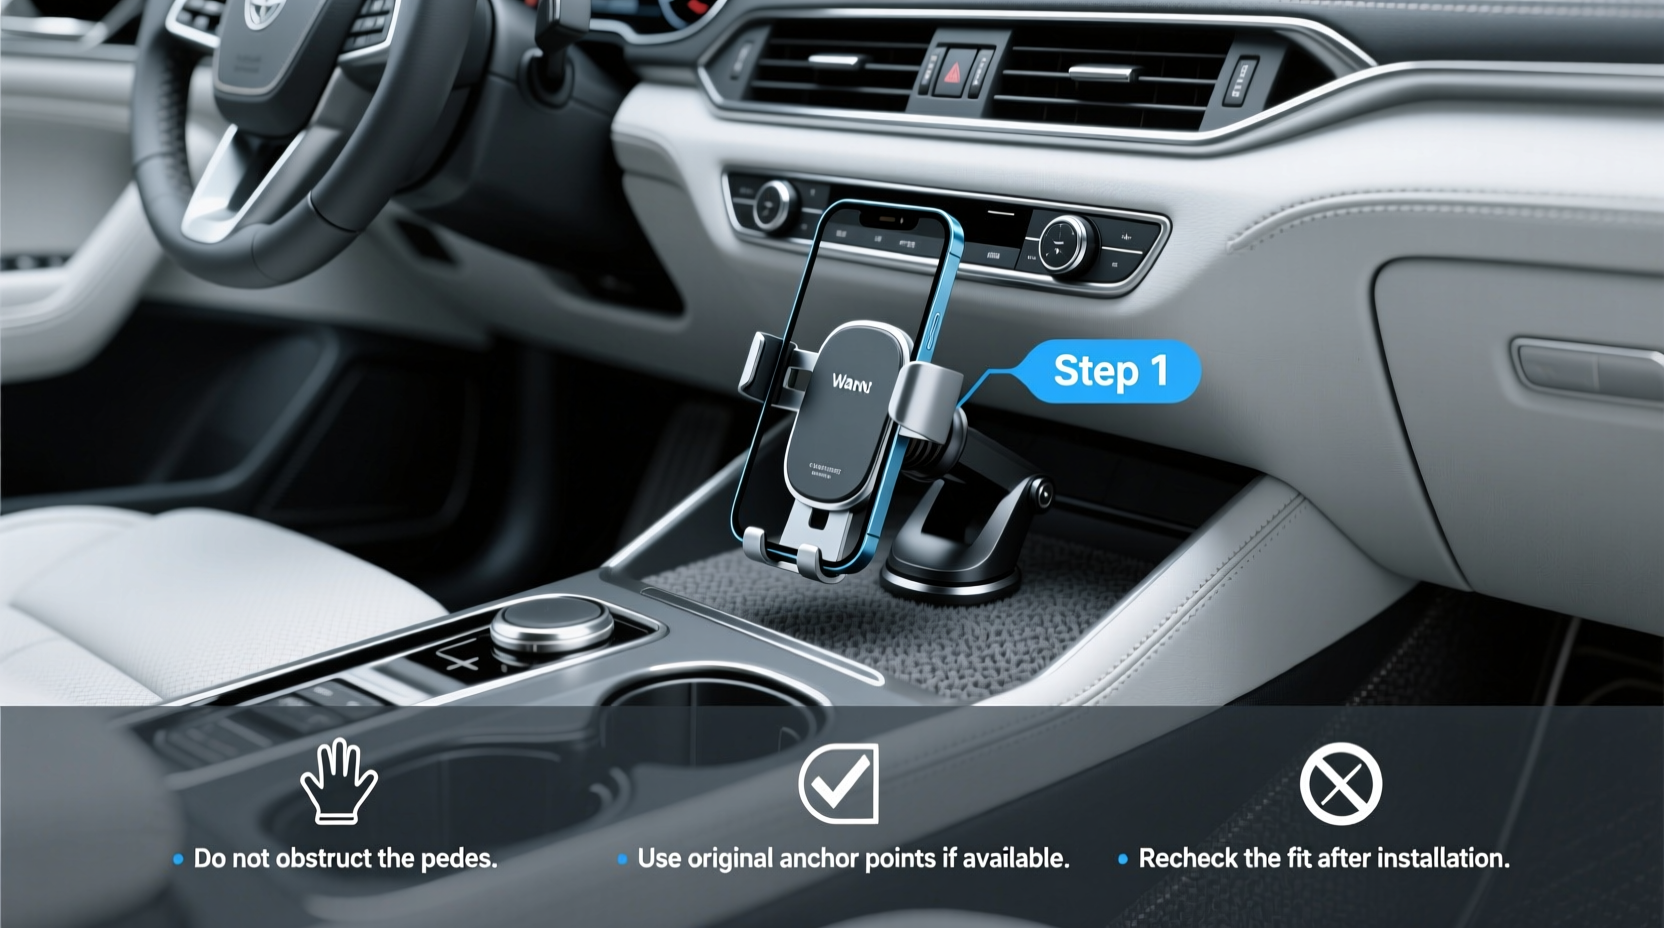
Step 1: Pick a safe mounting location
Choose a stable area that does not block your view, controls, vents, or any airbag deployment zone.
Step 2: Clean the dashboard
Remove dust, dirt, and surface residue with a material-safe cleaner and a clean cloth.
Step 3: Dry the area
Wait until all moisture and cleaner residue have evaporated.
Step 4: Prepare the mounting disc
Check its size and orientation, then remove the protective backing without touching the adhesive.
Step 5: Apply the disc
Place it carefully on the selected spot and press evenly across the full surface.
Step 6: Allow the adhesive to cure
Leave the disc undisturbed for the time stated by its manufacturer.
Step 7: Attach the phone mount
Fit the suction cup or compatible holder onto the center of the disc and lock it as directed.
Step 8: Check the hold
Test the base gently while parked before placing your phone in the holder.
Step 1: Find the Right Spot on the Dashboard
Start by sitting in the driver’s seat and checking your normal driving position. The mount should be easy to see without forcing you to look far away from the road. It should also remain within comfortable reach without requiring you to lean forward.
Check the dashboard for airbag labels and deployment areas. Never place a phone mount in front of an airbag or where it could interfere with deployment. Follow the vehicle owner’s manual if you are unsure where an airbag opens.
Avoid placing the mount over a speaker, sensor, vent, screen, or important control. Also avoid sharp curves and narrow raised sections. A flat or gently curved area is usually easier to work with than a steep or uneven section.
Before removing the adhesive backing, place the disc against the dashboard without sticking it down. Check the viewing angle and make sure the phone will not block the windshield or instrument panel.
Good location
A stable dashboard area with enough room for the entire mounting disc.
Poor location
A steep curve, flexible trim panel, airbag cover, or area that blocks the driver’s view.
Step 2: Clean the Dashboard Surface
Cleaning is one of the most important parts of the process. Even a small amount of dust or oil can reduce the contact between the adhesive and dashboard. Start by wiping away loose dirt with a clean microfiber cloth.
Next, use a dashboard-safe cleaner or the cleaning pad supplied with your mounting product. Follow the instructions for the cleaner and the vehicle interior. Do not assume that rubbing alcohol, household glass cleaner, or an all-purpose degreaser is safe for every dashboard.
Some mount makers warn that their supplied cleaning wipes may discolor certain plastics, vinyls, and painted surfaces. Test the cleaner in a hidden area if the instructions call for it. Let the surface dry completely before moving to the next step.
Do not apply dashboard polish, silicone spray, or interior shine products before installation. These products may leave a slick film that interferes with adhesive contact.
Remove dust
Wipe the full area with a clean microfiber cloth.
Remove residue
Use only a cleaner approved for the dashboard material.
Allow full drying
Do not place the adhesive disc on a wet or damp surface.
Step 3: Position the Adhesive Mounting Disc
Hold the disc over the cleaned area and check its position one more time. Make sure it sits flat enough for the full adhesive area to contact the dashboard. If the disc rocks from side to side, the mounting spot may be too curved or uneven.
Once you are happy with the position, peel off the protective film. Try not to touch the exposed adhesive with your fingers. Skin oils and dust can affect the bonding surface.
Place the adhesive side against the dashboard. Start with one edge if the product instructions allow it, then lower the rest without trapping dirt or creating folds. Do not slide the disc around after it touches the dashboard.
If the disc is flexible, follow its instructions for curved surfaces. Do not bend a rigid disc or force it onto a steep curve. The disc should sit securely without lifting edges.
Keep the position straight
Line up the disc before exposing the adhesive so you do not need to reposition it.
Avoid touching the sticky side
Handle the disc by its edges to keep the adhesive clean.
Check the edges
The disc should not have lifted corners or sections that fail to contact the dashboard.
Step 4: Press the Disc Firmly Into Place
Apply firm, even pressure across the disc. Use your fingers or the flat part of your hand, depending on the product instructions. Pay attention to the center and edges so the adhesive makes consistent contact.
Different manufacturers give different pressure and hold times. Some Scosche mounting instructions call for firm pressure for around 30 to 60 seconds, while other products specify a different method. Follow the directions supplied with your exact disc.
Do not press so hard that you damage the dashboard or deform a flexible mounting surface. The goal is even contact, not maximum force. If the dashboard itself moves or bends, stop and choose a more stable area.
Press evenly
Spread pressure across the disc instead of pressing only on one small point.
Keep the disc still
Avoid twisting or sliding it while the adhesive is making contact.
Inspect the edges
Look for bubbles, raised corners, or visible gaps.
Step 5: Wait for the Adhesive to Cure
Do not attach your phone mount right away unless the manufacturer says it is ready for use. Many automotive adhesive products need time to build their full bond. A common instruction for some dashboard mounting discs is to wait 24 hours, but the exact time depends on the adhesive.
During this period, leave the disc alone. Do not pull on it, twist it, or test it repeatedly. Avoid attaching a heavy phone holder before the recommended waiting period has passed.
Temperature also matters. Some adhesive systems have a preferred application temperature range. For example, Quad Lock lists an ideal application range of 70°F to 100°F for its adhesive dash mount and advises against applying it below 50°F. These figures apply to that product, not every mounting disc.
If the car is very cold or extremely hot, check the instructions before installation. A controlled, moderate-temperature environment is generally a better place to prepare the surface than a freezing driveway or a dashboard heated by direct summer sun.
Follow the stated cure time
Use the waiting period printed in the instructions, not a guessed time.
Avoid early loading
Do not attach the phone or pull on the mounting disc while the adhesive is setting.
Keep the area clean
Do not spray dashboard cleaner or interior dressing over the new adhesive.
Step 6: Attach the Car Phone Mount
After the adhesive has cured, attach the phone mount according to its design. If it uses a suction cup, center the cup on the mounting disc. Press the cup down and activate its locking lever or twist mechanism if it has one.
For a direct adhesive holder, make sure the base matches the disc and that the adhesive is approved for the intended connection. Do not place a suction cup on an adhesive surface that is not designed to support suction.
Adjust the phone holder while the car is parked. Tighten the joints as directed, but do not overtighten plastic parts. Check that the phone sits securely and that the holder does not move when you gently touch it.
Center the suction cup
Keep the full suction surface within the mounting disc.
Lock the base
Use the lever or twist-lock system as described by the manufacturer.
Set the viewing angle
Adjust the phone so it does not block the road or important vehicle displays.
Step 7: Test the Mount Before Driving
Check the mount while the vehicle is parked. Gently touch the base and phone holder to see whether anything shifts. Do not yank the mount or place your full weight on it.
Install your phone and check whether the holder stays in position. Move the phone gently as you would when placing it into or removing it from the holder. If the base lifts, twists, or makes a clicking sound, remove the phone and inspect the installation.
A successful installation should have a flat, secure disc with no lifted edges. The mount should stay in place when you adjust the phone. If it moves during this basic check, do not rely on it while driving.
Secure base
The disc stays firmly attached without peeling at the edges.
Stable holder
The mount does not rotate or shift during normal phone placement.
Clear driving view
The phone does not block your view of the road, dashboard displays, or controls.
How Long Should You Wait Before Using the Phone Mount?
The correct waiting time depends on the adhesive system. Some products allow use after a short period, while others need a full day or longer to reach their intended bond strength. Always use the instructions for the exact mounting pad rather than assuming all adhesive products cure at the same speed.
For example, Arkon’s APVHB13 dashboard disc instructions call for 24 hours of curing before pressure is applied. Some Scosche adhesive mounting instructions also state that full bond strength is reached after 24 hours. These are product-specific instructions, not a universal rule for every car mount.
Waiting may feel inconvenient, especially if you need your phone for navigation. However, using the mount too soon can place stress on an adhesive layer that has not finished bonding. It is better to use a suitable alternative during the waiting period than to rush the installation.
Source: m.media-amazon.com
Short initial hold
Some products require firm pressure for a stated number of seconds during application.
Curing period
The adhesive may need additional time without a phone or mount attached.
Full bond
Use the manufacturer’s stated period before applying the normal load.
Does Warm Weather Help Adhesive Stick Better?
Moderate warmth can help some pressure-sensitive adhesives form a bond, but excessive heat is not helpful. The adhesive manufacturer’s application range matters more than the outdoor temperature alone.
A dashboard sitting in direct sunlight may become too hot for the recommended application conditions. Very cold surfaces can also affect some adhesive products. If the instructions provide a temperature range, follow it.
Do not use a heat gun or hair dryer to warm the dashboard before installation unless the manufacturer specifically allows it. Too much heat can damage the trim or change the surface finish.
Use moderate conditions
Apply the adhesive within the temperature range stated by its manufacturer.
Avoid direct sun
Let an overheated dashboard cool before installation.
Avoid freezing surfaces
Do not apply adhesive below its recommended minimum temperature.
How to Fix a Car Phone Mount That Keeps Falling Off
If your phone mount keeps falling off, do not keep pressing it back onto the same dirty or unsuitable spot. First, find out whether the problem comes from the dashboard, adhesive, suction cup, or mounting arm. Each part needs a different fix.
Remove the phone before checking the mount. If the adhesive disc has lifted from the dashboard, the problem is at the dashboard connection. If the disc stays in place but the suction cup releases, check the cup and its locking mechanism. If the base stays secure but the phone tilts, inspect the arm and adjustment joints.
A weak bond may not become reliable just because you press it down again. Many adhesive products are designed for one-time use. Once removed, their original bonding ability may be reduced. Replace the adhesive pad or mounting disc when the manufacturer recommends it.
Source: m.media-amazon.com
Problem: The adhesive disc peels away
Possible causes include dirt, oil, an incompatible surface, a steep curve, or insufficient curing time. Replace the adhesive using a compatible product and prepare a better location.
Problem: The suction cup releases
The cup may be dirty, damaged, or unable to form a seal. Clean it as directed and check whether it is compatible with the mounting disc.
Problem: The phone holder tilts
The adjustment joint may be loose, the phone may be too heavy, or the mounting arm may be too long.
Problem: The mount works in cool weather but fails in summer
Heat may be affecting the adhesive or dashboard material. Check the product’s temperature limits and surface compatibility.
Clean or Replace a Dirty Suction Cup
If the mounting disc remains firmly attached but the suction cup falls off, inspect the cup itself. Dust, hair, and small bits of debris can stop the cup from forming a good seal. Remove the cup from the disc and clean it using the method recommended by the mount maker.
Check the rubber or silicone surface for cuts, cracks, or permanent deformation. A damaged cup may not hold even on a smooth mounting disc. Replace it if the manufacturer does not offer a safe repair method.
Do not apply cooking oil, petroleum jelly, or random sticky products to improve suction. These substances can contaminate the mounting surface and make the next installation harder.
Clean the cup
Remove dust and residue using the approved cleaning method.
Inspect the seal
Look for cracks, hardened areas, or damaged edges.
Replace damaged parts
Use a compatible replacement cup if the original cannot hold securely.
Replace Weak or Used Adhesive
If the adhesive has already peeled away, do not assume that pressing it back down will restore its original strength. Some automotive adhesive pads are single-use. Dust and surface oils may also have collected on the exposed adhesive.
Remove the old pad only by following the product instructions. Clean the mounting area with a dashboard-safe method and let it dry. Then install a fresh replacement pad that is approved for the dashboard material.
Be careful with permanent adhesive discs. Strong automotive adhesives may be difficult to remove and can damage trim during removal. If you are unsure whether a disc is safe for your dashboard, contact the vehicle or mount manufacturer before applying another one.
Use a fresh pad
Do not rely on an adhesive layer that has lost contact or collected dirt.
Check compatibility again
A new pad will not solve a problem caused by an unsuitable dashboard material.
Allow proper curing
Repeat the recommended waiting period before using the holder.
Reduce Movement From a Heavy Phone
A large smartphone with a thick protective case can put extra weight on the mount. This becomes more noticeable when the holder has a long arm or several adjustable joints. The extra leverage can cause the base to move on rough roads.
Try a shorter mounting arm or a more compact holder if the phone keeps bouncing. Check the mount’s weight limit and make sure the phone is within its supported size range. Do not add extra adhesive layers to compensate for a holder that is not designed for your phone.
A secure base should remain stable during normal use. If the phone makes the holder lean or pull away from the dashboard, choose a mount with a stronger and more suitable design.
Shorten the arm
A shorter arm can reduce leverage and unwanted movement.
Check the phone weight
Make sure the holder supports your phone and case together.
Reduce unnecessary joints
A simpler mount may have fewer points that can loosen.
Common Mistakes to Avoid When Mounting a Phone Holder
A car phone mount can fail even when you buy a good product. Small installation mistakes often make the difference between a stable base and one that falls off after a few drives. Avoid these problems before applying a new adhesive pad.
The most common mistake is sticking the mount directly onto a rough dashboard without checking whether the adhesive supports that surface. Another mistake is using a cleaner that leaves a film or damages the dashboard finish.
It is also easy to rush the curing period. A mount may feel secure at first but release when the car gets hot or travels over rough pavement. Follow the instructions from the beginning instead of trying to fix a weak installation later.
Source: m.media-amazon.com
Applying adhesive over dashboard polish
Interior shine products can leave a slick layer. Clean the area with a compatible product before installation.
Using ordinary household tape
Household tape may not be made for vehicle heat, vibration, or the dashboard material.
Skipping the drying step
Moisture and cleaner residue can weaken contact between the adhesive and dashboard.
Moving the disc after placement
Sliding the disc can disturb the adhesive and collect dirt.
Using the phone too soon
Loading the mount before the recommended cure time can weaken the bond.
Choosing a steep dashboard curve
A mounting disc that cannot sit flat may develop lifted edges.
Ignoring airbag areas
A mount in an airbag deployment zone can create a serious injury risk.
Why You Should Not Use Super Glue
Super glue is not a good general solution for attaching a phone mount to a car dashboard. It can bond unevenly, become brittle, and damage some interior plastics or finishes. It can also make later removal difficult.
The dashboard moves and flexes as the vehicle heats, cools, and travels over bumps. A rigid glue joint may not handle that movement well. Use a mounting system designed for automotive interiors instead.
If a strong adhesive is needed, select one with clear vehicle-material compatibility and removal instructions. Do not use an industrial adhesive simply because it has a strong bond.
Risk of surface damage
Strong glue can mark, discolor, or damage dashboard trim.
Difficult removal
The holder may be hard to remove without damaging the dashboard.
Poor flexibility
A rigid bond may not suit a surface that expands, contracts, or flexes.
Why You Should Not Drill Into the Dashboard
Drilling holes for a phone holder is usually unnecessary. Modern dashboards can contain wiring, sensors, airbag components, and other equipment. You may not know what sits behind the visible trim.
A hole can also affect the vehicle’s finish and may create problems when you sell or trade the car. If a permanent mounting system is required, use a vehicle-specific product installed according to its instructions.
Never drill near an airbag cover or an area with unknown wiring. Ask a qualified vehicle technician if a mounting solution requires changes to the dashboard.
Avoid hidden components
The area behind the dashboard may contain important vehicle systems.
Protect the interior
Unneeded holes can cause lasting cosmetic damage.
Use a proper mounting system
Choose a mount designed for the vehicle instead of making an improvised attachment.
Important Dashboard and Driving Safety Tips
A phone mount should never make driving less safe. Choose a position that keeps the phone visible when needed but does not block the road, windshield, mirrors, instrument panel, or important controls. The mount should also stay away from airbag deployment areas.
The National Highway Traffic Safety Administration explains that airbags deploy very rapidly and can cause serious injuries if a person or object is too close to the deployment area. A phone mount or phone placed in an airbag path can create an additional hazard. Follow your vehicle manual when selecting a mounting position.
Also check your state’s rules on windshield obstructions and phone use while driving. Rules can vary by state. A dashboard mount may be a better choice in some situations, but it still needs to be placed carefully.
Set up navigation and choose your route before moving. Use voice directions when possible. Do not reach across the dashboard or adjust the phone while driving. If you need to change a setting, pull over in a safe place first.
Source: i.ytimg.com
Keep airbags clear
Never attach a mount where it could interfere with an airbag cover or deployment path.
Protect your view
Keep the phone out of your direct road view and away from important windshield areas.
Avoid blocking controls
The mount should not cover climate controls, hazard buttons, screens, or vents.
Secure the charging cable
Route the cable so it cannot interfere with steering, pedals, or gear controls.
Adjust only while parked
Set the viewing angle and navigation before driving.
What If There Is No Safe Dashboard Location?
Some vehicles have very small dashboards or large areas covered by airbag warnings, sensors, and displays. If you cannot find a safe flat location, do not force an adhesive mount into a poor spot.
A compatible vent mount may be an option if the vent is strong enough and the holder does not interfere with airflow or controls. A vehicle-specific console mount may also work. Check the vehicle and mount instructions before using either option.
You can also consider a suitable windshield mount where permitted. Check state rules and keep the phone outside the driver’s critical viewing area. The safest choice is the one that fits the vehicle without blocking visibility or interfering with safety systems.
Vent mount
Useful when the vent design supports the holder and airflow remains acceptable.
Console mount
Can provide a mounting point away from a textured dashboard.
Windshield mount
May work if it is allowed by local rules and does not obstruct the driver’s view.
Textured Dashboard Mounting Methods Compared
Different mounting methods solve different problems. An adhesive disc can help when the dashboard texture prevents a suction cup from forming a seal. A direct adhesive base may work when the dashboard material is approved for that adhesive. A vent mount avoids the dashboard surface altogether.
Use the table below to compare the main options. The best choice depends on the shape and material of your dashboard, the phone’s weight, and the mount maker’s instructions.
Source: vicseed.com
Best starting option for a compatible textured dashboard
An automotive dashboard disc designed to provide a smooth mounting area.
Best for avoiding dashboard adhesive
A compatible vent or vehicle-specific console mount.
Best for a suitable smooth surface
A direct adhesive base or suction cup installed according to its instructions.
Mounting Method Comparison
A mounting disc is useful when the dashboard texture is the main problem and the disc adhesive is compatible with the dashboard. A direct adhesive base is simpler but has stricter surface requirements. A vent mount is another option when the dashboard cannot support an adhesive connection.
No method is automatically suitable for every vehicle. Check the mount dimensions, surface material, phone weight, and driving position before making a choice.
Adhesive mounting disc
Main benefit: creates a flat surface for a compatible suction cup. Main limitation: the disc still needs a suitable dashboard material and may be difficult to remove.
Direct adhesive mount
Main benefit: fewer parts and a compact setup. Main limitation: many products require a smooth, non-textured, non-porous surface.
Vent mount
Main benefit: avoids adhesive contact with the dashboard. Main limitation: vent strength, shape, and airflow can restrict compatibility.
Windshield mount
Main benefit: provides a smooth glass surface for suitable suction cups. Main limitation: visibility and local windshield obstruction rules must be considered.
Vehicle-specific mount
Main benefit: designed around a particular vehicle interior. Main limitation: may cost more and may fit only certain models or trim versions.
A Simple Decision Guide
If your dashboard has shallow texture and is made from an approved hard plastic, look for a compatible adhesive disc. If the dashboard is deeply grooved, soft, or rubber-like, check for another mounting area or a different mounting style.
If the dashboard is smooth but the suction cup still fails, inspect the suction cup and its locking system before buying another adhesive disc. If the mount is secure but the phone bounces, consider a shorter arm or a holder designed for the phone’s weight.
Shallow texture and firm plastic
Check whether a dashboard adhesive disc is approved for the material.
Deep texture or soft trim
Consider a vent mount or another suitable mounting location.
Smooth surface and poor suction
Clean and inspect the suction cup and locking mechanism.
Secure base but moving phone
Check the phone weight, arm length, and holder adjustment joints.
Research Notes and Useful Questions the Installation Guides Often Leave Open
Manufacturer instructions provide the most useful details for adhesive compatibility, cleaning, pressure, and curing. The reviewed guidance also shows why one installation method cannot be applied to every dashboard.
Quad Lock’s support guidance for its adhesive dash mount specifies smooth, non-textured, non-porous surfaces and lists several materials that its adhesive will not bond to. Its instructions also provide a specific temperature range. This means a standard adhesive mount should not be assumed to work on a deeply textured or soft-touch dashboard.
Jensen Mobile’s dashboard mounting instructions describe using a plastic disc when the dashboard is textured or not flat. The instructions show the disc being attached first, followed by a suction-cup mount. This is a useful option when the product is designed for that type of setup.
Scosche’s mounting instructions describe cleaning the dashboard, applying the adhesive base, and pressing it firmly. Its instructions also warn that the supplied wipe may discolor certain interior materials. Arkon’s dashboard disc instructions highlight the importance of selecting a safe location and allowing the adhesive to cure before applying pressure.
The main practical improvement in this guide is to separate the dashboard connection from the suction-cup connection. A mount can fail at either point, and each needs a different fix. Checking both connections helps avoid replacing a working suction cup when the actual problem is an incompatible adhesive pad.
Source: m.media-amazon.com
Observed question: Why will my phone mount not stick?
Reader stage: installation. The reviewed product guidance addresses cleaning, surface compatibility, and adhesive contact. The useful answer is to inspect the dashboard material and mounting method before applying another pad.
Inferred next need: How long should I wait before using the mount?
Reader stage: after installation. Product instructions provide different curing periods. The useful answer is to follow the exact adhesive manufacturer’s stated waiting time.
Inferred next need: Can I remove the mounting disc without damaging the dash?
Reader stage: maintenance or repositioning. Arkon warns that some strong adhesive discs can create a permanent bond. Check removal instructions before installation.
Inferred next need: What if the suction cup falls off but the disc stays attached?
Reader stage: troubleshooting. Separate the suction-cup connection from the adhesive-disc connection and inspect the cup for dirt or damage.
Observed safety need: Where should I place the mount?
Reader stage: before installation. NHTSA airbag guidance and mounting instructions support avoiding airbag deployment zones and blocked views.
Competitor Coverage and Editorial Improvement
The reviewed material included Quad Lock’s adhesive mount support page, Jensen Mobile’s dashboard disc instructions, Scosche mounting instructions, Arkon’s dashboard disc manual, and NHTSA’s airbag guidance. These sources cover adhesive compatibility, surface preparation, mounting discs, curing, removal concerns, and airbag safety.
Coverage varies by source. Some instructions focus on smooth surfaces and do not explain what to do when a driver has a deeply textured dashboard. Others show how to use a mounting disc but provide less detail about separating a suction-cup failure from an adhesive failure.
This guide combines those practical steps into one installation and troubleshooting sequence. The comparison is limited to the pages and instructions reviewed. It does not claim that the same topics are absent from all other websites.
Quad Lock support guidance
Useful for understanding adhesive surface limits, material compatibility, application temperature, and single-use adhesive pads.
Jensen Mobile adhesive instructions
Useful for the mounting-disc method on dashboards that are textured or not flat.
Scosche mounting instructions
Useful for cleaning, pressure application, and warnings about cleaning wipes.
Arkon dashboard disc manual
Useful for curing time, placement safety, and the risk of permanent adhesive bonding.
NHTSA airbag guidance
Useful for understanding why objects must be kept away from airbag deployment areas.
Frequently Asked Questions
Q
Can I stick a car phone mount directly onto a textured dashboard?
Yes, but only if the mount’s adhesive is designed for your dashboard material and texture. Some adhesive bases can attach to certain textured plastics, while others require a smooth, non-textured surface.
If the surface is too rough for a direct adhesive connection, a compatible dashboard mounting disc may provide a flatter area for a suction cup. Always check the instructions before applying the pad.
Q
Does a 3M adhesive disc work on a textured dashboard?
A 3M adhesive disc can work on some textured dashboards when the disc and adhesive are designed for that surface. Some dashboard mounting kits use a plastic disc with adhesive underneath to create a smoother area for a suction-cup mount.
However, not every 3M adhesive product is suitable for every dashboard. Check the exact adhesive type, dashboard material, temperature requirements, and installation instructions before use.
Q
How long should I wait after sticking a phone mount to the dashboard?
Follow the curing time stated by the adhesive manufacturer. Some dashboard mounting products require 24 hours before the mount is loaded, while others may specify a different period.
Do not attach your phone early just because the adhesive feels sticky. The bond may need additional time to develop its intended strength.
Q
Can I use rubbing alcohol to clean my dashboard before installing a phone mount?
Do not assume rubbing alcohol is safe for every dashboard. Some plastics, vinyls, painted surfaces, and soft-touch coatings may discolor or become damaged when exposed to certain cleaners.
Use a cleaning product approved for your dashboard material and follow the phone mount manufacturer’s instructions. Test it in a hidden area when recommended, then allow the surface to dry completely.
Q
Why does my car phone mount keep falling off in hot weather?
High dashboard temperatures can affect some adhesives, especially when the surface was not cleaned properly or the adhesive was not fully cured. Heat may also make certain dashboard materials softer or more flexible.
Check the adhesive’s temperature rating and make sure it is compatible with your dashboard. Replace a damaged or weakened pad with a suitable product and follow its installation instructions.
Q
Can I use super glue to keep my car phone mount in place?
Super glue is not recommended as a general fix for a loose dashboard phone mount. It may damage the dashboard finish, create a brittle connection, and make the holder difficult to remove.
Use a compatible automotive adhesive disc or mounting base instead. If the dashboard material does not support adhesive mounting, choose another mounting style.
Q
Will a dashboard mounting disc leave marks when I remove it?
It may. The result depends on the adhesive strength, dashboard material, age of the bond, and removal method. Some heavy-duty adhesive discs are designed to create a very strong or permanent bond.
Check the manufacturer’s removal instructions before installation. If the product requires heat for removal, use only the approved method and avoid overheating the dashboard. Ask a qualified interior repair professional if you are concerned about damaging a valuable trim surface.
Q
What should I do if my dashboard is too rough for an adhesive pad?
Do not keep adding adhesive layers to a surface that cannot support the mount. Look for a suitable flat area on the dashboard or consider a compatible vent, console, or windshield mount.
Check that the alternative does not block your view, interfere with vehicle controls, or sit in an airbag deployment area. A safe mounting location matters more than keeping the holder in one preferred spot.
✦ Wrapping Up
Conclusion
Getting a car phone mount to stick to a textured dashboard is mainly about choosing the right mounting system and preparing the surface properly. A compatible adhesive mounting disc can provide a flatter area for a suction cup when the dashboard texture prevents a good seal. However, the adhesive must still be suitable for the dashboard material.
Start by choosing a safe location away from airbags, controls, vents, and your direct view of the road. Clean the area with a material-safe product, let it dry, and apply the disc with even pressure. Follow the manufacturer’s curing time before attaching the phone holder.
If the mount still falls off, inspect the adhesive connection and suction cup separately. Replace worn or contaminated adhesive rather than repeatedly pressing it back into place. If the dashboard is too soft, deeply textured, or unsuitable for adhesive, use another mounting method.
💡 Key Takeaway
Before buying another phone holder, check your dashboard material and choose a compatible mounting disc. Clean and dry the area, apply the disc carefully, wait for the full curing period, and test the mount while parked. Keep the holder away from airbags and anything that could block your view.