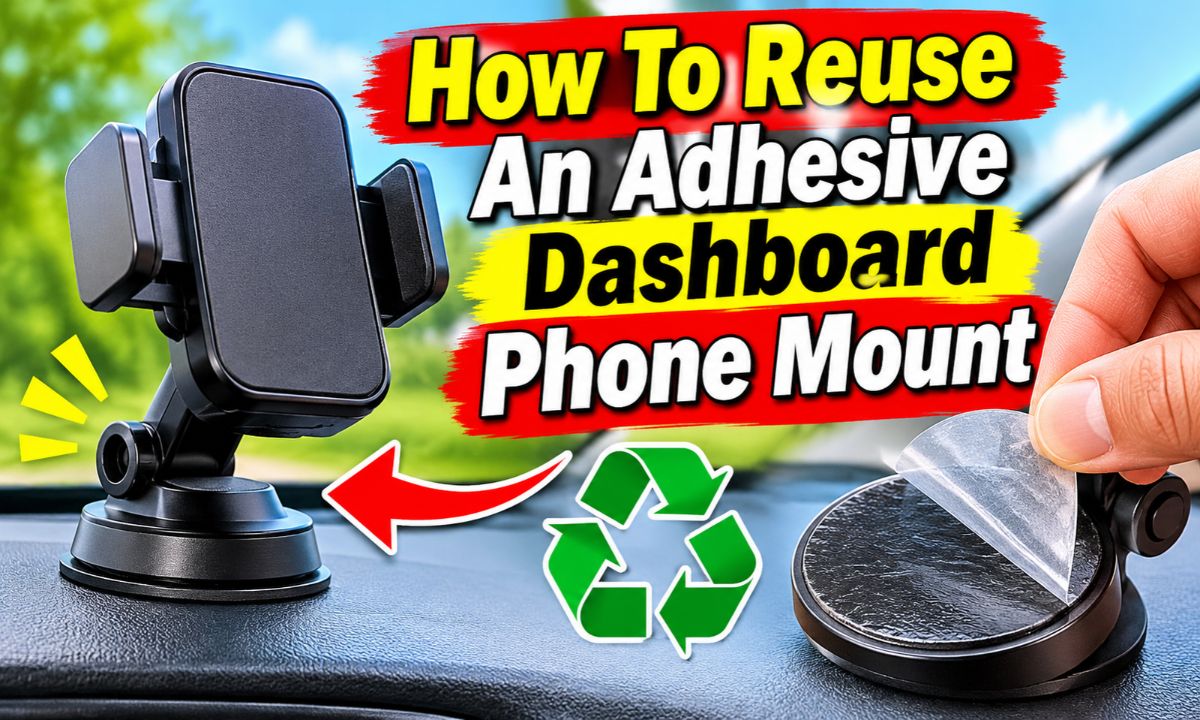
You can reuse some adhesive dashboard phone mounts by cleaning their reusable gel or suction surfaces. Mounts with one-time adhesive tape need a new replacement pad or tape.
Drivers across the United States use dashboard phone mounts for GPS directions, hands-free calls, and daily commutes. After moving a mount to another car or removing it to clean the dashboard, you may find that its sticky base no longer holds well. Before buying a new holder, check what kind of adhesive system your mount uses.
The key is to tell reusable sticky gel apart from permanent adhesive tape. A washable gel suction cup may regain its grip after careful cleaning. A foam adhesive pad or a semi-permanent mounting disk usually cannot be reused once removed. This guide explains how to check your mount, clean the right parts, replace worn adhesive, and test the holder before placing your phone on it.
1. Identify the Type of Adhesive on Your Phone Mount
Start by looking at the bottom of the phone mount. The type of base tells you whether cleaning, washing, or replacing the adhesive is the right move. Do not assume every sticky-looking pad works the same way.
Some mounts use a soft gel suction cup that can be washed and reused. Others use a separate dashboard disk with strong adhesive tape. Some have a foam pad or a thin double-sided tape layer that is designed for one installation only.
The distinction matters because cleaning a reusable gel cup may restore its grip, while washing a tape-backed pad can ruin the bond. Check the product manual, label, or maker’s support page if the design is unclear.
Source: m.media-amazon.com
Reusable gel suction cup
This base often feels soft, smooth, and slightly tacky. Some makers allow you to rinse it with warm water and air-dry it to restore its grip.
One-time adhesive tape
This is often a thin film or foam layer under a flat mounting disk. Once peeled away from the dashboard, it may lose its ability to form a reliable bond.
Separate dashboard pad
This disk creates a smoother surface for a suction mount on a textured dashboard. Its underside may use permanent or semi-permanent tape and may need replacement after removal.
Replaceable adhesive insert
Some mounts use a removable adhesive layer that can be replaced with a maker-approved pad. Keep the mount body and replace only the worn part.
How to tell whether the sticky base is reusable
Look for terms such as washable gel, reusable suction cup, replaceable adhesive, or one-time-use pad. These words can appear in the product manual or on the maker’s website. They are more useful than the pad’s appearance alone.
A flexible gel surface may be washable, but that does not mean the tape underneath a dashboard disk is washable. If the pad has a paper liner, foam tape, or a thin adhesive film, treat it as a replacement part unless the maker says otherwise.
Check the model
Find the brand and model number on the mount or its packaging. Use that number to locate the correct care and replacement instructions.
Inspect the pad
Look for cracks, cuts, dust, oil, hardened spots, peeling edges, or missing sections. These signs can point to a worn or damaged base.
2. Gather the Supplies Before You Start
Prepare a few basic items before cleaning or reinstalling the mount. The right supplies help remove dirt without scratching the dashboard or damaging the sticky surface.
You usually need a clean microfiber cloth, warm water, and a dry place for the mount to air-dry. A small amount of mild soap may be suitable for some washable gel cups, but follow the maker’s directions first.
If the mount uses one-time tape, you may also need a replacement adhesive pad made for that model. Do not buy a random tape roll before checking the base size, shape, material, and weight requirements.
Source: ae01.alicdn.com
Microfiber cloth
Use it to wipe the dashboard and remove loose dust without leaving lint behind.
Warm water
Use it for washable gel surfaces when the manufacturer allows rinsing. Avoid hot water unless the instructions specifically permit it.
Mild soap
Use only when approved for the gel material. Strong cleaners can leave residue or harm the surface.
Replacement adhesive
Choose a pad or tape designed for the mount and the dashboard material. Correct fit matters for a secure hold.
Plastic removal tool
A plastic card or trim tool can help lift an old pad carefully. Avoid sharp metal tools that can scratch the dash.
What you should avoid using
Do not reach for strong solvents, paint thinner, abrasive pads, or rough brushes. They may damage the gel, remove dashboard coatings, or leave a surface that is harder to bond to.
Avoid adding cooking oil, petroleum jelly, glue, or household sticky substances to improve grip. These products can attract dirt and make the mount less stable.
Harsh chemical cleaners
Use only a cleaner approved for the dashboard and adhesive material. A cleaner that works on glass may not be suitable for soft-touch plastic or vinyl.
Paper towels
They can leave lint or fibers on some sticky surfaces. A clean microfiber cloth is usually a better choice.
3. How to Clean and Reuse a Washable Gel Phone Mount
If your mount has a washable gel suction cup, cleaning may restore its grip. Dust, skin oils, dashboard residue, and small fibers can build up on the surface and reduce contact. Follow the maker’s care instructions rather than treating every gel cup as identical.
For example, iOttie’s support guidance for its sticky gel suction cup says to rinse the cup with warm water and let it air-dry. It also says the suction cup itself cannot be removed or replaced. This is a model-specific instruction, not a rule for every phone mount.
Source: m.media-amazon.com
Step 1: Remove the phone and mount
Take your phone off the holder. Release the mount’s locking lever, if it has one, and lift the base using its release tab. Do not yank the arm or pull hard on the dashboard.
Step 2: Inspect the gel surface
Check for dirt, lint, cracks, tears, or areas that have become hard. A badly damaged cup should be replaced rather than cleaned.
Step 3: Rinse when permitted
Hold the gel surface under warm running water if the maker allows it. Gently move water across the surface to loosen dust and dirt. Do not scrape it with a blade or rough sponge.
Step 4: Let it air-dry
Place the mount in a clean area and let the gel dry naturally. Do not wipe it with a dirty cloth or use a hair dryer, heater, or direct flame.
Step 5: Check the surface again
Make sure no lint, water drops, or cleaner residue remain. The cup should look even and free from visible damage.
Step 6: Reattach the mount
Place it on a suitable clean surface. Press it down evenly and engage its locking lever if the design uses one.
How to know if cleaning worked
A clean gel cup should make even contact with the mounting surface. It should not have visible gaps, loose edges, or a layer of dust between the cup and the dashboard.
Test the empty mount with gentle pressure. If the base lifts, slides, or releases easily, do not put your phone on it. Clean it again only if the maker permits another wash. If it still fails, the gel may be worn or damaged.
Good sign
The base sits flat, stays in place, and does not lift at the edges during a gentle parked test.
Warning sign
The base slides, peels away, or loses its hold after a short time. Stop using it until the cause is fixed.
4. How to Reuse a Mount With Removable Adhesive Tape
A mount with removable adhesive tape may be reusable after you replace the old adhesive layer. In most cases, the mount body is reusable, but the original tape is not. Peeling off the old layer and pressing the same dirty tape back onto the dash is not a dependable repair.
First, check whether the manufacturer sells a replacement pad or adhesive insert. A model-specific part is usually the best fit because it matches the shape, thickness, and intended surface of the mount.
Source: m.media-amazon.com
Step 1: Remove the old adhesive
Lift a loose edge slowly with a plastic card or trim tool. Work at a low angle and avoid scraping the dashboard. Stop if the dashboard finish begins to lift or change.
Step 2: Remove leftover residue
Use a dashboard-safe adhesive remover only if its label permits use on your dashboard material. Test a hidden spot first. Wipe away residue without soaking seams or nearby electronics.
Step 3: Clean the mount base
Remove dust, oil, and old adhesive from the flat mounting area. Follow the adhesive maker’s cleaning directions and let the base dry fully.
Step 4: Fit the replacement pad
Use a correctly sized replacement pad or tape. Align it with the base and press it down evenly. Avoid touching the exposed adhesive with your fingers.
Step 5: Install the mount
Prepare the dashboard as directed by the adhesive maker. Place the mount carefully because some strong tapes form a difficult-to-remove bond once pressed down.
Step 6: Allow the bond to build
Follow the stated wait time before loading the mount. Some pressure-sensitive tapes gain bond strength over hours or days, so an immediate pull test is not a substitute for the full cure period.
Can you reuse the original double-sided tape?
Usually, no. Once a pressure-sensitive adhesive tape has been peeled away, it may collect dust, stretch, tear, or lose close contact with the surface. Pressing it down again does not restore its original bond.
The iOttie Dashboard Pad is one example of a product with one-time adhesive tape. Its support page states that the tape on the underside is not reusable, and its product page describes the pad as a one-time-use part. Other brands may use different designs, so check your exact model.
Reuse the mount body
Keep the holder, arm, and base if they are in good condition and the maker permits reuse.
Replace the tape layer
Use the approved replacement pad or a compatible adhesive specified for the mount.
5. Prepare the Dashboard Before Reinstalling the Mount
A clean adhesive pad cannot make up for a dirty or unsuitable dashboard. Dust, wax, oil, dressing products, and loose surface coatings can weaken the bond. Choose a firm, flat area that gives the adhesive enough contact.
The dashboard material also matters. Some vehicles have soft-touch coatings, textured plastic, vinyl, or leather. A strong adhesive may pull at a surface coating or leave a mark when removed. Check the vehicle manual and mount instructions before attaching anything.
Source: ae01.alicdn.com
Step 1: Choose a safe location
Pick a stable area that does not block your view of the road, airbags, controls, vents, or instrument panel. Do not place the mount where it could interfere with an airbag deployment path.
Step 2: Remove loose dirt
Wipe away dust and crumbs with a clean microfiber cloth. Avoid pushing dirt into textured grooves.
Step 3: Clean with an approved product
Use a cleaner suitable for the dashboard material. For some tape systems, the adhesive maker may recommend a specific isopropyl alcohol and water mix. Do not assume that mix is safe for every dashboard finish.
Step 4: Let the area dry
Wait until the surface is fully dry and free from cleaner residue. Moisture trapped under the pad can weaken contact.
Step 5: Check the temperature
Follow the mount and tape maker’s temperature limits. Avoid fitting adhesive in a very cold car or on a dashboard heated by direct sun unless the product instructions allow it.
Why surface preparation matters
3M’s guidance for its VHB tape says that bonding surfaces should be clean and dry. It describes a 50:50 isopropyl alcohol and water mixture as a common cleaning method for many substrates, while also warning that some materials need different preparation.
The same guidance explains that firm pressure improves adhesive contact and that bond strength builds over time. These details apply to the specified 3M tape systems, not automatically to every car mount adhesive. Always use the instructions for the tape on your mount.
Smooth, firm surface
A firm surface gives the pad a better chance to make even contact.
Textured dashboard
Deep grooves can leave gaps under a flat adhesive pad. A maker-approved dashboard disk may help create a smoother mounting area.
Leather or soft-touch finish
Adhesive may mark, stain, or pull at these surfaces. Use only a mounting method approved for the vehicle finish.
6. Test the Reused Phone Mount Before Driving
Never assume the mount is ready just because it feels sticky. A phone adds weight and may shift as the car turns, brakes, or moves over rough roads. Test the base while the vehicle is parked before using it on a trip.
Start with the empty holder. Check that the base stays flat and that the arm, ball joint, and phone cradle lock firmly. Then place your phone in the holder while parked and check for movement.
Source: m.media-amazon.com
Step 1: Check the base
Look around the full edge for lifting, bubbles, gaps, or movement.
Step 2: Check the arm and joints
Tighten the adjustment knobs as directed. Make sure the arm does not droop or rotate under light hand pressure.
Step 3: Add the phone
Fit the phone in the holder while parked. Check that the mount stays in place and the phone does not slip out.
Step 4: Recheck after a short period
Look for a loose edge or a change in position before driving. If the base starts to move, remove the phone and repair or replace the mounting system.
When should you stop using the mount?
Stop using the mount if it falls, shifts, peels, or cannot hold the phone while the car is parked. Do not rely on a weak adhesive base and hope it will hold on the road.
A phone that drops while driving can distract you. Move the phone to a secure storage spot and use a different mounting method until the problem is fixed.
Replace damaged parts
A cracked suction cup, torn gel layer, bent base, or worn locking lever can make reuse unreliable.
Choose another mounting method
If your dashboard material does not support adhesive, consider a compatible vent, cup-holder, or windshield mount where permitted.
7. Why Your Reused Adhesive Mount May Not Stick
If the mount still falls after cleaning or replacing the pad, look for the cause before trying another repair. A weak hold can come from dirt, a damaged gel cup, an uneven dashboard, an unsuitable adhesive, or poor installation conditions.
The table below links common symptoms to likely causes and sensible next steps. These are troubleshooting clues, not a guarantee that one cause is responsible.
The mount falls soon after installation
Possible causes include old tape, dust, oil, moisture, or poor contact. Clean the surfaces and use a fresh compatible pad if the adhesive is one-time use.
The gel cup feels sticky but slides
The surface may be dirty, wet, or unsuitable for suction. Follow the maker’s cleaning steps and try only a permitted smooth mounting surface.
One edge keeps lifting
The dashboard may be curved or deeply textured, or the pad may be too small. Use a compatible mounting disk or choose another approved location.
The mount works indoors but fails in the car
Heat, cold, dashboard materials, vibration, or direct sun may affect the bond. Check the product’s temperature limits and surface compatibility.
The pad has cracks or tears
The adhesive or gel layer may be worn out. Replace the affected part rather than trying to seal the damage.
Does heat make an adhesive dashboard mount fail?
Heat can affect some adhesives and dashboard materials, but the result depends on the product. A parked car in direct sun can become much hotter than the outdoor air, so a mount that seems secure in a cool room may behave differently inside the vehicle.
Use the temperature range listed by the mount or tape maker. Do not use a hair dryer or heat gun to soften an adhesive pad while it is on the dashboard. Excess heat can damage the dashboard finish or nearby parts.
Follow the product temperature range
Check the installation and operating limits in the manual. Do not substitute a general tape guideline for the mount maker’s instructions.
Avoid direct sun during installation
Choose a moderate, stable temperature within the product’s stated range and let the bond develop as directed.
8. Can You Use New Adhesive Tape on an Old Phone Mount?
You may be able to fit new tape to an old mount if the manufacturer allows it and the base is designed for a flat adhesive layer. The replacement must suit the mount’s shape, weight, and dashboard material. A thick or poorly cut pad can change the angle or make the holder unstable.
Do not cover moving parts, release tabs, vents, screws, or locking mechanisms with tape. The adhesive should sit only on the intended bonding area. If the maker sells a replacement pad, start there instead of choosing a generic product.
Match the size
The new pad should cover the intended bonding area without hanging over the edges or leaving large gaps.
Match the material
Choose adhesive intended for the relevant plastic, metal, or dashboard surface. Some tapes are not suitable for flexible vinyl, soft-touch coatings, or textured materials.
Check the load guidance
Do not rely only on a tape’s advertised strength. The full mount assembly, phone weight, surface finish, heat, and vibration all affect real use.
Follow the cure time
Use the exact wait time in the tape instructions. Do not attach a heavy phone before the bond has had time to develop.
Is ordinary double-sided tape enough?
Not always. Office or craft tape may not be made for vehicle interiors, temperature changes, or the load placed on a phone mount. A tape that feels strong between two small objects may still fail on a dashboard.
Use an adhesive product intended for the surface and conditions, and follow its technical instructions. If the dashboard finish is delicate or the mount is heavy, a different mounting system may be the safer choice.
Do not stack old tape
Layering new tape over worn adhesive can create an uneven base and a weak bond.
Do not mix unknown adhesives
Combining glue, gel, and tape can make removal harder and may damage the dashboard.
9. How to Remove an Old Mount Without Damaging the Dashboard
Remove anold mount slowly and with care. Pulling it straight up can damage the dashboard surface or leave adhesive behind. The safest method depends on whether you are removing a suction cup, a gel base, or a tape-backed disk.
For a suction cup, release its locking lever first if present. Use the release tab to let air under the cup, then lift slowly. For a tape-backed pad, work gently from an edge with a suitable plastic tool and stop if the dashboard coating begins to lift.
Step 1: Remove the phone
Take the phone and any loose accessories off the holder before removing the base.
Step 2: Release the lock
Open the suction lever or release mechanism if the mount has one.
Step 3: Lift slowly
Use the release tab or a plastic tool as directed by the manufacturer. Avoid sharp blades and sudden force.
Step 4: Clean the remaining residue
Use a dashboard-safe product after checking its label and testing a hidden area. Wipe gently and keep liquids away from electronics and seams.
What if the adhesive will not come off?
Do not keep pulling harder. Stop and check the mount maker’s removal advice. Some adhesive removers may help with residue, but they can also affect paint, plastic, vinyl, or soft-touch coatings.
If the dashboard surface starts to peel, discolor, soften, or feel tacky, stop using the cleaner. A vehicle detailer or the vehicle maker’s service team may be able to advise on the finish.
Use gentle methods first
Try slow lifting and a plastic tool before considering a cleaner approved for the dashboard material.
Protect nearby parts
Keep liquids and tools away from screens, buttons, air vents, and seams.
10. When Replacing the Adhesive Is Better Than Reusing It
Replace the adhesive when it is torn, stretched, hardened, dirty beyond cleaning, or no longer holds after the correct care steps. A new pad is also the better choice when the old one was designed for one-time use.
The same rule applies when the mount has been removed several times and its base no longer sits flat. A low-cost replacement pad can be more sensible than risking a phone falling while driving, provided the replacement is compatible.
The pad has lost its shape
A warped or uneven pad may not make full contact with the dashboard.
The adhesive has collected dirt
Deeply embedded dust and fibers can prevent the adhesive from contacting the surface.
The base keeps coming loose
Repeated failure after correct cleaning and installation suggests that the adhesive or mounting surface is no longer suitable.
The manufacturer says one-time use
Follow that instruction. Do not try to restore a pad that the maker says cannot be remounted.
Should you replace the whole mount?
You do not always need a new phone holder. If the arm, cradle, joints, and locking parts are sound, a compatible replacement pad may be enough. If the base is cracked or the locking mechanism fails, replacing only the tape will not solve the problem.
Check whether the maker offers replacement bases, suction cups, or dashboard pads. If those parts are not available, compare the cost and fit of a new mount with the risks of using an improvised repair.
Replace only the pad
Choose this when the mount body is sound and the maker offers a matching replacement.
Replace the full mount
Choose this when the base, joints, or phone grip are damaged or when no suitable replacement part exists.
Frequently Asked Questions
Q
Can I wash the sticky part of my dashboard phone mount?
Only if the manufacturer says the sticky part is washable. Some gel suction cups can be rinsed with warm water and air-dried. Adhesive tape and foam mounting pads generally should not be washed because water can weaken or damage the bond.
Q
How many times can I reuse an adhesive phone mount?
There is no single reuse limit for all mounts. A washable gel cup may be reused as long as it remains intact and holds securely. A one-time adhesive pad should be replaced after removal. Follow the instructions for your exact model.
Q
Can I use rubbing alcohol to clean a sticky dashboard mount?
Do not use rubbing alcohol on the gel or tape unless the manufacturer approves it. Some adhesive systems use an alcohol-and-water mixture to prepare a bonding surface, but that does not mean alcohol is safe for every gel pad or dashboard finish.
Q
Can I put a used adhesive phone mount on another car?
Yes, if the mount body is reusable and its base is designed for reuse. Clean a washable gel cup according to its instructions. For a one-time adhesive base, fit a new compatible pad before installing it in the second car.
Q
Why does my phone mount fall off when the dashboard gets hot?
Heat may affect the adhesive, the dashboard material, or the contact between the two surfaces. Check the mount’s temperature limits, remove dust and residue, and use a fresh compatible pad if needed. Do not keep using a mount that releases under the weight of the phone.
Q
Can I use super glue to fix a loose dashboard phone mount?
Super glue is not a good general repair for a phone mount. It can damage dashboard finishes, make future removal difficult, and create a brittle bond that may not suit vibration or heat. Use a compatible replacement pad or another approved mounting method.
✦ Wrapping Up
Conclusion
You can reuse an adhesive dashboard phone mount when its design allows it. Washable gel suction cups may regain their grip after proper cleaning and air-drying. One-time adhesive tape and semi-permanent dashboard pads usually need a fresh replacement part after removal.
The most reliable approach is to identify the base, follow the maker’s care instructions, prepare the dashboard, and test the mount while parked. Never trust a loose pad to hold your phone during a drive. If the adhesive is damaged or the dashboard surface is unsuitable, replace the pad or choose another mounting option.
💡 Key Takeaway
Check your mount’s model and adhesive type first. Clean only washable gel, replace one-time tape, and test the empty mount before putting your phone back on it.