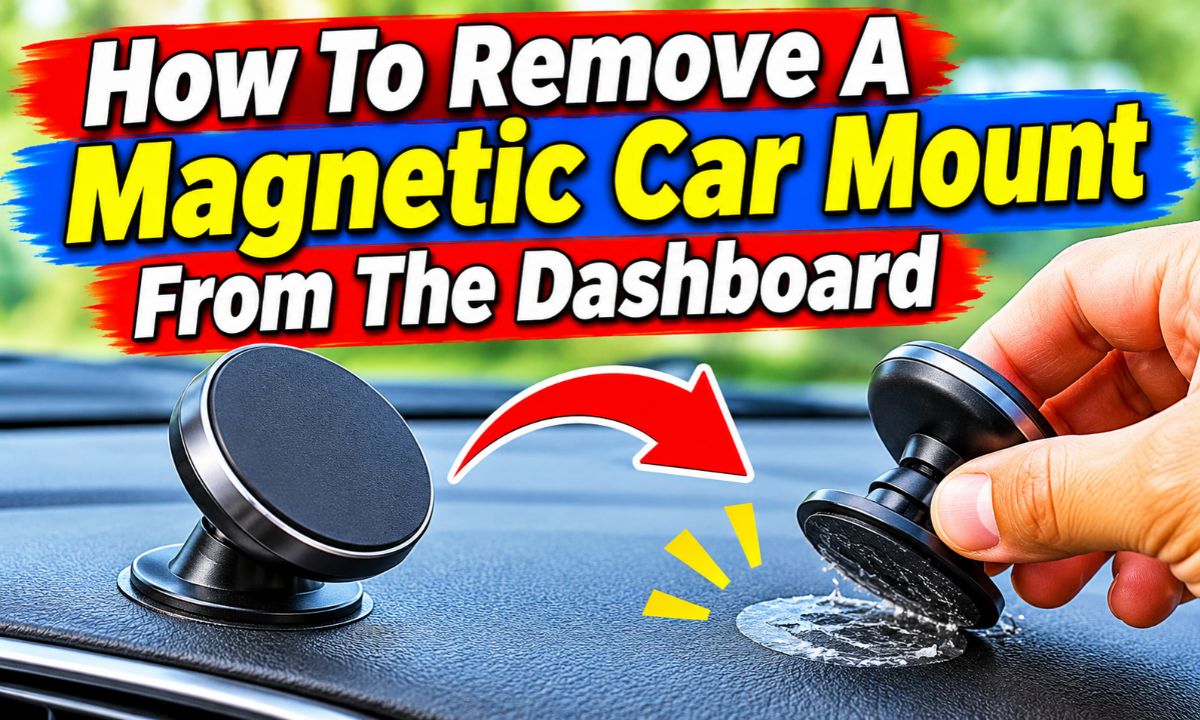
Remove a magnetic car mount by gently warming its adhesive, sliding dental floss or a plastic card underneath, and cleaning leftover residue with a dashboard-safe cleaner.
Across the United States, drivers use magnetic phone mounts for navigation, hands-free calls, and daily commutes. These mounts are common in cars, pickup trucks, and SUVs. However, when you replace a phone holder, sell your vehicle, or change your dashboard setup, removing the old mount can become a challenge. Strong adhesive pads can stick firmly to plastic, vinyl, and other interior surfaces.
The good news is that you can often remove a magnetic car mount at home with a few simple tools. The key is to loosen the adhesive without pulling hard or scratching the dashboard. A little patience can help prevent costly marks, torn surface coatings, and damaged trim.
Before starting, check the mount manufacturer‘s removal instructions. Some brands recommend gentle heat, while others advise using a thin plastic card without heat or liquid. These differences matter because dashboard materials and adhesive types are not all the same. This guide explains how to choose the right method and remove both the mount and its sticky residue.
Why Magnetic Car Mounts Can Be Difficult To Remove
A magnetic car mount may look small, but its adhesive base can form a strong bond with your dashboard. Many mounts use double-sided foam tape or pressure-sensitive adhesive. These materials help keep a phone holder in place during turns, bumps, and sudden stops.
Heat inside a parked car can also affect the adhesive over time. Summer temperatures in states such as Texas, Arizona, and Florida can make a dashboard very hot. Repeated heating and cooling may change how the adhesive feels and how easily it releases.
The mount itself may not be the only part that needs removal. Some magnetic holders have a separate metal plate attached to a phone or phone case. Others use a mounting disc that stays on the dashboard when the main holder is removed.
Strong adhesive pads
These pads create a firm bond with the dashboard. Pulling the mount straight upward may stretch the adhesive or damage a delicate surface.
Dashboard texture
A textured dashboard can make adhesive removal harder because the tape may grip small grooves and raised areas.
Aging adhesive
Old adhesive can become stiff, brittle, or sticky. Its condition affects the best removal method.
Different interior materials
Plastic, vinyl, painted trim, soft-touch coatings, and leather need different levels of care.
Identify The Type Of Magnetic Mount First
Look closely at the bottom of your phone holder. An adhesive mount usually has a flat base with a sticky pad underneath. A suction-cup mount has a rubber cup and may include a locking lever. A magnetic holder can also attach to an adhesive mounting disc rather than directly to the dashboard.
This distinction matters because removing a suction cup is different from removing a bonded adhesive base. If your mount has a removable ball joint or locking connection, detach the upper holder first. This makes the remaining base easier to reach.
Adhesive base
Use the manufacturer’s approved method, such as a plastic card, dental floss, or gentle heat when permitted.
Suction cup
Release the locking lever and gently lift the cup’s edge. Avoid pulling hard against the dashboard.
Adhesive mounting disc
Remove the phone holder from the disc first, then work on the disc’s adhesive layer.
Tools And Supplies You Need Before Starting
Gather your supplies before you begin. Having the right tools nearby makes the job easier and reduces the temptation to use sharp objects or excessive force. Most basic adhesive mounts can be handled with ordinary household items.
You do not need a professional detailing kit for every removal. However, the cleaner and removal tool must be suitable for your specific dashboard material. Check your vehicle owner’s manual if you are unsure which products are safe.
Hair dryer
Useful for softening some adhesive pads when the mount manufacturer allows heat. Choose a low setting.
Dental floss
Helps slice through the adhesive layer behind the mount. Use ordinary unwaxed or suitable strong floss that will not damage the surface.
Plastic card
A thin plastic card or trim-safe pry tool can help lift the edge of the base. Avoid metal cards and sharp edges.
Microfiber cloth
Useful for wiping away loosened adhesive and cleaning the area without adding unnecessary scratches.
Dashboard-safe cleaner
Choose a cleaner approved for the material used on your dashboard. A mild interior cleaner is often suitable for routine cleaning.
Protective gloves
Optional gloves can improve grip and protect your hands when handling sticky residue or cleaning products.
What You Should Avoid Using
Do not reach for a kitchen knife, screwdriver, razor blade, or metal scraper. These tools can leave permanent scratches or cut through soft dashboard coatings. A sharp edge can also slip and damage nearby trim.
Avoid using a heat gun unless the vehicle and mount manufacturers specifically approve the method. A heat gun can concentrate too much heat in one small area. Strong solvents can also discolor plastic, vinyl, and painted surfaces.
Metal scrapers
Can scratch, gouge, or cut the dashboard.
Excessive heat
Can soften, warp, or discolor plastic and vinyl.
Unapproved solvents
Products containing acetone, paint thinner, or strong petroleum solvents may damage interior coatings.
Abrasive pads
Can change the texture or finish of the dashboard.
How To Remove A Magnetic Car Mount From The Dashboard Step By Step
The safest approach is to remove the holder without twisting or forcing the base. Start by checking the instructions for your exact model. If the instructions prohibit heat or liquids, follow the approved plastic-card method instead.
For an adhesive mount that permits gentle warming, a hair dryer and dental floss can help loosen the bond. Work slowly and keep checking the dashboard for changes in color, texture, or shape.
Source: carinterior.alibaba.com
Step 1: Park And Prepare The Vehicle
Park on a level surface, turn off the engine, and remove the key or switch off the vehicle. Let the dashboard cool to a comfortable temperature before you begin. Make sure the area is well lit.
Step 2: Remove The Phone And Accessories
Take your phone off the magnetic holder. Remove loose cables, charging accessories, and any detachable parts that could get in your way.
Step 3: Inspect The Mounting Base
Look for a seam between the adhesive base and dashboard. Check whether the base is attached with foam tape, a thin adhesive pad, or a mounting disc. Read the manufacturer’s instructions before choosing heat or a removal tool.
Step 4: Warm The Adhesive Only If Approved
If the instructions allow heat, use a household hair dryer on its lowest setting. Keep it at a safe distance and move it continuously rather than holding it in one spot. Some Scosche MagicMount replacement-base instructions specify low heat for 2 to 3 minutes with the dryer held 6 to 9 inches away. Treat those measurements as model-specific guidance, not a rule for every dashboard.
Step 5: Slide Dental Floss Behind The Base
When the adhesive is accessible, gently work dental floss between the mount and dashboard. Move it back and forth with short, controlled motions. Keep the floss close to the adhesive layer instead of pulling upward against the dashboard.
Step 6: Release The Mount Slowly
Continue moving the floss until the adhesive separates. Support the mount with your other hand so it does not fall onto the console. If the floss becomes stuck or the dashboard begins to flex, stop and reassess.
Step 7: Lift Away Remaining Adhesive
If a thin adhesive layer remains, use a flexible plastic card when the mount instructions allow it. Slide the card under the loose edge with very little pressure. Avoid digging into the dashboard or bending the plastic trim.
Step 8: Clean The Dashboard
Apply a small amount of dashboard-safe cleaner to a microfiber cloth, not directly onto the dashboard. Gently wipe the affected area. Follow the cleaner’s instructions and use a separate dry cloth to remove excess moisture.
Step 9: Inspect The Finished Area
Check for sticky patches, scratches, discoloration, or changes in texture. The job is complete when the base and unwanted adhesive are gone and the dashboard retains its original appearance.
Signs That The Mount Has Been Removed Successfully
A successful removal should leave the dashboard free of loose adhesive and unwanted mounting parts. The surface should not feel sticky when you gently touch it with a clean finger. It should also look consistent with the surrounding trim.
Do not keep rubbing a stubborn mark just to make it disappear. A slight difference in sheen may come from the adhesive or from an older surface coating. Aggressive cleaning can make the problem worse.
There are no raised edges or pieces of adhesive left behind.
Clean surface
The area is free of sticky residue and cleaning product.
No new damage
There are no fresh scratches, tears, or heat-related changes.
How To Remove A Magnetic Mount Without Using Heat
You can remove some magnetic car mounts without a hair dryer. This may be the better option when your dashboard has a delicate coating or the manufacturer specifically warns against heat. Some Scosche MagicMount instructions recommend using a thin plastic card to lift the adhesive mounting parts slowly.
Start by finding a loose edge. If there is no opening, try gently working a thin plastic card into the edge of the adhesive pad. Do not force the card under a tightly bonded base. A small amount of movement is enough to help you judge whether the adhesive is releasing.
For a thicker adhesive layer, dental floss may work better than a plastic card. Slide it behind the mount and move it slowly from side to side. Keep the movement level and avoid pulling the floss upward into the dashboard.
Source: storage.googleapis.com
Use a flexible plastic card
Choose a clean card with smooth edges. Keep it nearly parallel to the dashboard to reduce the chance of gouging the surface.
Work around the edge
Move a little at a time instead of trying to release the whole base in one motion.
Use dental floss for thick pads
Floss can cut through the adhesive layer without requiring a sharp metal tool.
Stop when resistance increases
If the dashboard starts bending or the adhesive refuses to release, do not apply more force.
When Is A No-Heat Method Better?
A no-heat method is useful when the dashboard material is sensitive to temperature or when the mount’s manual advises against warming the base. It is also a reasonable first approach when you do not know the exact adhesive type.
However, no-heat removal is not automatically safe for every mount. A very strong adhesive pad may resist a plastic card, and forcing the tool underneath can still damage the surface. If the mount cannot be released with gentle pressure, contact the manufacturer or an automotive interior specialist.
Delicate dashboard finishes
Avoid unnecessary heat on soft-touch or specially coated surfaces.
Manufacturer restrictions
Follow instructions that prohibit heat or liquids.
Unknown dashboard material
Use a cautious approach and check the vehicle owner’s manual first.
How To Remove Sticky Adhesive Residue From The Dashboard
Removing the mount does not always remove the adhesive. You may find a thin film, small pieces of foam tape, or a sticky patch where the base was attached. The right cleaning method depends on the dashboard material and the type of adhesive.
Begin with the least aggressive method. Use your fingers or a clean microfiber cloth to gently lift loose pieces. If the residue remains, check the vehicle owner’s manual and select a cleaner that is approved for the exact surface.
General Motors’ interior-cleaning guidance warns that unsuitable cleaners can permanently alter modern interior finishes. It recommends mild, neutral-pH products for many interior surfaces and advises applying cleaner to a towel rather than spraying it directly onto the surface.
Source: manuals.plus
Use a microfiber cloth
Wipe gently to collect loose adhesive particles without scratching the dashboard.
Try a material-safe interior cleaner
Use a product intended for the exact dashboard material and follow its label.
Apply cleaner to the cloth
This helps control moisture and reduces the risk of liquid entering dashboard gaps or electronic components.
Dry the area
Use a clean, dry microfiber cloth after cleaning to remove excess moisture.
Can You Use Rubbing Alcohol To Remove The Adhesive?
Rubbing alcohol can loosen certain adhesives, but that does not make it safe for every dashboard. Some plastic, vinyl, painted, and soft-touch surfaces may become discolored or develop an uneven sheen after contact with alcohol.
General Motors specifically warns against using organic solvents, including alcohol, on the interior surfaces covered by its cleaning bulletin because they can change the appearance of low-gloss materials. Other vehicle makers may have different instructions, so check your own owner’s manual.
If your vehicle manufacturer permits alcohol for the specific material, test it on a hidden area first and follow the stated concentration and application method. Otherwise, use a compatible interior cleaner instead.
Do not assume all plastic is alike
A hard plastic panel may respond differently from a soft-touch vinyl coating.
Avoid soaking the area
Excess liquid can enter seams, switches, and electronic components.
Check for color transfer
Stop if the cloth picks up dashboard color or the finish begins to change.
What If The Adhesive Is Thick Or Hardened?
Old adhesive may break into small pieces instead of coming off as one clean strip. Do not scrape it aggressively. Try lifting the loose edges with a plastic tool that is approved for your dashboard material.
If the residue remains firmly bonded, ask the vehicle manufacturer or a professional detailer about a suitable adhesive remover. A product that works on glass or metal may not be safe for vinyl or soft-touch plastic.
Loose foam pieces
Remove them gently with your fingers or a plastic tool.
Thin sticky film
Use a compatible interior cleaner and microfiber cloth.
Hard, stubborn residue
Seek material-specific cleaning advice rather than using a stronger solvent without testing.
How To Remove Different Types Of Magnetic Car Mounts
Not every magnetic phone holder attaches to the dashboard in the same way. Some use a permanent-style adhesive base, while others use suction cups or removable mounting discs. Identifying the design helps you avoid using the wrong removal method.
The following table compares common mount types and the most suitable starting approach. Always check the exact model instructions before applying heat or cleaning products.
Adhesive magnetic mount
Use the approved plastic-card or dental-floss method to separate the adhesive base.
Suction-cup magnetic mount
Release the suction mechanism first, then gently lift the rubber cup’s edge.
Magnetic mount with a mounting disc
Detach the holder from the disc before removing the disc’s adhesive backing.
Vent magnetic mount
Release its clip from the air vent. It usually does not require adhesive removal from the dashboard.
Adhesive Magnetic Dashboard Mounts
These mounts are usually attached with a sticky base or foam tape. They are often the most difficult type to remove because the adhesive is designed to hold firmly against the dashboard.
Use dental floss or a plastic card when permitted by the manufacturer. If the instructions allow low heat, a hair dryer may help soften the bond. Clean any remaining residue with a dashboard-safe product.
Main concern
Strong adhesive can pull at surface coatings if the mount is lifted too quickly.
Best starting point
Inspect the adhesive edge and follow the mount’s specific removal instructions.
Suction-Cup Magnetic Mounts
A suction-cup holder uses pressure to stay attached rather than relying entirely on adhesive. Look for a small release tab or locking lever. Move the lever to its release position and gently lift the edge of the cup.
Some suction-cup mounts also use an adhesive dashboard disc. If so, removing the suction cup will leave the disc behind. Treat that disc as a separate adhesive removal job.
Release the lever
Unlock the suction mechanism before lifting the cup.
Avoid sudden pulling
Gentle lifting helps prevent unnecessary pressure on the dashboard.
Magnetic Mounts With Metal Plates
Some magnetic phone mounts use a thin metal plate attached to the phone or phone case. If the plate is attached to the dashboard instead, remove it separately from the holder.
A thin plastic card can help lift an adhesive metal plate when the manufacturer allows it. If the plate is attached directly to your phone, follow the phone and mount instructions instead of treating it like a dashboard-mounted base.
Check where the plate is attached
Determine whether it is on the phone, inside the case, or on the dashboard.
Protect the surface
Use a plastic tool rather than a knife or metal scraper.
Common Problems And How To Fix Them
Sometimes a magnetic car mount does not come off as easily as expected. The adhesive may be too strong, the dashboard may have a textured finish, or a previous removal attempt may have left marks. The safest response is to identify the problem before trying another method.
Do not increase heat or force just because the first attempt fails. A slow, controlled approach is usually better than trying to finish the job in one pull.
Source: carinterior.alibaba.com
Problem: The Mount Will Not Budge
The adhesive may still be firmly bonded. Check the manufacturer’s instructions and try an approved removal method. Do not pull the base upward with force.
Problem: Dental Floss Keeps Breaking
The adhesive may be thick or the floss may be too weak. Try a suitable plastic trim tool or stronger floss, provided the mount instructions allow it.
Problem: Sticky Residue Remains
Use a dashboard-safe cleaner and a microfiber cloth. Avoid adding stronger chemicals without checking material compatibility.
Problem: The Dashboard Looks Shiny
The cleaning product may have altered the surface finish or left residue. Stop using the product and consult the vehicle manufacturer’s cleaning guidance.
Problem: The Dashboard Looks Scratched
Stop scraping immediately. Do not use polish or abrasive products unless the manufacturer confirms they are safe for that finish.
Problem: The Dashboard Feels Soft Or Warped
Stop applying heat and pressure. Allow the area to cool and have a professional inspect it if the surface does not return to its normal appearance.
When Should You Stop And Ask For Professional Help?
If the dashboard begins to lift, crack, or change shape, stop the removal process. The same applies if the mount appears to be bonded to a coated or delicate surface that you cannot identify.
An automotive detailer or interior trim specialist may be able to assess the adhesive and recommend a suitable removal method. This is especially useful for expensive vehicles with soft-touch dashboards, leather trim, or special interior finishes.
If the mount is attached near an airbag cover, instrument panel seam, or sensitive electronic component, do not insert tools into the gap. Keep removal work away from airbag deployment areas and follow the vehicle manufacturer’s instructions.
Visible surface damage
Seek professional help if the dashboard coating begins to peel, crack, or deform.
Unclear adhesive type
Contact the mount manufacturer if you cannot identify the adhesive or approved removal process.
Airbag or electronic components nearby
Avoid inserting tools or applying liquid near sensitive dashboard components.
Common Mistakes To Avoid During Removal
A few simple mistakes can turn a quick maintenance task into an expensive repair. Most dashboard damage happens when someone uses too much force, applies the wrong chemical, or works too quickly.
Take your time and stop whenever the dashboard shows signs of stress. A few extra minutes are worth protecting the finish of your vehicle.
Pulling The Mount Straight Up
This can place unnecessary stress on the dashboard and adhesive bond. Use an approved separation method instead.
Using A Screwdriver
A metal screwdriver can leave deep scratches or puncture soft trim. Choose a smooth plastic tool.
Heating One Spot For Too Long
Concentrated heat may damage plastic, vinyl, or painted surfaces. If heat is approved, keep the dryer moving.
Spraying Cleaner Directly On The Dashboard
Liquid can enter seams and electronic components. Apply a small amount to a microfiber cloth instead.
Using Acetone Or Paint Thinner
These strong solvents may damage dashboard materials and surface coatings.
Ignoring The Mount Manual
Removal instructions can differ between models. A method that works for one adhesive base may be unsuitable for another.
Scrubbing Too Hard
Hard rubbing and abrasive pads can change the surface texture or finish.
How To Prevent Adhesive Problems With Your Next Car Mount
If you plan to install another magnetic phone holder, think about removal before choosing its mounting position. A suitable location and removable mounting system can make future changes much easier.
Read the installation instructions before attaching a new mount. Check whether the adhesive is intended for your dashboard material and whether the manufacturer offers replacement pads or a separate mounting disc.
Avoid placing a mount over an airbag cover, instrument panel seam, or an area that blocks your view. A phone holder should not interfere with safe driving or vehicle controls.
Source: storage.googleapis.com
Choose A Suitable Mounting Location
Select a flat, stable area that does not block the windshield, vents, controls, or airbag deployment zones.
Use A Removable Mounting Disc
A separate disc can provide an attachment surface for some suction-cup mounts. Check its compatibility with your dashboard.
Keep The Dashboard Clean
Remove dust and loose dirt using the approved cleaning method before installation.
Follow Adhesive Instructions
Use the correct installation and curing process stated by the manufacturer.
Keep Installation Records
Save the mount model and instructions so you can find the correct removal procedure later.
Should You Use A Magnetic Mount With A Removable Adhesive Pad?
A replacement adhesive pad can be useful if you expect to move or replace your phone holder. Some mounts offer separate replacement bases, which means you may not need to replace the entire assembly.
However, removable does not mean damage-free. Even a replaceable adhesive pad can bond strongly to a dashboard. Check the manufacturer’s instructions and confirm that the mounting base is compatible with your vehicle’s interior.
Replacement adhesive
Can make it easier to reuse the main mount assembly.
Reusable suction cup
May reduce the need for a permanent adhesive base, depending on the dashboard surface.
Vent-mounted holder
Can avoid dashboard adhesive entirely, although compatibility with the vehicle’s air vents matters.
A Simple Decision Guide For Choosing The Right Removal Method
The right removal method depends on the mount design, adhesive type, and dashboard material. Use this decision table to choose a sensible starting point before you begin. Manufacturer instructions always take priority over general advice.
Adhesive base and heat is approved
Consider gentle hair-dryer heat followed by dental floss or another approved separation tool.
Adhesive base and heat is prohibited
Use the manufacturer’s recommended plastic-card method. Do not add heat or liquid.
Suction-cup base
Release the locking mechanism and gently lift the rubber cup.
Sticky residue only
Use a material-compatible interior cleaner and microfiber cloth.
Dashboard coating is damaged
Stop cleaning and seek advice from a vehicle interior specialist.
How Long Does It Take To Remove A Magnetic Car Mount?
There is no fixed removal time for every mount. A small adhesive base with a loose edge may come off quickly, while an older mount with a strong foam pad may take longer. The dashboard material and manufacturer’s instructions also affect the process.
Do not rush to meet a time target. Work in short steps, inspect the surface often, and stop if the adhesive does not release with gentle pressure.
Easy removal
A loose adhesive edge may allow the base to separate with a simple plastic tool.
Moderate removal
A bonded foam pad may need careful floss work or manufacturer-approved warming.
Difficult removal
A stubborn mount may need professional attention to avoid dashboard damage.
Frequently Asked Questions
Q
Can I remove a magnetic car mount without damaging my dashboard?
Yes, you can often remove an adhesive magnetic car mount without damaging the dashboard. Use the removal method approved by the mount manufacturer and work slowly. Dental floss or a smooth plastic card may help separate the adhesive without scratching the surface.
The result depends on the dashboard material, adhesive strength, and condition of the mount. Stop if the surface begins to lift, crack, or change color.
Q
Will a hair dryer help remove a magnetic car mount?
A hair dryer can soften some adhesive pads and make removal easier. Use low heat only when the manufacturer permits it, keep the dryer moving, and maintain a safe distance from the dashboard.
Some mount instructions specify particular heat settings and distances, while other models prohibit heat. Always follow the instructions for your exact model.
Q
Can I use Goo Gone to remove car mount adhesive?
Some mount manufacturers recommend household adhesive removers for certain adhesive residues. However, that does not mean every adhesive remover is safe for every dashboard.
Check the vehicle owner’s manual and the cleaner’s label first. Test an approved product on a hidden area and stop if you notice discoloration, color transfer, or a change in surface texture.
Q
Does rubbing alcohol damage a car dashboard?
It can damage or change the appearance of some dashboard surfaces. Alcohol may affect vinyl, painted trim, plastic coatings, and soft-touch finishes.
Some vehicle manufacturers specifically warn against alcohol-based cleaners on certain interior materials. Use only a cleaner approved for your dashboard and test it in an inconspicuous area when instructed.
Q
How do I remove a magnetic phone holder that is stuck very firmly?
First, identify the adhesive type and check the manufacturer’s removal instructions. If heat is permitted, gentle warming may help. Otherwise, use a plastic card or dental floss if the manufacturer recommends that method.
Avoid metal tools and forceful pulling. If the mount remains firmly attached or the dashboard begins to flex, contact the mount manufacturer or an automotive interior specialist.
Q
Can I use dental floss to remove a car mount?
Yes, dental floss can help cut through the adhesive layer behind some magnetic car mounts. Slide it behind the base and move it back and forth with controlled motions.
Keep the floss close to the adhesive instead of pulling upward against the dashboard. Stop if it catches, breaks repeatedly, or begins to damage the surface.
Q
Will removing a magnetic car mount leave a permanent mark?
It may leave a sticky patch, a difference in surface sheen, or a visible outline. Some marks come from leftover adhesive, while others may result from changes to the dashboard finish during long-term exposure.
Try a compatible interior cleaner first. If the mark remains, do not scrub harder or apply a stronger solvent without checking material compatibility.
Q
Can I use a razor blade to remove adhesive from my dashboard?
A razor blade is not a good choice for most dashboard surfaces. It can scratch plastic, cut vinyl, and damage soft-touch coatings.
Use a smooth plastic removal tool or another method approved by the vehicle and mount manufacturers. Keep sharp tools away from dashboard seams and nearby electronic components.
✦ Wrapping Up
Conclusion
Removing a magnetic car mount from your dashboard does not have to be difficult. The most important step is identifying the mounting system and checking the manufacturer’s removal instructions before using heat, floss, or a plastic tool.
For some adhesive bases, gentle warming followed by dental floss can help release the mount. Other models require a no-heat plastic-card method. Once the base is removed, clean the remaining adhesive with a product approved for your dashboard material.
Avoid sharp metal tools, excessive heat, strong solvents, and forceful pulling. These shortcuts can damage plastic, vinyl, paint, or soft-touch coatings. If the mount refuses to release or the dashboard begins to change, stop and ask a professional for help.
💡 Key Takeaway
Before removing your mount, check its model instructions and identify your dashboard material. Prepare dental floss, a smooth plastic tool, and a compatible interior cleaner. Work slowly, inspect the surface as you go, and never force a stubborn adhesive pad.
2 thoughts on “How To Remove A Magnetic Car Mount From The Dashboard: Safe Guide”



2 thoughts on “How To Remove A Magnetic Car Mount From The Dashboard: Safe Guide”