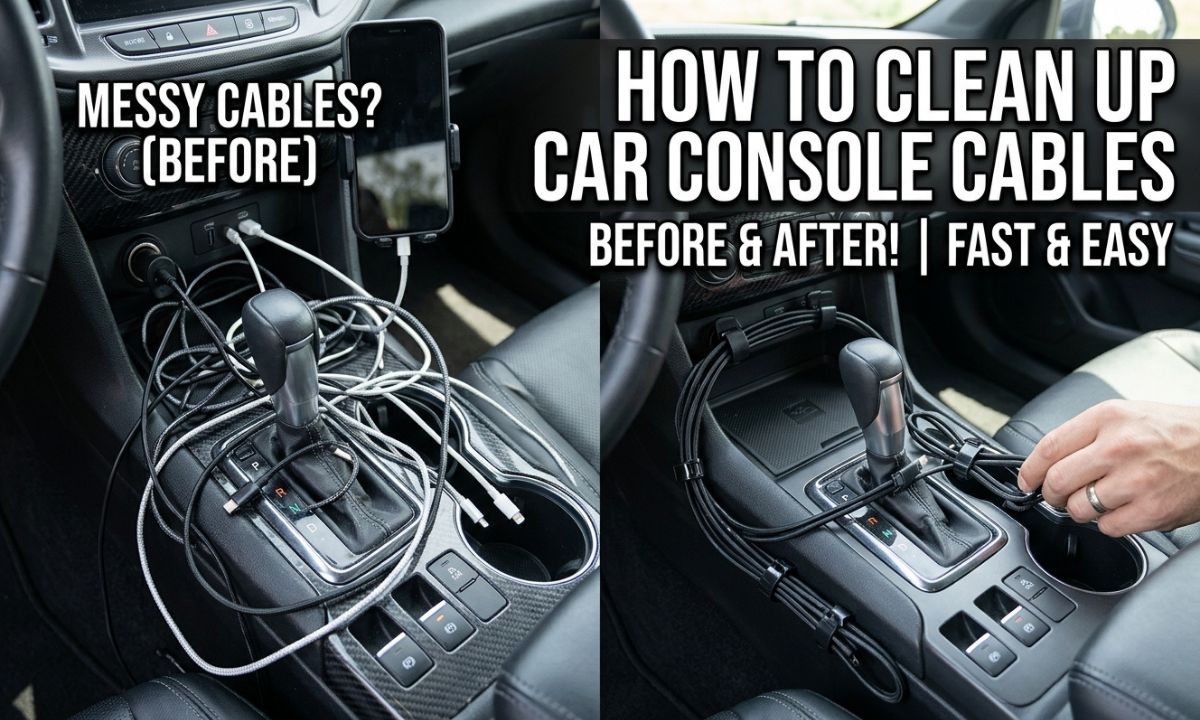
Remove loose items, unplug removable cables, wipe away dust, inspect each wire, bundle extra length, and secure the cables away from driving controls.
A messy car center console is a common problem for drivers across the United States. Between daily commutes, school runs, road trips, and long drives, charging cords, USB cables, audio wires, and adapters can quickly pile up around the gear shifter and storage area. A clean console makes your car look better and makes everyday tasks easier.
Learning how to clean up car console cables does not require special tools or expensive accessories. A few microfiber cloths, a soft brush, cable ties, and a suitable interior cleaner are often enough. The key is to separate cleaning from cable organization. First remove dirt and inspect the wires. Then arrange them so they stay in place without blocking controls or getting pinched.
Car console cables become messy because drivers often add new accessories without removing old ones. A phone charger, USB adapter, dash camera cable, and audio cord may all compete for space. When several wires share one small area, they can overlap, twist, and collect dust.
The center console also gets frequent use. Drivers place phones, keys, receipts, coins, and other small items there. These objects can push cables into narrow gaps or pull connectors out of their proper positions.
Long cables are another common cause. A cord that is much longer than needed creates extra loops around the cup holders or storage compartment. Those loops can catch on objects and make the area harder to clean.
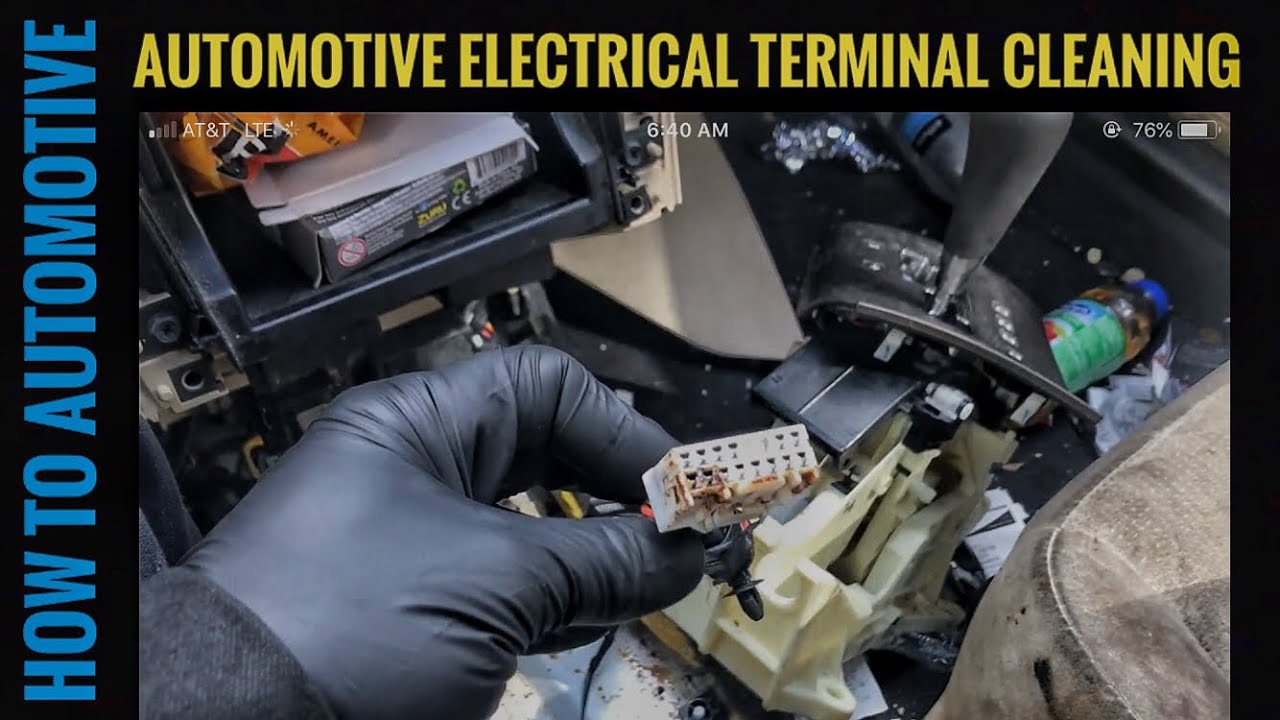
A simple cleaning and organization routine solves most of these problems. However, electrical wiring behind the dashboard needs a different approach from removable phone chargers. Never pull apart factory wiring just to make the console look tidy.
Source: i.ytimg.com
Too many accessories
Multiple chargers, adapters, and audio cords can crowd the available space and create overlapping wires.
Excess cable length
Long charging cords leave loose loops that collect dust and get caught under objects.
Poor storage habits
Dropping cables into the console without wrapping or securing them makes tangles more likely.
Dust and spilled debris
Crumbs, dirt, and small objects can settle around cable openings and make routine cleaning harder.
Why Cable Clutter Can Become a Driving Problem
Loose wires are not only an appearance problem. A cable can fall near the gear selector, become trapped under a moving seat, or hang near the driver’s feet. These situations can interfere with normal vehicle operation.
A tangled cord can also put pressure on a phone charging port. Repeated pulling and bending may damage the cable or connector. Keeping the wire supported and leaving enough slack helps reduce unnecessary strain.
Reduced access
Tangled cables can make it harder to reach storage spaces, cup holders, and console controls.
Connector wear
Repeated pulling can loosen or damage the ends of charging and audio cables.
Potential interference
A poorly routed cable can become caught near pedals, seat tracks, or other moving parts.
What You Need Before Cleaning Car Console Cables
Gather your cleaning supplies before starting. You do not need a large detailing kit. Basic household items and a few cable management accessories can handle most removable console cables.
Choose soft cleaning tools that will not scratch the console or damage the cable covering. Avoid rough brushes, sharp tools, and soaking wet cloths. Small amounts of moisture are enough for most interior cleaning tasks.
Check your vehicle owner’s manual before cleaning unusual surfaces or working near electrical equipment. Some vehicles have wireless charging pads, built-in USB hubs, and sensitive electronic controls inside the console.
Source: s.alicdn.com
Microfiber cloths
Use clean, soft microfiber cloths to remove dust and wipe the outside of removable cables.
Soft detailing brush
A small soft-bristle brush helps loosen crumbs and dirt around narrow console gaps.
Vacuum with a crevice attachment
A vacuum can collect loose dust and crumbs from accessible areas without pushing dirt deeper into the console.
Automotive interior cleaner
Choose a product approved for the specific plastic, vinyl, or other material in your console.
Cable ties or hook-and-loop straps
These accessories hold extra cable length together and make future adjustments easier.
Cable clips
Small cable clips guide charging wires along suitable surfaces and help prevent them from falling.
Small storage organizer
A divided console tray can keep adapters and spare cables separate from everyday items.
Choose the Right Cable Management Accessories
Cable clips work well when you want to guide a charging wire along the side of a console. Choose a size that holds the cable without squeezing its outer covering. Check that the adhesive is suitable for automotive interior temperatures and the surface where you plan to attach it.
Reusable hook-and-loop straps are useful for bundling extra cable length. They are easier to adjust than permanent zip ties. A small cable sleeve can also group several removable accessory wires together, provided it does not hide damaged sections or make inspection difficult.
Do not assume that every adhesive clip or organizer is suitable for every dashboard. Test the placement and check the vehicle’s material guidance before attaching anything.
For one charging cable
Use one or two small clips to guide the wire toward the phone storage or mounting area.
For several removable cables
Use reusable straps to keep the wires together while leaving each connector accessible.
For spare accessories
Use a small divided storage tray to prevent adapters and unused cords from mixing.
How To Clean Up Car Console Cables Step by Step
The easiest way to clean up console cables is to work in a clear order. Remove loose accessories first, clean the exposed surfaces, inspect the wires, and then organize everything before reconnecting the devices.
Park on a level surface in a safe place. Turn off the vehicle and follow the owner’s manual before disconnecting accessories. If a device requires a special shutdown or removal procedure, follow its instructions.
Keep factory wiring and unfamiliar electrical connectors in place. The steps below are intended mainly for removable charging cords, USB cables, and other accessible accessories.
Source: i.ytimg.com
Step 1: Empty the center console
Remove phones, loose adapters, receipts, coins, and other items. Place small accessories in a safe container so they do not get lost.
Step 2: Unplug removable cables
Disconnect ordinary charging and audio cables according to the device instructions. Hold the connector rather than pulling on the wire.
Step 3: Sort the cables
Separate cables by purpose. Group phone chargers, audio cables, and accessory cords. Set aside damaged or unnecessary cables.
Step 4: Remove loose dust
Use a soft brush or vacuum crevice attachment to collect dust and crumbs from accessible console spaces.
Step 5: Wipe the cables
Wipe the outside of each unplugged cable with a dry microfiber cloth. If necessary, use a barely damp cloth on the cable exterior and dry it immediately.
Step 6: Clean the console
Apply an approved interior cleaner to a microfiber cloth, not directly to the console. Wipe the accessible surfaces carefully and keep liquid away from electrical openings.
Step 7: Allow everything to dry
Make sure the console and cable surfaces are dry before reconnecting accessories. Do not plug in a wet connector.
Step 8: Bundle extra cable length
Use reusable straps to secure excess wire. Leave enough length for normal movement and comfortable device use.
Step 9: Secure the cables
Use suitable clips to guide wires along safe paths. Keep them away from controls, moving parts, and sharp edges.
Step 10: Reconnect and inspect
Reconnect the accessories according to their instructions. Check that every cable is secure and that the console opens and closes normally.
How to Remove Dust From Tight Console Gaps
Dust often collects where the center console meets the dashboard. Small crumbs may also fall around USB ports, cup holders, and storage compartment edges. A soft detailing brush can loosen this dirt without requiring you to remove trim panels.
Use a vacuum with a narrow attachment to collect loosened debris. Keep the nozzle from pressing against buttons, connectors, or exposed wiring. Work slowly so you do not pull on a cable or scratch a delicate surface.
Avoid using high-pressure compressed air around console openings. Strong airflow can push dirt farther inside switches and electrical spaces. It can also disturb small components that are not designed for forceful air.
Brush first
Gently loosen dust around accessible edges and seams.
Vacuum second
Collect the loosened debris instead of blowing it deeper into the console.
Wipe last
Finish with a clean microfiber cloth after the loose dirt has been removed.
How to Clean Sticky Charging Cables
A charging cable may feel sticky because of spilled drinks, hand oils, or residue from a storage compartment. First disconnect the cable from both the vehicle and the device. Check its manufacturer’s cleaning instructions before using any liquid.
For a compatible cable, wipe the outside gently with a slightly damp microfiber cloth. Do not soak the cable or allow moisture to enter the connector. Dry it completely before using it again.
If the outer covering has become soft, swollen, cracked, or damaged, replace the cable. Cleaning cannot restore damaged insulation.
Use gentle pressure
Avoid aggressive scrubbing that may wear away the cable’s outer covering.
Avoid harsh chemicals
Do not use bleach, strong degreasers, or solvents unless the cable manufacturer specifically approves them.
Check the connector
Look for corrosion, bent contacts, or debris. Do not insert metal objects into the connector.
How to Organize Car Console Cables After Cleaning
Once the cables and console are clean and dry, arrange the wires based on how often you use them. Keep your main phone charging cable easy to reach. Store spare cords and less frequently used adapters in a separate compartment.
The best setup uses the shortest practical cable and the fewest necessary accessories. You do not need to hide every wire. A short, well-secured cable is often easier to use and maintain than a complicated arrangement behind the console.
Before attaching clips, plan the cable route. Check that the wire can reach the intended device without stretching. Also check that it does not cross a moving part or interfere with normal access to vehicle controls.
Source: amazingcarsanddrives.com
Keep frequently used cables accessible
Place the main charging cord near its intended charging position without leaving it loose across the console.
Store spare cables separately
Keep backup cords in a small organizer rather than leaving them connected all the time.
Use reusable straps
Secure excess cable length in loose loops that do not put pressure on the wire.
Avoid overcrowding
Remove old adapters and unused cables that no longer serve a purpose.
Use Cable Clips to Control Loose Wires
Cable clips can keep charging cords from sliding into the gap beside the console. Place them on a suitable, clean surface where they can guide the wire without affecting buttons, lids, or controls.
Clean the mounting surface according to the clip manufacturer’s instructions. Allow it to dry before attaching the clip. Press the clip into place as directed and allow any required adhesive setting time before routing the cable.
Do not attach clips to steering controls, airbag covers, seatbelt parts, or surfaces that must move. Never force a cable behind a trim panel simply to hide it. If the route requires removing dashboard panels, consult the vehicle service information or a qualified technician.
Choose the right size
The clip should hold the cable without squeezing or bending it sharply.
Check the adhesive
Use a product approved for the surface and the temperature conditions inside a vehicle.
Test the route
Make sure the cable stays in place when the console lid opens and closes.
Bundle Extra Cable Length Without Damaging It
Extra cable length is one of the main reasons a center console looks untidy. Instead of stuffing the cord into a small opening, make a loose loop and secure it with a reusable strap.
Avoid tight knots and sharp folds. They can stress the internal conductors, especially near the connector ends. Keep the loop large enough that the cable retains its natural shape.
Leave a little movement near the device connection. A cable should not pull on the phone or charging port when the device is moved within its normal storage area.
Make loose loops
Keep the cable in broad curves instead of tight circles or knots.
Secure the center
Place a reusable strap around the bundled section without squeezing it.
Protect the connector ends
Avoid bending the wire sharply where it meets the plug.
Use a Console Organizer for Spare Cables
A console organizer is helpful when you carry several charging cords or small adapters. Divided sections keep each item in its own space and make it easier to find the correct cable.
Choose an organizer that fits the available compartment. It should not prevent the console lid from closing or block access to important vehicle equipment. A removable tray is useful because you can lift it out and clean underneath.
Keep the number of stored cables low. A spare charging cord may be useful during a road trip, but several old or damaged cords only create more clutter.
Top compartment
Keep the charging cable and commonly used adapter here.
Separate storage section
Place spare cords and less frequently used accessories in a divided area.
Remove unnecessary items
Discard or recycle cables that are damaged or no longer compatible with your devices.
Important Safety Tips When Cleaning Car Console Cables
Cleaning removable console cables is usually a simple task, but working around vehicle electronics requires care. A car console may contain USB ports, power outlets, electronic switches, wiring harnesses, and other sensitive parts.
Do not treat every wire as a phone charger. Some cables are part of the vehicle’s factory electrical system. Others may connect to an aftermarket stereo, dash camera, or tracking device. If you cannot identify a wire, leave it connected and ask a qualified technician for help.
Never use water or cleaning spray directly on electrical connectors. Keep liquids away from USB ports, power sockets, switches, and openings. If liquid enters an electrical connection, stop using the affected accessory and seek appropriate inspection before reconnecting it.
Source: i.ytimg.com
Turn off the vehicle
Follow the owner’s manual before disconnecting accessories or cleaning near electrical components.
Keep liquids away
Apply suitable cleaner to a cloth instead of spraying it into the console.
Do not pull factory wiring
Avoid removing connectors or dashboard panels unless you have the correct service instructions and skills.
Keep cables away from pedals
Never allow wires to hang into the driver’s footwell.
Check moving parts
Make sure cables cannot become trapped by seat rails, sliding compartments, or console lids.
Replace damaged cables
Do not continue using cords with exposed conductors, melted insulation, or damaged plugs.
Can You Use Rubbing Alcohol on Car Console Cables?
Rubbing alcohol is not the best default cleaner for every car cable. Some cable coverings and console finishes may react poorly to alcohol or other solvents. Always check the cable manufacturer’s cleaning instructions.
For ordinary dust, a dry microfiber cloth is usually enough. For sticky dirt, use a compatible cleaning method with very little moisture. Keep liquid away from the connector and allow the cable to dry fully.
Never pour alcohol into a USB port or vehicle power socket. Do not use household cleaning mixtures inside electrical openings. If a connector is dirty internally or shows corrosion, have it inspected rather than trying to clean it with improvised tools.
Best starting option
Use a clean, dry microfiber cloth for ordinary dust and loose dirt.
For stubborn residue
Follow the cable maker’s approved cleaning instructions and use a compatible method.
For electrical ports
Avoid liquid cleaners and metal tools. Seek professional inspection if contamination is inside the connection.
When Should You Call a Professional?
A professional inspection is the better choice when a cable disappears behind the dashboard, appears connected to factory wiring, or has an unknown purpose. Modern vehicles may have complex electrical systems, and removing the wrong connector can cause faults.
Stop using an accessory if you notice a burning smell, unusual heat, melted plastic, repeated electrical failures, or visible exposed wires. Do not cover these signs with a cable sleeve or adhesive tape.
A qualified automotive technician can identify the circuit, inspect damaged wiring, and determine whether a repair or replacement is needed.
Unknown wiring
Ask a technician to identify wires that disappear behind dashboard panels.
Electrical warning signs
Stop using the affected equipment if it becomes unusually hot or smells like burning.
Repeated connection problems
Have damaged ports, loose factory connectors, or recurring electrical faults inspected.
Common Problems When Cleaning and Organizing Console Cables
Sometimes a console still looks messy after cleaning. The problem may be cable length, poor clip placement, damaged accessories, or an unsuitable storage setup. Finding the cause is better than adding more ties and organizers.
Check the cable route before buying accessories. A shorter compatible cable may solve the problem without extra clips. If a wire needs to cross an important control area to reach its destination, choose another charging position.
Source: s.alicdn.com
Problem: Cables keep falling down
Possible cause: The clips are too large, the adhesive is unsuitable, or the mounting surface was dirty. Clean the surface and use an appropriate cable holder.
Problem: The console lid will not close
Possible cause: Too much cable is stored inside. Reduce the number of cables and move spare accessories to another compartment.
Problem: Cables become tangled again
Possible cause: Loose loops and mixed accessories are stored together. Separate each cable and secure extra length with reusable straps.
Problem: The charging cable disconnects
Possible cause: The cord is stretched or the connector is worn. Check the cable and port, and replace damaged equipment.
Problem: Dust returns quickly
Possible cause: The console is used as general storage. Remove unnecessary items and wipe the area regularly.
Problem: Adhesive clips keep coming loose
Possible cause: The surface or adhesive is not suitable, or the vehicle interior is too hot for the product. Check the manufacturer’s temperature and surface requirements.
What to Do When a Cable Is Too Long
A long cable does not need to be replaced if it is in good condition and works correctly. First, measure the practical distance between the power source and the device. Then bundle the extra length in a loose loop.
If the cord is still difficult to manage, consider a shorter compatible replacement. Check the connector type, charging requirements, and device manufacturer’s recommendations before purchasing one.
Avoid cutting a charging cable or splicing its wires to reduce the length. This can damage insulation and electrical connections.
Measure the route
Choose a cable that reaches the device without excessive slack.
Bundle the excess
Use a reusable strap to keep extra length in a safe location.
Replace when practical
Choose a compatible shorter cable if the existing one remains difficult to store.
How to Fix a Cable That Gets Caught in the Console Lid
If a cable gets trapped when you close the console lid, stop forcing the lid shut. Open it and check where the cord is being pinched. Look for sharp edges or narrow gaps that may damage the cable covering.
Move the cable to an accessible route that does not cross the closing edge. If the console has a purpose-built cable opening, use it according to the vehicle instructions.
Check the wire after adjusting it. Replace the cable if the outer covering has been cut or crushed.
Find the pinch point
Identify the exact area where the lid presses against the wire.
Change the route
Move the cord away from the lid’s closing path.
Inspect the covering
Look for cuts, flattened sections, or exposed internal wires.
How to Keep Your Car Console Cables Clean and Organized
The easiest way to prevent another cable mess is to build a simple maintenance habit. You do not need to repeat the full cleaning process every week. A quick check and wipe can prevent dust, crumbs, and loose wires from building up.
After using a charging cable, return it to its designated place. Avoid dropping it into a cup holder or leaving it stretched across the passenger seat. If you regularly carry several devices, give each cable a clear storage position.
Check your arrangement whenever you clean the interior. Make sure clips remain secure and straps have not become too tight. Look for signs of wear, especially near cable connectors.
Source: s.alicdn.com
Remove unnecessary cords
Keep only the cables and adapters you regularly need in the console.
Wipe cables when needed
Remove dust and surface dirt with a clean microfiber cloth.
Check cable condition
Inspect connectors and outer coverings for signs of wear.
Keep storage simple
Use one designated space for spare accessories rather than several loose storage spots.
Review cable routing
Check that wires remain clear of moving parts and vehicle controls.
A Simple Monthly Cable Maintenance Routine
A short monthly inspection can help you catch small problems before they become harder to manage. Remove spare items, check the cable clips, and look for dust around the accessible console openings.
Inspect each charging cable from end to end. Pay attention to the areas near the connectors because these sections often experience repeated bending. Replace any cable that shows exposed wiring, cracks, or other damage.
Finish by checking the console lid, storage tray, and gear selector area. Everything should move normally without catching or pulling on a wire.
First
Remove loose items and unnecessary accessories.
Next
Wipe the console and inspect accessible cable surfaces.
Then
Check clips, straps, and cable connectors.
Finally
Confirm that every cable is secure and away from moving parts.
Which Cable Organization Method Is Best for Your Car?
The best cable management method depends on how many wires you use and how much space your console provides. A single phone charger needs very little equipment. A vehicle with several removable accessories may benefit from a small organizer and separate cable holders.
The following comparison explains the main options. Choose a method that keeps the cables accessible without placing pressure on the wires or interfering with vehicle equipment.
Source: i.ytimg.com
Cable clips
Best for guiding one or two frequently used charging cables along an approved console surface.
Hook-and-loop straps
Best for controlling extra cable length and keeping removable wires together.
Cable sleeves
Best for grouping several compatible accessory cables when they share a safe route.
Console organizer
Best for storing spare cords, charging adapters, and small accessories.
Shorter charging cable
Best for reducing excess length when a compatible shorter cable is available.
A Practical Setup for One Charging Cable
If you use only one phone charger, keep the setup simple. Choose a compatible cable with enough length to reach the phone’s intended location. Use a suitable clip to guide it and a small strap to secure any excess length.
This arrangement reduces clutter while keeping the cable easy to remove. You can also disconnect it and store it inside the console when it is not needed.
One compatible cable
Use a cord with suitable connectors and charging capability.
One cable holder
Guide the wire toward its normal charging position.
One reusable strap
Secure the extra length without tightly bending the cord.
A Practical Setup for Multiple Accessories
Drivers who use a phone charger, dash camera, and audio accessory need a little more planning. Start by separating removable accessory wires from factory wiring. Do not bundle unknown or permanently installed electrical harnesses together.
Use separate holders for frequently accessed cords. Store spare adapters in a divided tray and label removable cables if you often mix them up.
If the arrangement involves routing permanent wires behind dashboard panels, use the accessory maker’s installation instructions or have the work completed by a qualified installer.
Separate removable accessories
Keep charging and audio cords easy to identify.
Store spare items
Use a small compartment for adapters and backup cables.
Leave factory wiring alone
Do not alter permanent electrical harnesses for appearance alone.
Frequently Asked Questions
Q
How often should I clean my car console cables?
Check your console cables whenever you clean your car interior. For most drivers, a quick inspection during regular interior cleaning is enough. Remove visible dust, check the cable clips, and look for damage around the connectors.
If you frequently eat or drink in your vehicle, inspect the console more often. Clean spills promptly while keeping liquid away from electrical openings.
Q
Can I use a vacuum to clean car console cables?
Yes, a vacuum with a suitable soft attachment can remove loose dust and crumbs from accessible console areas. Keep the nozzle away from delicate connectors, buttons, and exposed wiring.
Do not use excessive suction on loose or fragile cables. A soft detailing brush is often a better choice for removing dirt directly from a removable cable.
Q
How do I hide charging cables in my car console?
Use a suitable cable clip to guide the charging wire along a safe console edge. Bundle extra length with a reusable hook-and-loop strap and store it in an accessible compartment.
Do not hide cables behind dashboard panels without checking the correct installation instructions. Keep every wire away from pedals, seat tracks, controls, and airbag areas.
Q
Is it safe to use cable ties inside a car?
Reusable hook-and-loop straps are generally a practical choice for organizing removable charging cables. They can hold extra wire length without requiring a permanent connection.
If you use ordinary cable ties, do not tighten them enough to crush the cable covering. Avoid using them to bundle unidentified factory wiring or electrical harnesses.
Q
Can I clean USB ports with a wet cloth?
No. Do not wipe inside a USB port with a wet cloth or spray cleaner into the opening. Moisture can cause electrical problems and may damage connected equipment.
For a visibly contaminated port, follow the vehicle manufacturer’s cleaning instructions. If debris is lodged inside or corrosion is present, have the port inspected by a qualified technician.
Q
Why do my car console cables keep getting tangled?
Cables usually become tangled when several cords are stored together without separate positions. Excess length, loose loops, and frequently moving accessories can make the problem worse.
Separate the cables by purpose, secure extra length with reusable straps, and use a small organizer for spare accessories. A shorter compatible charging cord may also reduce clutter.
Q
Should I replace a dirty charging cable?
Not necessarily. A cable with ordinary surface dust or removable dirt can often be cleaned with a dry microfiber cloth, provided its manufacturer allows that method.
Replace the cable if it has exposed wires, cracked insulation, melted areas, damaged connectors, or signs of overheating. Cleaning cannot make a physically damaged cable safe.
Q
Can I put car console cables under the carpet?
Do not simply push loose charging wires under the carpet. A cable may become trapped by seat tracks, interfere with floor coverings, or create an unsafe installation.
Permanent accessory wiring should follow the vehicle and accessory manufacturer’s approved routing instructions. Use a qualified installer if the cable must pass behind trim or through concealed areas.
✦ Wrapping Up
Conclusion
Cleaning and organizing car console cables is a simple way to make your vehicle interior look better and feel easier to use. Start by removing unnecessary accessories, unplugging removable cords safely, and wiping away dust with a microfiber cloth. Then inspect each cable and replace anything that shows signs of damage.
Once the console is clean, use cable clips, reusable straps, or a small organizer to keep everything in its proper place. Choose the shortest practical cable and avoid tight bends or crowded storage spaces. Most importantly, keep wires away from pedals, moving seats, gear controls, and sensitive electrical components.
A few minutes of routine care can prevent the same clutter from returning. You do not need an expensive cable management system. A simple setup with fewer wires and clear storage positions is often all your car needs.
💡 Key Takeaway
Start by emptying your center console and sorting every cable. Clean the removable cords and accessible surfaces, replace damaged wires, and secure the remaining cables with reusable straps or suitable clips. Before driving, check that nothing can interfere with your controls, pedals, seat movement, or console lid.