
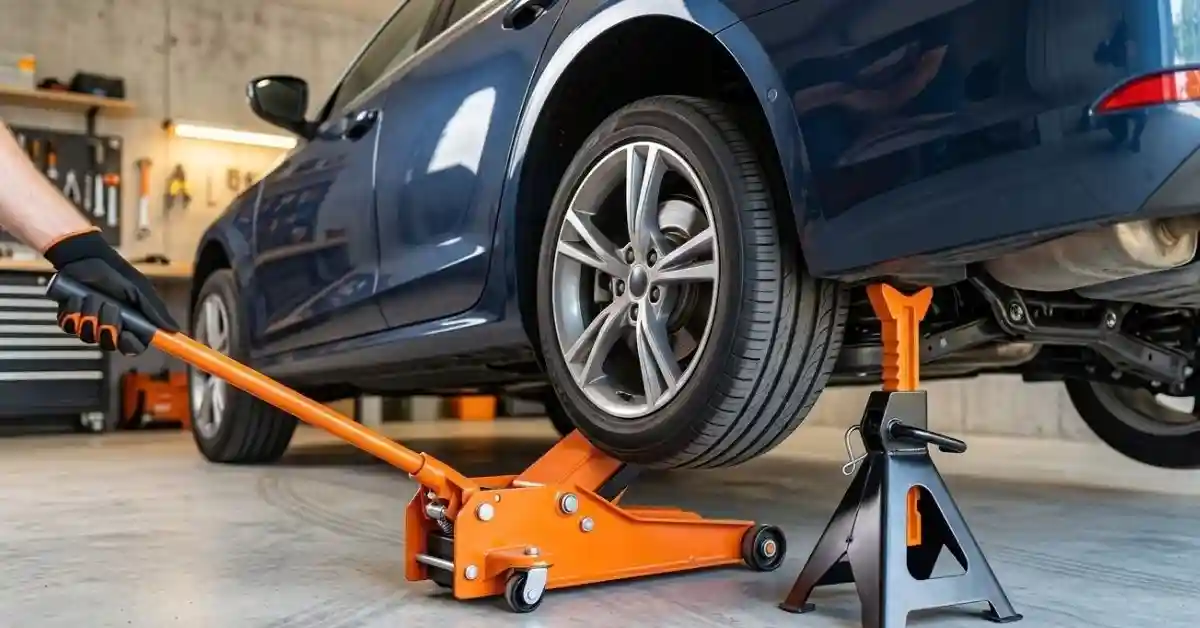
Learning how to jack up a car safely is one of those basic skills that can save time and money. It can also prevent a very bad day in the driveway. A car jack looks simple, but a small mistake in where you place it can damage the car or make the car unstable.
The biggest lesson I’ve learned from looking closely at this job is that lifting a car is not about getting it high fast. It is about keeping the car stable from start to finish. In this guide, I’ll walk through the safe setup, where the jack goes, when to use jack stands, and the mistakes I would avoid.
What You Need Before You Jack Up a Car
Before learning how to jack up a car safely, get the right tools ready. You do not want to stop halfway through a job because you need something that is still in the garage.
For a basic tire change, the factory jack may be enough if the owner’s manual says to use it that way. For work under the car, you need proper jack stands and a suitable floor jack.
| Tool | Main job |
| Car jack | Lifts the vehicle |
| Jack stands | Support the vehicle after lifting |
| Wheel chocks | Help stop the car from rolling |
| Lug wrench | Loosens and tightens wheel nuts |
A flashlight is also useful. So are gloves and safety glasses. NHTSA guidance for vehicle work stresses using a firm, level surface, setting the parking brake, and using wheel chocks.
Check the Owner’s Manual First
This is the step I would never skip.
Your owner’s manual should show the approved jacking points. Some cars have small marks or notches near the rocker panels. Others use points on the frame, subframe, or axle area.
Do not guess.
A jack placed under a plastic cover, thin body panel, fuel tank, exhaust part, or another weak point can cause damage. Manufacturer instructions also warn that using the wrong lifting point can make the vehicle fall.
| Check first | Why it matters |
| Jack points | Prevents body or chassis damage |
| Vehicle weight | Helps match the jack to the car |
| Manual instructions | Gives vehicle-specific lifting rules |
How to Jack Up a Car Safely Step by Step
Once the car is parked in the right place, the actual lifting process is quite simple. The trick is to move slowly and check the setup more than once.
1. Park on Firm, Level Ground
Find a hard, flat surface.
A clean concrete driveway or garage floor is ideal. Avoid soft soil, loose gravel, steep driveways, grass, or sloped ground when possible.
A soft surface can let the jack sink. A slope can let the vehicle move as you lift it.
| Surface | What I would do |
| Level concrete | Good choice |
| Firm asphalt | Usually suitable if level |
| Soft soil or grass | Avoid |
| Steep slope | Avoid |
AAA also recommends using a board under the jack if the ground is too soft, but a firm, level surface is still the better choice.
2. Turn Off the Engine and Secure the Car
Put an automatic transmission in Park. For a manual transmission, follow the vehicle manual for the proper gear position.
Set the parking brake.
Then use wheel chocks on the wheels that will stay on the ground.
The point is simple: you want to stop the car from rolling while one or more wheels are off the ground.
NHTSA-published service guidance specifically calls for the engine to be off, the parking brake set, and wheel chocks installed before lifting.
3. Loosen the Lug Nuts Before Lifting
If you are changing a wheel, loosen the lug nuts while the tire is still on the ground.
Do not remove them yet.
This is one of those small tricks that makes the whole job easier. The weight of the car helps keep the wheel from turning while you break the nuts loose. AAA gives the same advice for tire changes.
| Before lifting | Why |
| Loosen lug nuts | Wheel stays more stable |
| Leave nuts partly threaded | Prevents the wheel from coming off early |
| Use the correct wrench | Reduces damage and slipping |
If a lug nut will not move, do not start jumping on the wrench beside a raised car. Get the wheel back on the ground and use a safer method.
4. Find the Correct Jacking Point
Now look at the owner’s manual again.
Position the jack directly under the approved lifting point. Make sure the jack saddle or head sits squarely against the correct part of the vehicle.
This is where I would slow down.
It is tempting to think, “That metal part looks strong enough.” That is not a good test. A part can look strong and still be the wrong lifting point.
5. Raise the Car Slowly
Start lifting the car a little at a time.
Stop after the first few pumps or turns and check the jack again.
Look at the jack from the side. Make sure it has not moved. Check that the lifting point is still seated correctly.
If something looks wrong, lower the car and reset the jack.
Do not try to fix a badly positioned jack while the vehicle is high in the air.
| Warning sign | What to do |
| Jack starts leaning | Stop and lower the car |
| Jack moves sideways | Lower and reposition |
| Vehicle shifts oddly | Stop immediately |
| Jack contacts the wrong area | Lower and check the manual |
For a tire change, raise the vehicle only enough to get the tire clear of the ground. You do not need a huge gap.

Where Should You Put Jack Stands?
This is one of the most important parts of learning how to jack up a car safely.
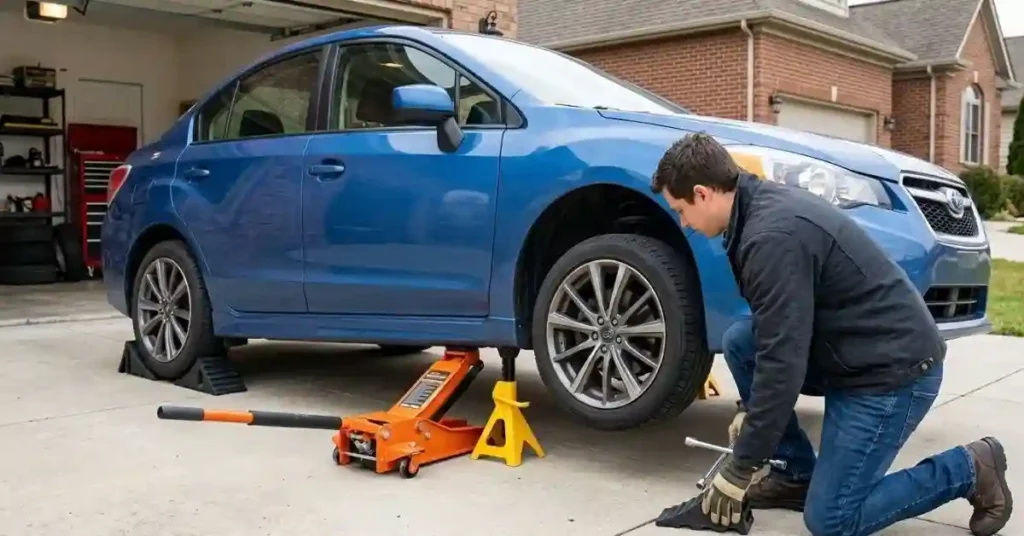
A jack lifts the vehicle. It should not be treated as your only support while you work underneath it.
If you need to get under the car, place properly rated jack stands at the manufacturer’s approved support points. NHTSA-published vehicle guidance warns not to work under a vehicle supported only by a jack because a jack can slip or fall.
Never Put a Jack Stand Anywhere That Looks Convenient
The correct location depends on the vehicle.
Some cars have reinforced pinch-weld points. Others use frame points or specific subframe areas.
Do not place a stand under a thin floor panel or another part that was not designed to carry the vehicle’s load.
| Good approach | Bad approach |
| Use the manual’s support point | Guess based on appearance |
| Use properly rated stands | Use random blocks |
| Keep the stand level | Balance it on an edge |
Once the stands are positioned, lower the car carefully onto them according to the vehicle and stand manufacturer’s instructions.
Do not assume that because the stand is touching the car, the setup is automatically safe.
Jack vs. Jack Stands: What Is the Difference?
The difference sounds basic, but it is easy to forget when you are in a hurry.
A jack is mainly for lifting. Jack stands are designed to support a raised vehicle.
| Equipment | Purpose |
| Jack | Raise the vehicle |
| Jack stand | Support the vehicle |
| Wheel chock | Help prevent rolling |
For a quick tire change, follow the factory jack instructions. For repairs that require your body under the car, use proper support equipment and follow the vehicle manual.
A factory emergency jack is not automatically a good choice for garage repair work. Some manufacturer instructions state that the supplied jack is intended for tire changes only.
Common Mistakes I Would Avoid
Most problems do not come from the act of turning a jack handle. They come from rushing the setup.
Here are the mistakes that stand out to me when breaking down this process.
| Mistake | Better approach |
| Jacking on a slope | Find level ground |
| Skipping wheel chocks | Chock the wheels |
| Guessing the jack point | Check the manual |
| Working under a jack | Use jack stands |
| Lifting too high | Lift only as needed |
Mistake 1: Working on Soft Ground
This is easy to underestimate.
The jack may look stable at first. Then the base starts sinking as more weight transfers onto it.
If the surface is soft, stop and find a better location. A solid, level surface is much safer than trying to make a poor location work.
Mistake 2: Putting the Jack Under a Random Metal Part
Not all metal parts are lifting points.
A body panel can bend. A suspension component may not be suitable for the lifting method you are using. Some vehicles have very specific points that must be used.
This is why I keep coming back to the manual. It removes the guesswork.
Mistake 3: Going Under the Car Too Soon
This is the mistake with the highest potential cost.
Never crawl under a vehicle simply because the jack has lifted it high enough.
If you need to work underneath, support the vehicle correctly first. NHTSA-published instructions are very clear that a vehicle should not be entered or worked under while supported only by a jack.
How High Should You Jack Up a Car?
The answer depends on the job.
For a tire change, you normally need enough height for the tire to clear the ground and for the replacement wheel to fit. You do not need to lift the entire car several feet.
For repair work, use the minimum height needed for the job and follow the vehicle manufacturer’s lifting instructions.
| Job | General goal |
| Tire change | Tire clears the ground |
| Brake work | Enough clearance for the repair |
| Under-car work | Use approved stands and required clearance |
| Inspection | Lift only as needed |
The less you lift, the less you change the vehicle’s center of gravity. That is one reason I prefer a low, controlled lift over trying to create a giant gap.
What If the Car Starts to Shift?
Stop.
Do not try to catch the car. Do not put your hands or feet under it. Do not try to push the vehicle back into place while it is raised.
If the setup becomes unstable, move away and lower the vehicle only when it can be done safely.
| Problem | Safe response |
| Jack slips | Stay clear and reassess |
| Car rolls | Do not approach a moving car |
| Stand shifts | Stop work and reset |
| Vehicle leans | Lower and inspect the setup |
This is also why keeping people out of the vehicle during jacking matters. Manufacturer instructions warn against having people or luggage in the vehicle while using the jack.
Extra Safety Checks Before You Work
Once the vehicle is supported, take a short pause.
Look at the entire setup instead of focusing only on the part you want to repair.
Check that the jack stands are seated correctly. Check that the vehicle is stable. Check that the jack and stands are on a suitable surface.
For an under-car job, I would also make sure I have enough room to move without bumping the vehicle.
| Final check | Question to ask |
| Vehicle position | Is it still level and stable? |
| Jack stands | Are they at approved points? |
| Wheels | Are the remaining wheels chocked? |
| Work area | Is there enough safe space? |
If anything feels questionable, stop.
A five-minute delay is much better than trying to save five minutes and creating a dangerous situation.
Can You Jack Up a Car Without Jack Stands?
Yes, for some tasks such as a tire change, a vehicle’s factory jack may be designed for that specific purpose.
But that does not mean you should use the jack alone for work underneath the car.
This distinction matters.
| Task | Jack alone? |
| Manufacturer-approved tire change | Follow the manual |
| Looking at a tire | Usually no need to go under |
| Brake repair | Use proper support |
| Oil or under-car repair | Do not rely on a jack alone |
The exact procedure depends on the vehicle. Some manuals give very specific limits for the factory jack, so the manual should always win over general advice.
A Simple Jacking Routine That Works
After going through the process several times, the safest routine is also the easiest to remember:
Park. Brake. Chock. Check. Position. Lift. Support. Check again.
That little sequence helps prevent the most common errors.
I also like the idea of doing a deliberate pause after the first small lift. It is much easier to spot a bad jack position when the tire is still close to the ground.
My Quick Safety Checklist
| Step | Done? |
| Read the manual | ☐ |
| Park on firm, level ground | ☐ |
| Turn engine off | ☐ |
| Set parking brake | ☐ |
| Chock the wheels | ☐ |
| Loosen lug nuts if needed | ☐ |
| Find approved jack point | ☐ |
| Position jack correctly | ☐ |
| Lift slowly | ☐ |
| Use jack stands for under-car work | ☐ |
If you cannot confidently complete the setup, the safest move is to stop and get help from a qualified mechanic.
Final Thoughts on How to Jack Up a Car Safely
The biggest lesson from how to jack up a car safely is that the jack itself is only one part of the job. The surface, jack point, wheel chocks, lifting height, and support method all matter. Most importantly, never treat a jack as your only support when working underneath a vehicle.
I would rather spend a few extra minutes checking the manual and setup than rush the job. Keep the car low, lift it slowly, use the correct points, and use proper jack stands whenever the job requires you to get underneath. That simple habit makes basic car work much less stressful.
FAQs: How to Jack Up a Car Safely
1. Where is the safest place to jack up a car?
Use the jack point listed in your car’s manual. Park on firm, level ground first. The right jack point helps prevent damage and keeps the car stable while you lift it.
2. Can I jack up a car on a slope?
It is best not to. Use firm, level ground when you jack up a car. A slope can let the car roll or make the jack less stable during the lift.
3. Do I need jack stands when lifting a car?
Yes, if you need to work under the car. A jack can lift the car, but jack stands are made to support it while you work beneath it.
4. Should I use wheel chocks when using a car jack?
Yes. Place wheel chocks on wheels that stay on the ground. They help stop the car from rolling while you lift one end with the jack.
5. How high should I jack up a car?
Lift the car only as high as needed for the task. For a tire change, the tire only needs to clear the ground. Avoid lifting it higher than needed.
To Get More About Home, Car Accessories Product You Can Visit Our Site. If You Found our Posts Helpful Leave a Comment Below