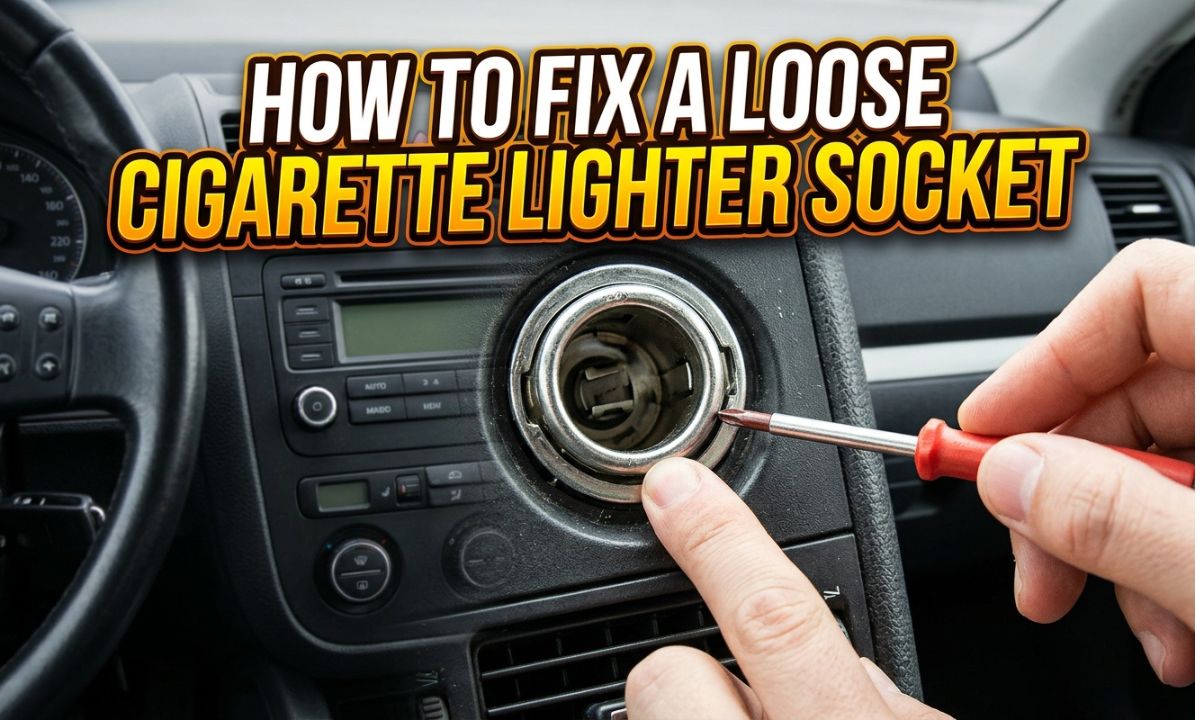
Fix a loose cigarette lighter socket by checking its mounting clips, retaining ring, and internal contacts. Replace damaged parts when needed.
If your phone charger keeps falling out of the 12V outlet in your Ford, Chevrolet, Toyota, Honda, or another American-market vehicle, the socket may need attention. You might notice that your charger stops working when you hit a bump, or the whole outlet moves when you plug something in. This can make daily drives, road trips, and long commutes frustrating.
The good news is that some loose socket problems have simple causes. A loose mounting ring, broken retaining clips, worn metal contacts, or an ill-fitting charger can all cause trouble. The right repair depends on which part is loose. Start with a safe inspection before buying a replacement or taking apart your dashboard.
This guide explains how to find the cause, tighten a loose socket, clean its contacts, and replace a damaged outlet. It also covers important electrical safety steps. Car designs differ, so always check your owner’s manual or vehicle service information before removing parts or working near dashboard wiring.
A cigarette lighter socket can become loose because its mounting clips wear out, its retaining ring breaks, or its internal metal contacts lose their grip. Years of plugging in chargers and other accessories can also cause wear. Rough roads and repeated movement may make an already weak connection worse.
First, understand that a loose socket and a loose charger plug are not the same problem. The socket may move inside the dashboard, or the charger may wiggle inside a socket that stays firmly in place. Each problem needs a different repair.
Most modern vehicles have a 12V accessory outlet in the center console, dashboard, armrest, or cargo area. Older vehicles may have a cigarette lighter designed to heat a removable lighter element. Although these parts look similar, their internal designs and repair methods can differ.
A useful example is a charger that falls out whenever you drive over a pothole. If the entire round outlet moves with it, inspect the mounting system. If the outlet stays still but the charger moves, inspect the internal contacts and charger fit.
Source: drivinglife.net
Broken mounting clips
Small plastic tabs hold some sockets inside the dashboard or console. A broken tab can allow the whole outlet to move.
Loose retaining ring
Some outlets use a separate ring or retainer to hold the socket in place. A loose or cracked ring can cause movement.
Worn internal contacts
Metal side contacts may lose their spring force after repeated use. The charger then fails to stay firmly connected.
Poor charger fit
Some accessory plugs are too narrow, too short, or poorly shaped for a particular socket.
Damaged socket housing
Heat, age, or force can damage the socket body and make it difficult to hold the outlet securely.
How to Tell Which Part Is Loose
Look at the outlet while gently checking its outer edge with your fingers. Do not insert a metal tool or touch the electrical contacts. If the entire outlet shifts inside the dashboard, the mounting hardware is likely the problem.
If the socket stays firmly in place but the charger moves inside it, the internal contacts or charger dimensions may be the cause. Try a known-good charger that fits the same type of outlet. If both plugs move in the same way, the socket may be worn.
The entire outlet moves
Inspect the retaining ring, mounting clips, and socket housing.
Only the charger moves
Check the charger’s size and inspect the socket’s internal contact springs.
The charger loses power over bumps
Look for an intermittent electrical connection, worn contacts, or a loose wiring connector.
Tools and Supplies You Need Before Starting
Gather the right tools before you begin. You may only need a flashlight and a replacement retaining ring for a simple mounting problem. A full socket replacement may require trim tools and a vehicle-specific removal tool.
Keep the repair simple. Do not use random metal objects to pry the socket out or bend its contacts. The outlet connects to an electrical circuit, and careless handling can cause a short circuit or damage nearby parts.
Your vehicle’s service manual is especially useful here. It can show where the socket clips are located, how the trim comes off, and whether the manufacturer requires a special removal tool.
Source: i.ytimg.com
Plastic trim removal tools
These help remove suitable dashboard or console panels without scratching or cracking the trim.
Screwdrivers
Use the correct type and size for any screws that secure the console or socket assembly.
Flashlight
A flashlight helps you inspect the socket, retaining clips, and mounting area.
Vehicle-specific socket removal tool
Some outlets have small release slots that need a special tool to remove the socket without damaging its housing.
Replacement retaining ring or clips
Use parts that match the original socket and mounting system.
Electrical contact cleaner
A suitable automotive electrical contact cleaner can remove light dirt and residue when used according to its instructions.
Digital multimeter
This can help check voltage and electrical continuity if you know how to use it safely.
Safety Items to Prepare
Park on a level surface, switch off the ignition, remove the key or turn off the vehicle, and keep the parking brake engaged. Let the outlet cool if it has been used to power a heated lighter. Remove any charger or accessory before inspecting it.
Follow the vehicle’s service instructions for disconnecting the battery or removing the correct outlet fuse. Some vehicles need special procedures after battery disconnection. These may affect radio settings, window controls, security systems, or other electronic features.
If the repair requires working near yellow or orange airbag wiring, dashboard airbag modules, or unfamiliar safety-system connectors, stop and use a qualified technician. Never probe an airbag circuit with a regular multimeter.
Do not work on a live socket
Isolate the circuit before cleaning, removing, or adjusting electrical parts.
Avoid metal objects inside the outlet
Coins, screwdrivers, and other conductive objects can bridge electrical contacts.
Check the service instructions
Battery disconnection and trim removal procedures vary by vehicle.
How to Fix a Loose Cigarette Lighter Socket Step by Step
The best repair starts with finding the exact point of movement. Do not try to tighten the outlet by pushing it harder into the dashboard. You could break the mounting tabs or damage the wiring behind it.
The steps below cover a common socket design. Your vehicle may use a different locking ring, clip system, or removal method. Follow its service manual if the instructions differ.
Source: autotoride.com
Step 1: Turn Off the Vehicle and Isolate the Circuit
Switch off the ignition and remove the key. If your vehicle uses a push-button start, follow the owner’s manual to place it in the correct off state. Remove all chargers and accessories from the outlet.
Locate the correct fuse by checking the fuse-box diagram or owner’s manual. It may have a label such as CIG, CIGAR, POWER OUTLET, or AUX POWER. Remove the correct fuse only if the vehicle’s instructions permit this method of isolation.
For socket removal or electrical work, disconnect the negative battery terminal when required by the service procedure. Follow the manufacturer’s waiting period and battery-disconnection instructions. Do not assume that pulling a fuse alone makes every nearby connector safe.
Important check
Confirm that the outlet has no power using the vehicle-approved method before touching its electrical connections.
Step 2: Inspect the Socket and Its Mounting
Use a flashlight to examine the outlet from the front. Look for a cracked outer ring, damaged plastic, visible corrosion, dark burn marks, or a socket that sits unevenly in the panel.
Gently check the outer housing for movement. Do not pull hard or use pliers. If the socket moves forward and backward, its retaining clips or mounting ring may be damaged.
Check whether the surrounding console trim is also loose. Sometimes the outlet appears to be the problem when the real cause is a damaged console panel or mounting bracket.
Look for broken tabs
Check for missing, cracked, or flattened retaining clips where the socket meets its holder.
Check the outer ring
Look for a loose locking ring or a gap between the socket and the dashboard.
Look for heat damage
Burn marks, melted plastic, or a burnt smell mean you should stop using the outlet.
Step 3: Remove the Socket if the Mounting Is Damaged
If the outlet needs removal, first gain access according to the vehicle’s service manual. Some sockets pull out from the front with a special removal tool. Others require removing a console panel or releasing a rear mounting ring.
Use the correct tool to release the retaining tabs. Pull the socket straight out only after the clips have been released. Forcing it can crack the holder or damage the trim.
Once you can reach the rear of the socket, inspect the electrical connector. Check for a loose plug, damaged locking tab, melted insulation, or a wire that has pulled away from its terminal. Do not tug on the wires.
Use the correct removal method
A socket removal tool may be required for models with internal release slots.
Protect the wiring
Release the connector by its locking tab instead of pulling on the wires.
Keep the parts organized
Set aside screws, clips, rings, and trim pieces so they can be reinstalled correctly.
Step 4: Tighten or Replace the Retaining Ring
If the socket body is in good condition but its retaining ring has come loose, check whether the ring can be reseated. Some designs use a threaded ring, while others use locking tabs or a snap-fit holder.
For a threaded design, align the ring correctly and tighten it according to the manufacturer’s instructions. Do not overtighten it. Too much force can crack plastic parts or damage the socket housing.
If the retaining ring is cracked, warped, or missing, replace it with the correct part. A damaged ring will not hold the outlet securely, even if you push it back into position.
Reseat a sound retainer
Use this option only when the original part is undamaged and designed to be reused.
Replace a broken ring
A matching replacement provides a more dependable hold than glue or improvised fasteners.
Check the alignment
Make sure the socket sits straight and its locking features engage fully.
Step 5: Replace Broken Mounting Clips
If the mounting clips are broken, a replacement clip or socket holder may solve the problem. Some outlets have clips built into the socket body, which means the entire socket assembly must be replaced.
Compare the old and new parts before installation. Check their diameter, depth, locking tabs, and connector design. A part that looks similar from the front may not fit the original mounting bracket.
Install the replacement using the correct locking method. Press it into place only when its tabs line up with the mounting slots. You should feel or see the retaining features engage without excessive force.
Match the original design
Choose the correct holder or socket for your exact vehicle and outlet location.
Avoid household glue
Glue can fail under heat and vibration and may make future repairs harder.
Check the final fit
The socket should sit evenly and should not move during normal plug insertion.
Step 6: Reconnect and Test the Outlet
Once the socket is secure, reconnect its electrical plug according to the service instructions. Make sure the connector locks into place and that no wire is trapped behind the console.
Restore the circuit using the correct fuse and battery procedure. Turn the ignition to the position required for your vehicle’s outlet. Some 12V outlets work only in ACC or RUN, while others may stay powered when the vehicle is off.
Test the outlet with a known-good charger or suitable accessory. The plug should fit securely, remain connected during gentle normal handling, and work without sudden power interruptions.
If the outlet moves again, loses power, becomes hot, or produces a burning smell, stop using it. The repair may not have addressed the real fault.
Check the socket position
The outer housing should sit straight and remain firmly mounted.
Check electrical operation
A suitable accessory should receive steady power under normal use.
Check for excess heat
Stop the test if the plug or socket becomes unusually hot.
How to Fix a Charger Plug That Feels Loose Inside the Socket
If the socket itself stays firmly mounted but your charger wiggles or falls out, focus on the internal contacts. Most traditional 12V accessory plugs use a center tip for positive power and side contacts for the ground connection.
These contacts help hold the plug in place while maintaining an electrical connection. If they become worn, bent, corroded, or damaged, the plug may lose contact when the vehicle moves.
A charger that is too small or has an unusual shape can cause similar symptoms. Before replacing the socket, compare the fit with another accessory that is known to work correctly.
Source: i.ytimg.com
Inspect the Internal Metal Contacts
With the circuit safely isolated, use a flashlight to inspect the inside of the socket. Look for dirt, corrosion, damaged side springs, and a center contact that appears pushed down or distorted.
Do not bend the contacts with a screwdriver while the outlet is connected to power. Some older lighter sockets have adjustable retaining tabs, but their shape and adjustment procedure are vehicle-specific.
An Audi technical service bulletin documents a problem in which certain accessory adapters damaged lighter socket retaining tabs. It also warns that removing an adapter at an angle can damage those tabs. That repair procedure applies to the covered Audi socket design, not every 12V outlet.
Light dirt
Use a suitable electrical contact cleaner and a soft cleaning tool after isolating the circuit.
Bent or worn contacts
Replace the socket when the contacts cannot maintain a secure connection.
Burned contacts
Do not keep using a socket with darkened, melted, or heat-damaged metal parts.
Clean the Socket Carefully
Light dirt or residue may interfere with a charger connection. Use an automotive electrical contact cleaner that is suitable for the socket materials and follow its label instructions.
Apply the cleaner only after the electrical circuit has been isolated. Do not flood the dashboard area or spray near other electrical connectors. Allow the socket to dry fully before restoring power.
Avoid household cleaners, water, oil, and abrasive materials. These can leave residue or damage the metal contacts and surrounding plastic.
Use a suitable cleaner
Choose a product intended for electrical contacts and compatible with the socket materials.
Avoid metal scraping
Do not use a knife, screwdriver, or other sharp conductive object inside the outlet.
Allow complete drying
Restore power only after the cleaner has evaporated as directed by its manufacturer.
Replace the Socket if Its Contacts Are Worn
Cleaning cannot restore metal springs that have lost their shape or tension. If several known-good chargers feel loose, the socket contacts may be worn beyond repair.
In this situation, replacing the socket is usually more dependable than trying to bend the contacts back into shape. A new outlet should match the original mounting style and electrical connection.
After installation, test it with a suitable charger. Do not force a plug into the outlet or use an accessory with an oversized metal head.
Replace worn contacts
Choose a complete compatible socket when the original internal parts are damaged.
Check accessory compatibility
Make sure the charger is designed for the type of 12V outlet in your vehicle.
How to Replace a Cigarette Lighter Socket
Replace the complete socket when its housing, internal contacts, or built-in mounting clips are damaged. This is often a better repair than trying to reuse parts that can no longer hold the outlet securely.
Replacement procedures vary by vehicle. Some models allow access from the front, while others require removal of a console panel. A few designs need a special tool to release internal locking tabs.
Before purchasing a new outlet, compare the original part with the replacement. Check its outside diameter, depth, connector shape, mounting system, and electrical rating. A universal socket is not automatically suitable for every car.
Source: foxed.ca
Step 1: Find the Correct Replacement
Use your vehicle identification details and the original part number to find a compatible replacement. Check whether your car uses a cigarette lighter receptacle or an accessory-only 12V power outlet.
These parts may look alike but can have different internal contacts and mounting features. A socket intended for a lighter heating element may not be suitable for every modern accessory-only outlet.
Check the electrical rating in your owner’s manual or service information. Do not choose a replacement with a lower rating or an incompatible connector.
Correct dimensions
The new socket must fit the original dashboard or console opening.
Matching connector
The wiring connector and terminal layout must match the vehicle.
Correct electrical rating
Follow the original vehicle specifications for voltage and current.
Step 2: Remove the Old Outlet
Follow the factory removal procedure after isolating the circuit. Remove the required trim panels with suitable plastic tools, then locate the socket’s locking mechanism.
Release the clips or retaining ring with the correct tool. Pull the socket out gently and disconnect its electrical connector by releasing the locking tab.
Inspect the surrounding holder and wiring before installing the replacement. If the plastic mounting bracket is cracked, replacing only the socket may not solve the loose-fit problem.
Avoid forcing the socket
Use the correct release points to prevent damage to the surrounding console.
Inspect the connector
Look for loose terminals, damaged locks, corrosion, and signs of overheating.
Step 3: Install the New Socket
Connect the replacement socket using the correct wiring connector. Check that the plug is fully seated and its locking tab is engaged.
Align the socket with the holder and install the retaining ring or mounting clips as directed. Make sure all notches and tabs line up before pressing the parts together.
The outlet should sit evenly with the surrounding trim. Do not use extra force to make an incorrectly sized socket fit.
Secure the wiring
Keep wires away from sharp edges and moving console parts.
Engage the retaining tabs
Confirm that the socket locks into its holder correctly.
Reinstall the trim
Replace screws, clips, and panels according to the service procedure.
Step 4: Test the New Outlet
Restore electrical power using the correct procedure. Turn the ignition to the required position and test the outlet with a compatible accessory.
Check that the plug fits properly and the socket does not move when you insert or remove it. Also check for intermittent power, unusual heat, and a burning smell.
If the outlet remains loose, inspect the holder and console mounting again. A replacement socket cannot fix a broken bracket behind the dashboard.
Secure fit
The outlet should stay in position during normal use.
Stable power
The accessory should work without sudden interruptions.
No overheating
Stop using the outlet if it becomes unusually hot.
Common Mistakes to Avoid During the Repair
A loose outlet may seem like a small problem, but the wrong repair can damage its wiring or create an electrical hazard. Take time to identify the fault instead of trying several quick fixes.
A common mistake is pushing the socket deeper into the dashboard. This does not repair a broken clip or retaining ring. It may also place extra strain on the electrical connector behind the panel.
Source: i.ytimg.com
Using household glue
Glue is not a dependable way to secure an electrical outlet. Heat and vibration can weaken it, and it may interfere with future repairs.
Forcing metal contacts
Prying at the contacts can damage the socket or create a short circuit. Follow the exact service procedure for your model.
Ignoring damaged wiring
A loose connector or melted wire can cause intermittent power and overheating. Replace damaged components using the correct repair method.
Using the wrong replacement
A socket that does not match the original dimensions or mounting style may never fit securely.
Installing a larger fuse
A higher-rated fuse can allow excessive current through the wiring and increase fire risk. Always use the specified rating.
Testing with an unsuitable device
A high-power accessory may exceed the outlet’s rated capacity. Check the vehicle manual before using an inverter or other demanding device.
Ignoring a hot outlet
Heat, smoke, melting, or a burning smell can indicate poor contact or excessive current. Stop using the circuit and have it checked.
Why You Should Not Use Tape or Plastic Shims
Wrapping tape around the socket or adding pieces of plastic may seem like an easy way to stop movement. However, these materials do not restore the original locking system.
They can also shift as the vehicle heats up or vibrates. If the outlet needs a new mounting ring, clip, or holder, use the correct replacement part instead.
Do not block ventilation or access
Improvised material should not interfere with the outlet, connector, or nearby components.
Do not hide damage
A temporary cover can make it harder to notice heat damage or a failing electrical connection.
How to Troubleshoot a Loose or Faulty 12V Outlet
If the repair does not work, use the symptoms to narrow down the cause. A loose physical fit, a dead outlet, and an intermittent connection are different faults. Replacing the socket without checking them can waste time and money.
Start with a known-good charger. Then check the ignition position, socket condition, fuse, and mounting hardware. If the outlet has signs of overheating or a fuse keeps blowing, stop testing and seek professional help.
Source: i.ytimg.com
The Socket Is Firm but the Charger Keeps Falling Out
This symptom points toward worn internal contacts or an accessory plug that does not fit correctly. Test another compatible charger. If it also feels loose, the socket may need replacement.
Do not force the charger deeper or wedge material around it. The correct solution is to restore a proper mechanical and electrical connection.
First check
Compare the fit with another compatible accessory.
Likely repair
Replace the worn socket if multiple suitable plugs fail to stay connected.
The Entire Socket Moves When You Touch It
This usually points to a damaged mounting ring, retaining clip, or console holder. Inspect the mounting system before replacing the electrical connector.
If the holder is cracked, replace the correct mounting part. Tightening a sound retainer may solve the issue, but a broken locking tab will not become reliable again by pressing it harder.
First check
Inspect the outer ring, retaining tabs, and surrounding trim.
Likely repair
Reseat or replace the damaged holder or mounting parts.
The Charger Works Only When You Hold It
A charger that works only when pressed or held at an angle may have a poor connection. The socket contacts could be worn, or the charger plug may be damaged.
Try a different known-good accessory. If the problem remains, inspect the socket and its wiring. Do not keep driving with one hand holding the charger in place.
First check
Test another compatible charger and inspect the socket for visible damage.
Likely repair
Replace the worn socket or repair a confirmed wiring fault.
The Outlet Has No Power After Repair
Check whether the outlet requires the ignition to be in ACC or RUN. Some vehicles turn off their power outlets when the engine or ignition is off.
If the outlet still has no power, check the correct fuse according to the owner’s manual. A blown fuse may indicate a short circuit, damaged socket, or faulty accessory.
A multimeter can help a trained person check the outlet’s voltage and ground connection. If the wiring is damaged or the replacement fuse blows again, stop and have the circuit diagnosed.
First check
Confirm the correct ignition setting and fuse.
Likely repair
Repair the confirmed fuse, wiring, connector, or socket fault.
The Outlet Gets Hot or Smells Burnt
An unusually hot outlet is a warning sign. Poor contact can create resistance and heat, while an overloaded accessory can draw more current than the circuit allows.
Unplug the accessory if you can do so safely, switch off the circuit, and stop using the outlet. If there is smoke, melting, or an active burning smell, do not continue testing it.
Have the socket, connector, fuse, and wiring checked before using the outlet again. Replacing only the front socket may not solve damage farther back in the circuit.
First check
Stop using the outlet and look for signs of heat damage without touching hot parts.
Likely repair
Have the damaged socket and wiring inspected and repaired.
When Should You Visit a Professional Mechanic?
A simple retaining ring or socket replacement may be suitable for a DIY repair when the manufacturer provides a clear procedure. However, some dashboard outlets are close to complex wiring, electronic modules, or airbag system components.
Get professional help if the outlet has melted, the wiring is damaged, the fuse repeatedly blows, or you cannot identify the correct connector. A technician can check the circuit and confirm whether the socket, ground, fuse holder, or wiring harness is faulty.
You should also seek help if removing the socket requires taking apart a dashboard section that contains airbag components. Incorrect handling of safety-system wiring can cause serious injury or leave an important safety system inoperative.
Source: i.ytimg.com
Repeatedly blown fuses
A fuse that fails again may indicate a short circuit or another electrical fault.
Melted plastic or wiring
Heat damage needs proper inspection and repair before the outlet is used again.
Airbag wiring nearby
Do not remove or test safety-system connectors without the required training and service procedure.
Unknown electrical problem
Professional diagnosis can prevent damage caused by incorrect wiring or unsuitable replacement parts.
Broken dashboard holder
A damaged console or mounting bracket may require more extensive trim repair.
Is It Safe to Drive With a Loose Cigarette Lighter Socket?
A loose outlet that is not being used may not affect the vehicle’s ability to drive. However, a loose electrical connection can create heat or intermittent contact when an accessory remains plugged in.
Do not use an outlet that moves excessively, sparks, smells burnt, or becomes unusually hot. If you suspect a short or damaged wiring, have the circuit checked before using it again.
Minor mounting movement
Avoid using the outlet until the mounting problem has been corrected.
Electrical overheating
Stop using the circuit and seek professional inspection.
How to Prevent Your Cigarette Lighter Socket From Becoming Loose Again
Good habits can help reduce wear on the outlet. A socket handles repeated plugging and unplugging, but unnecessary force and poor-fitting accessories can shorten its useful life.
Use compatible chargers and remove them carefully. Keep the socket clean, avoid overloading it, and check for early signs of movement or heat.
Source: i.ytimg.com
Use a compatible charger
Choose an accessory plug designed for standard 12V vehicle outlets and check that it fits properly.
Remove plugs straight out
Pull the accessory out gently rather than twisting or forcing it sideways. This helps reduce stress on the internal contacts.
Avoid oversized adapters
A wide or aggressive plug head can damage certain lighter socket retaining tabs.
Keep the outlet clean
Close the outlet cover when available and keep dust, coins, and other objects out.
Do not exceed the power rating
Check the owner’s manual before connecting high-power accessories such as inverters or portable appliances.
Inspect loose fittings early
Fix a moving socket before repeated use damages the holder, connector, or surrounding trim.
Unplug accessories when not needed
This reduces unnecessary strain on the plug and prevents some accessories from drawing power while parked.
Can a Loose Socket Damage a Phone Charger?
Yes, a poor connection can affect a charger. Repeated interruptions may cause charging to stop and start, while poor contact can create unwanted heat at the plug or socket.
If your charger becomes hot, shows visible damage, or works only at a certain angle, stop using it. Check both the charger and the outlet before connecting another device.
Check the charger
Look for bent tips, damaged side contacts, and melted plastic.
Check the outlet
Look for loose contacts, corrosion, and signs of overheating.
Frequently Asked Questions
Q
Why does my cigarette lighter socket keep falling into the dashboard?
The socket may have broken retaining clips, a loose mounting ring, or a damaged console holder. These parts keep the outlet in position.
Inspect the mounting system and replace damaged clips or retainers. If the holder itself is cracked, it may also need replacement.
Q
Can I tighten a loose cigarette lighter socket without removing it?
Sometimes. If your vehicle uses an accessible threaded retaining ring, you may be able to reseat or tighten it according to the service instructions.
However, broken clips, a cracked housing, and worn internal contacts usually require removal and repair or replacement. Do not push the outlet harder into the dashboard.
Q
Why does my car charger keep falling out of the 12V socket?
The charger may be too small for the outlet, or the socket’s internal metal contacts may have lost their grip. A damaged charger plug can also cause this problem.
Try another compatible charger. If several suitable plugs feel loose, inspect the socket and replace it if its contacts are worn.
Q
Can I use superglue to fix a loose cigarette lighter socket?
No. Superglue is not a dependable repair for a vehicle power outlet. Heat and vibration may weaken the bond, and glue can make later repairs difficult.
Use the correct retaining ring, mounting clips, or replacement holder instead. This restores the intended mounting method.
Q
How much does it cost to replace a cigarette lighter socket?
The cost depends on your vehicle, the replacement part, and how difficult it is to access the outlet. A simple socket may cost less than a complete console-mounted assembly.
Labor can also increase when the technician must remove several trim panels or repair damaged wiring. Ask for a quote based on your exact vehicle and the confirmed fault rather than assuming every socket has the same repair cost.
Q
Can I replace a cigarette lighter socket myself?
Yes, some vehicle owners can replace a socket themselves when the outlet has a simple mounting system and the manufacturer provides a clear procedure.
You need the correct replacement part, suitable tools, and a safe way to isolate the circuit. If the repair involves airbag wiring, damaged harnesses, or complex dashboard removal, use a qualified technician.
Q
Why does my cigarette lighter socket work sometimes but not all the time?
An intermittent connection can come from worn internal contacts, a loose electrical connector, damaged wiring, or a poor ground connection. A charger with a damaged plug can also cause the same symptom.
Test a known-good accessory and inspect the outlet for visible damage. If power still cuts out when the socket is disturbed, have the electrical connection checked.
Q
Can I bend the metal tabs inside a cigarette lighter socket?
Some older lighter socket designs have adjustable retaining tabs, but the correct adjustment depends on the exact socket. Bending the wrong contacts can damage the outlet or cause a short circuit.
Never adjust the tabs while the circuit is powered. Follow the manufacturer’s service procedure, or replace the socket if its contacts are badly worn or distorted.
Q
Will a loose cigarette lighter socket drain my car battery?
A loose mounting ring alone does not normally drain the battery. However, some vehicle outlets stay powered after the ignition is switched off, and connected accessories may continue to draw power.
Check your owner’s manual to learn whether your outlet is always powered or ignition-controlled. Unplug accessories when they are not needed.
Q
Why does my cigarette lighter fuse keep blowing after I replace the socket?
A repeated blown fuse may point to a short circuit, incorrect wiring, a damaged connector, or an accessory drawing too much current. The replacement socket may also be incompatible.
Stop replacing the fuse and do not install a higher-rated one. Have the circuit inspected to find the cause before using the outlet again.
✦ Wrapping Up
Conclusion
A loose cigarette lighter socket can make charging devices and using 12V accessories difficult. The first step is to find out whether the whole outlet moves inside the dashboard or the charger moves inside the outlet. This simple check helps you choose the right repair.
For a loose mounting system, inspect the retaining ring, clips, and console holder. For a loose charger connection, check the internal contacts and plug fit. Clean light dirt safely, replace worn or broken parts, and follow your vehicle’s service instructions whenever you remove the outlet.
Do not use glue, force, or an oversized fuse as a shortcut. Heat damage, repeated blown fuses, and damaged wiring need proper electrical inspection. When the repair is complete, confirm that the socket sits firmly and supplies steady power to a compatible accessory.
💡 Key Takeaway
Switch off and isolate the outlet, inspect the mounting clips and internal contacts, and replace damaged parts with vehicle-compatible components. Test the socket with a known-good charger before returning it to regular use.